No products in the cart.
Sailing Ellidah is supported by our readers. Buying through our links may earn us an affiliate commission at no extra cost to you.

A Full Guide to The Jib Sail And How To Use It
Most cruising boats today have a sail plan consisting of at least three sails: A mainsail, a headsail, and a light-wind sail.
The Jib sail (along with its sister, the Genoa) is one of the most widely used headsails on modern sailboats in combination with a larger mainsail. It is very versatile and easy to use in different configurations throughout most weather conditions.
In this article, I want to explain the Jib in detail and talk a bit about how it works and how we rig and trim it to get the most performance out of the boat. I’ll also show you each part of the sail and its materials before explaining how it differs from other headsails like the Genoa .
Finally, I’ll finish with some tips on maintaining the sail properly to make sure it last as long as possible.
Well, shall we get started?
What is a Jib sail, and what do we use it for?
The Jib is a triangular sail that does not overlap the mainsail. It is typically between 100% and 115% of the foretriangle size and is commonly seen on modern vessels with fractional rigs.
The foretriangle is the triangular area formed by the mast, deck, and forestay. Learn more terms here .
Like other headsails, the Jib is usually rigged on a furling system attached to the forestay , making it easy to operate. The Jib can also be rigged with a self-tacking system, making upwind sailing easy for you, whether you want to cruise solo or with your friends.
How the Jib works on a sailboat
The Jib provides a sail area forward of the mast, allowing the boat to be steered and balanced effectively.
The curved shape of the sail creates a pressure differential. The outer, more convex side (leeward side) has a lower pressure than the inner, concave side (windward side). This pressure differential generates lift, which translates into forward propulsion, much like how an airplane wing produces lift.
How to rig a Jib
You can rig the Jib on either a furling system or directly to the forestay. Most modern sailing boats are equipped with a furling system, which is a long sleeve that runs from the top of the mast down to the bow and attaches to a drum on the bottom and a swivel on the top.
Take a closer look at this step-by-step process on how to rig the Jib to sail onto a furling system:
- Feed the Jib’s luff into the track on the furler’s sleeve with the top of the sail first and connect the head ring on the sail to the chackle on the swivel.
- Attach the Jib halyard to the swivel and hoist the sail up.
- When the sail is hoisted almost all the way to the top, you attach the sail’s tack to a shackle on the top of the drum.
- Put the halyard on a winch and winch it tight.
- Now you have to manually roll up the sail around the forestay and tie on the two sheets to the clew of the sail.
- Lead the two sheets on each side of the vessel’s side decks through the sheet cars, turn blocks, and back to the winches.
- Now that the sail is furled away, we need to tie the furling line onto the drum. You have to figure out how the furling line attaches, as it differs from system to system.
- Once the furler line is attached to the drum, ensure that it can wrap itself up freely.
- Pull the sail back out using one of your sheets and monitor that the furling line wraps on nicely.
- Leed the furling line through the blocks and funnels, through the jammer , and leave it next to the winch.
- Furl the sail away again using the furling line and ensure that the sheets run freely as you monitor your sail getting wrapped nicely around the forestay.
- Secure the furler line jammer and tidy up your two sheets. Make sure to secure the sheets around the winches.
So, you see now why most boats use furling systems? It is easy! Many larger sailboats even have electrical furlers, removing the need for the furling line.
How to use, reef, and trim a Jib
To use the Jib, you wrap the furler line around the winch, open the jammer, and pull on either of the sheets, depending on which tack you are sailing on. You should hold on to the furler line to prevent the sail from unfurling itself uncontrollably, especially in strong winds. Trying to catch it if it starts running can injure your hands, so be careful! I’m speaking from experience here; burned hands are “No bueno.”
You can now unfurl the entire sail or a part of it. Once the full sail, or the amount you desire, is out, adjust your car position and tighten the sheet.
How to reef a jib
You do the opposite as the above to reef the sail or furl it back in.
Ease off the working sheet, but keep it on the winch. At the same time, pull in on the furler line either manually or on the winch. Remember to move the cars forward and re-tighten the sheet if you are reefing away only a part of the Jib.
How to trim a jib
Adjusting the sheet cars and sheet tension is important to obtain an optimal sail shape in the Jib. Finding this balance is what we call sail trim . I’m not going too deep into sail trim here, as it is a topic for itself, which will require a separate article,.
But here is a rule of thumb:
You want the leech and foot of the sail to form an even “U” shape on any point of sail . When sailing upwind, you usually move the car aft. When bearing off the wind, you move the car forward.
The goal is to apply even tension on both the foot and the leech. When you reef the sail, you’ll also want to move the car forward to adjust for the reduced sail area. Sailing downwind doesn’t require the same fine-tuning as upwind sailing.
Four tips for sailing upwind:
- Winch up the jib sheet until the leech stops fluttering and the foot has a nice, even “U” shape.
- You must move the sheet car forward if the foot is tight and the leech flutters.
- Move the sheet cars aft if the leech is tight and the foot flutters .
- If the wind increases and the boat starts to heel excessively, you can either ease off the sheet or adjust your course more head to wind.
You should play around and experiment with sail trim, as every boat behaves differently. Trimming sails is an art that takes time to master. Staysails, Jibs, and Genoas are trimmed the same way, but the car positions will be different due to their size and shape differences. Once you learn how to trim a Jib, you’ll be able to trim any headail and even a storm jib or a spinnaker.
Sailing with more than one Jib
Sailing with multiple jib sails can be beneficial on longer downwind passages. Most furling systems have two tracks, allowing you to have two Jibs on the same furler, making this setup easy to reef. You can do the same with Yankees and Genoas, depending on what you have available in your boat.
Some sailboats have two or more forestays, allowing them to have two individually furled Jibs. This is usually called a cutter rig. Most Cutter rigs, however, use a Staysail on the inner forestay and a Yankee sail on the outer, but this versatile rig allows you to experiment with many setups.
Exploring the different parts of the Jib
Head: The head is the top corner of the Jib. It typically has a ring in the top corner that attaches to the Jib halyard or the top swivel for furling systems.
Leech: The leech is the aft part of the rib, located between the clew and head.
Luff : A Jib’s luff is the front part between the tack and head. Jibs can be equipped with luff foam to help maintain their shape when partially reefed on a furler.
Clew : The clew is the aft lower corner of the jib where the sheets are attached.
Tack : The tack is the lower, forward corner of the Jib. The tack is connected to a furler drum on the forestay on most sailboats. Vessels using traditional hank-on headsails connect the tack to a fixed point on the bow.
Foot : The foot of the Jib is the bottom portion of the sail between the clew and the tack.
Telltales: Telltales are small ropes, bands, or flags attached to the front of the Jib’s leech to help us understand how the wind affects the sail and allow us to fine-tune the trim for optimal performance.
Commonly used materials for the Jib
The most common material used for Jib’s today is Dacron woven polyester, followed by CDX laminate due to the relatively affordable price. Continuing up the range, we find woven hybrids like Hydranet, Vectran, Radian, and other brands.
Then, we have advanced laminates with Aramids, carbon, kevlar, and more exotic materials. At the top of the spectrum, we find the latest technology in DFi membrane sails like Elvstrøms EPEX or North Sails 3Di, which comes at a premium price tag.
These days, however, modern technology has given us warp-oriented woven cloth, which is becoming a popular option due to its increased ability to keep shape over time without stretching as much as traditionally cross-cut dacron sails. ProRadial, made by Contender and Dimension Polyant, is a good example. North Sails has an excellent article that goes in-depth on sail materials.
The difference between a Jib and a Genoa
The difference between a Jib and a Genoa is that the Jib is a headsail that does not overlap the mainsail, while the larger Genoa is designed to overlap the mainsail. While the smaller Jib is excellent at pointing upwind and easier to handle, the larger Genoa excels on any points of sail with the wind behind the beam.
Genoas are usually larger than 115% of the foretriangle , with sizes ranging from 120% to 150%. They are often used on yachts with masthead rigs and smaller mainsails but are also common on fractional rigs.
How to Maintain and Care for Your Jib Sail
Good maintenance and care of your Jib will ensure optimal performance and minimize wear and tear. Check out these tips on how to maintain and protect your Jib:
- Rinse the Jib with fresh water regularly and leave it up to dry before packing it away. Proper drying will prevent moisture and mildew.
- Give the sail a service once a year. Check for any damaged seams and repair them if necessary. If there are any chafing marks, reinforce the sail with patches on chafe points and add shafe guards to the equipment it rubs against.
- Protect the sail from UV rays by keeping it packed away when not in use. A furling Jib can be protected by adding a UV strip to the foot and leech.
I also wrote an article on how to make sails last longer .
Final Words
We have talked a lot about the Jib’s features and how it works in this article. I recommend you to head out and set sail to get some experience and play around with your sails. If you don’t have a boat, chat around in your nearest marina; someone will for sure bring you along for a sail. I know I would.
Remember to experiment with sail trim and practice tacking and maneuvering the vessel with the sail on both the port and starboard sides.
If you still have questions, check out the frequently asked questions section below or drop a comment in the comment field. I’ll be more than happy to answer any of your questions!
PS: Explore more sails in my easy guide to different types of sails here .
FAQ – The Jib Sail Explained
When to use a jib sail.
The Jib is an excellent sail for most conditions, especially when cruising at any angle towards the wind. The Jib has a benefit over the Genoa in strong winds as it is easier to handle, and its smaller size makes it more effective than a reefed Genoa when sailing to windward.
Can you sail with just the Jib?
It is possible to sail with just the Jib alone, and it works exceptionally well downwind on deep angles where the mainsail usually would have blocked off the wind.
Can you sail upwind with just the jib?
It is possible to sail upwind with just the Jib, but most sailboat owners prefer to balance their boats by flying their mainsail combined with theiJib when sailing to windward.
What is the difference between a Genoa and a Jib?
The Genoa is different from a Jib sail as it is larger and overlaps the mainsail, whereas the Jib is smaller and does not overlap the mainsail.
Sharing is caring!
Skipper, Electrician and ROV Pilot
Robin is the founder and owner of Sailing Ellidah and has been living on his sailboat since 2019. He is currently on a journey to sail around the world and is passionate about writing his story and helpful content to inspire others who share his interest in sailing.
Leave a Reply Cancel reply
Your email address will not be published. Required fields are marked *
How To Use a Jib on a Sailboat (Here’s What You Need To Know)

If you’re a sailor looking to maximize your control of your sailboat, learning how to use a jib is essential.
A jib is a triangular sail mounted at the bow of the boat and is a key component in controlling the speed and direction of your boat.
This article will provide an overview of what a jib is and how to use it, including understanding the forestay, adjusting the jib sheet, positioning the jib, trimming the jib, and practicing with a jib.
Plus, we’ll provide a few tips to ensure you get the most out of your jib.
Read on to discover everything you need to know to use a jib on a sailboat.
Table of Contents
Short Answer
A jib is a triangular sail that is set on a stay in front of the mast of a sailboat.
To use a jib, the sheet attached to the clew of the sail must be pulled in to bring the sail around so that the wind fills it.
The sheet should be adjusted to keep the sail trimmed properly while sailing.
The jib can also be used to help turn the boat, by easing the sheet and allowing the sail to swing out to the windward side.
What is a Jib?
A jib is an essential component of a sailboat, as it provides the boat with increased control and maneuverability on the water.
A jib is a triangular sail that is mounted on the front of the boat, also known as the bow.
It is attached to the forestay, a metal cable that runs from the bow of the boat to the mast.
The jib is used to create lift, allowing the sailboat to move more quickly and efficiently through the water.
The jib works in conjunction with the main sail, providing additional power and control when sailing.
It can be adjusted to the wind direction and the desired angle of the sailboat, which can help to increase the speed of the boat and improve its performance in different wind conditions.
Additionally, the jib can also be used to help the boat turn and maneuver in tight spaces, such as when entering a harbor or marina.
In order to use a jib on a sailboat, the jib must first be raised and secured to the forestay.
This is usually done by attaching it to the luff groove, which is a groove along the edge of the sail that slides onto the forestay.
Once the jib is secure, the jib sheet is used to control the jibs angle and direction of travel.
The jib should be adjusted according to the wind direction and the desired angle of the sailboat.
Finally, the jib trim is adjusted, which will keep the jib in the optimal position for smooth sailing.
With practice, sailors can become proficient in using a jib to their advantage.
Understanding the Forestay

When it comes to using a jib on a sailboat, understanding the importance of the forestay is essential.
The forestay is the metal cable that runs from the bow of the boat to the mast.
It plays an integral role in the efficiency and maneuverability of the boat, as it is the connection point for the jib sail.
Without the forestay, the jib cannot be raised and secured, which limits the boats performance.
Knowing how to properly adjust and maintain the forestay is key to using a jib correctly and efficiently.
When raising the jib, the forestay should be taut to hold the jib in place.
It is essential to make sure that the forestay is not too loose, as it could cause the jib to flutter and lose its shape.
Additionally, the forestay should not be too tight, as it will increase the strain on the jib and could cause damage.
The tension of the forestay should be adjusted to achieve the optimal balance between stability and sail shape.
In addition to ensuring the proper tension of the forestay, it is important to pay attention to the alignment of the forestay with the mast.
If the forestay is misaligned with the mast, it can disrupt the wind flow and cause the jib to flutter.
This fluttering can be prevented by ensuring the forestay is properly aligned.
By understanding the role of the forestay and how to adjust it correctly, sailors can use a jib to their advantage and improve their sailing performance.
With practice, sailors can become proficient in using a jib and the forestay to achieve the desired angle and direction of travel.
Adjusting the Jib Sheet
Adjusting the jib sheet is a key part of using a jib on a sailboat.
The jib sheet is a rope or line that is attached to the clew of the jib and runs to the cockpit or winch, allowing the sail to be adjusted to the appropriate position and angle.
It is important to ensure that the jib sheet is securely attached to the clew of the jib before sailing.
Additionally, the jib sheet should be adjusted to the correct tension depending on the wind conditions.
If the jib sheet is too loose, the jib will flog and be ineffective.
If the jib sheet is too tight, the sail will be over-trimmed and the boat will be slower.
To find the optimal jib sheet tension, try different tensions and angles and make sure to pay attention to how the boat responds to the changes.
With practice, you will be able to determine the best tension for the jib sheet.
Positioning the Jib

Positioning the jib on a sailboat is an important step for any sailor looking to make the most of their sailing experience.
While the jib is an essential component of a sailboat, it is also essential to understand how to properly use it.
In order to use a jib, the jib must first be raised and secured to the forestay, which is the metal cable that runs from the bow of the boat to the mast.
The jib sheet is then used to control the jibs angle and direction of travel.
It is important to pay attention to the wind direction and adjust the jib accordingly.
The jib should be adjusted to be perpendicular to the wind direction, and this angle should be kept consistent during the sail.
This helps to ensure that the sailboat will move in the desired direction, and that the jib will provide optimal lift.
Sailors should also adjust the jib trim, which is the tension on the jib sheet.
The jib trim should be adjusted according to the wind conditions to keep the jib in the optimal position for smooth sailing.
Too much tension on the jib sheet can cause the jib to backwind, which can slow down the boat and make it difficult to maneuver.
Too little tension can cause the jib to luff, which can reduce the lift provided by the sail.
Finally, with practice, sailors can become proficient in using a jib to their advantage.
Utilizing the jib to its fullest potential can help to optimize speed and control, and make the sailing experience even more enjoyable.
Trimming the Jib
Trimming the jib is a crucial part of using a jib on a sailboat.
This is the step that will ensure the jib is in the optimal position for the best sailing experience.
The jib trim should be adjusted according to the wind direction and the desired angle of the boat.
When the wind is coming from a certain direction, the jib will need to be adjusted accordingly.
If the wind is coming from the starboard side, the jib should be adjusted to the right.
If the wind is coming from the port side, the jib should be adjusted to the left.
In addition to adjusting the jib to the wind direction, the jib trim should also be adjusted to the desired angle of the boat.
This will help to maximize the performance of the boat and ensure that the jib is in the best position for sailing.
The jib trim should be adjusted so that the angle of the jib is roughly the same as the angle of the boat.
This will ensure that the jib is properly positioned and will help to maximize the performance of the boat.
Finally, the jib trim should be adjusted periodically to ensure that the jib is in the best position for sailing.
This can be done by observing the jib and adjusting the trim as necessary.
By trimming the jib correctly, sailors can improve their sailing experience and make the boat faster and easier to navigate.
Practicing with a Jib

Using a jib on a sailboat requires practice and skill to become proficient.
While learning the basics of how to use a jib is important, it is also necessary to gain an understanding of the wind and how it affects the sailboat.
By learning the basics of how a jib works and how to adjust it, sailors will be able to use the wind to their advantage.
The jib should be raised and secured to the forestay, which is the metal cable that runs from the bow of the boat to the mast.
Next, the jib sheet is used to control the jibs angle and direction of travel.
This is done by adjusting the tension on the sheet, which will affect the angle of the sail and the direction of the boat.
The jib trim is then adjusted to keep the jib in the optimal position for smooth sailing.
To practice using a jib on a sailboat, it is important to start slowly and focus on learning the basics.
Begin by familiarizing yourself with the wind and understanding how the direction of the wind affects the sailboat.
Once you understand the basics, you can experiment with different angles and settings to see how the jib affects the boats speed and direction.
As you become more comfortable and experienced with using a jib, you can begin to practice more advanced maneuvers, such as tacking, jibing, and reefing.
These maneuvers can be used to control the speed and direction of the sailboat, and can make the sailing experience more enjoyable.
Sailing with a jib can help to make the boat faster and easier to navigate, and can enhance the sailing experience.
By understanding the basics of using a jib and practicing regularly, sailors can become comfortable and confident in their ability to use a jib to their advantage.
Tips for Using a Jib
Using a jib on a sailboat is a great way to increase control and maneuverability while sailing.
A jib is essentially an additional sail that can be attached to the forestay, a metal cable running from the bow of the boat to the mast.
It is important to know the basics of how to use a jib in order to maximize the sailing experience.
Here are some tips to help you get started.
First, it is important to ensure that the jib is properly raised and secured to the forestay.
This can be done by attaching the jib’s clew, or the corner of the sail, to the forestay using a wire or cable.
It is also important to make sure that the jib is taut and free of wrinkles or creases.
Once the jib is in place, the jib sheet can be used to control the jib’s angle and direction of travel.
This is done by adjusting the jib sheet, which is a rope connected to the corner of the jib, in order to change the tension of the sail.
It is important to adjust the jib sheet according to the wind direction and the desired angle of the sailboat.
This will ensure that the jib is in the optimal position to take advantage of the wind.
Finally, the jib trim should be adjusted.
This is done by using the jib sheet and the jib halyard, which is a rope that runs from the top of the jib to the deck.
By adjusting the tension of the jib halyard, the angle of the jib can be changed to keep it in the best position for sailing.
Using a jib correctly can help to improve the sailing experience and make the boat faster and easier to navigate.
By following the tips outlined above, sailors can get a better understanding of how to use a jib on a sailboat and maximize their sailing experience.
Final Thoughts
Using a jib on a sailboat can make sailing smoother, faster, and more enjoyable.
With a solid understanding of the components and the proper technique, anyone can become a pro at using a jib.
It just takes a little practice, patience, and understanding of the wind direction.
With the right know-how, you’ll be sailing like an expert in no time!
James Frami
At the age of 15, he and four other friends from his neighborhood constructed their first boat. He has been sailing for almost 30 years and has a wealth of knowledge that he wants to share with others.
Recent Posts
Does Your Boat License Expire? Here's What You Need to Know
Are you a boat owner looking to stay up-to-date on your license requirements? If so, youve come to the right place! In this article, well cover everything you need to know about boat license...
How to Put Skins on Your Boat in Sea of Thieves? (Complete Guide)
There is a unique sense of pride and accomplishment when you show off a boat you customized to your exact specifications. With Sea of Thieves, you can customize your boat to make it look like your...
- AROUND THE SAILING WORLD
- BOAT OF THE YEAR
- Email Newsletters
- Best Marine Electronics & Technology
- America’s Cup
- St. Petersburg
- Caribbean Championship
- Boating Safety
Sailboat Winch Technique 101
- By Sean Clarkson
- Updated: May 2, 2014
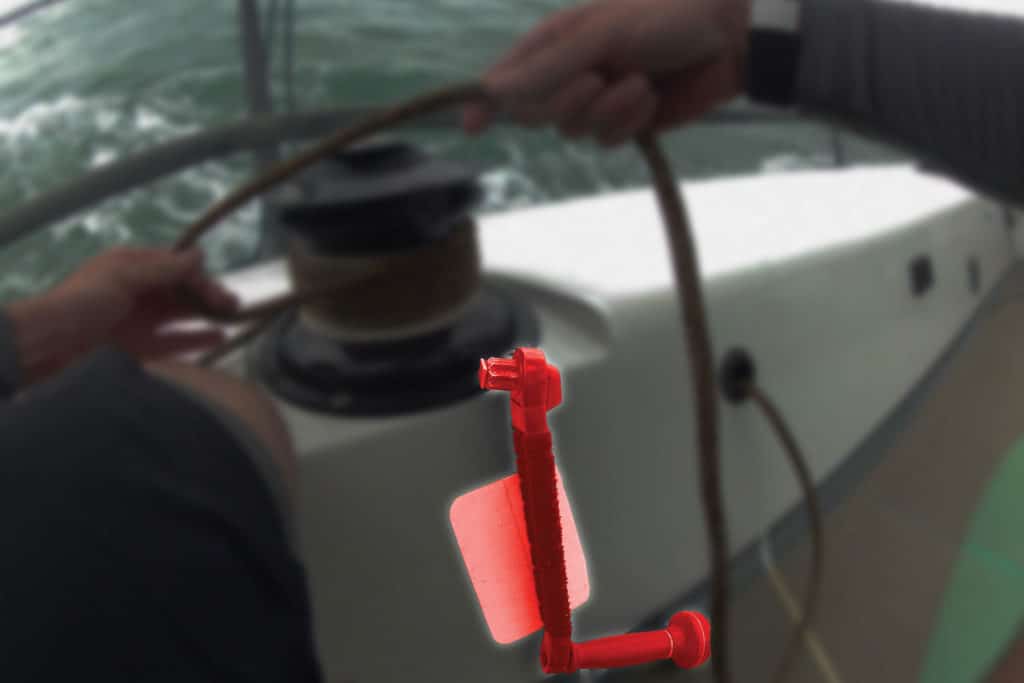
Loading a sailboat winch in the correct direction is the first step. Many big-name sailors have fallen victim to this. If there’s any doubt, especially if your boat has counter-rotating winches, put arrows on the top of the winch or on the deck around the base of the winch. It may not look cool, but neither is putting turns on incorrectly.
It’s important that the sheet is led to the winch at the correct height. If it’s too low, it can slip down the drum, and if it’s too high, it can lead to regular overrides. The sailing winch manufacturer can provide a drawing with the ideal angle for the lead.
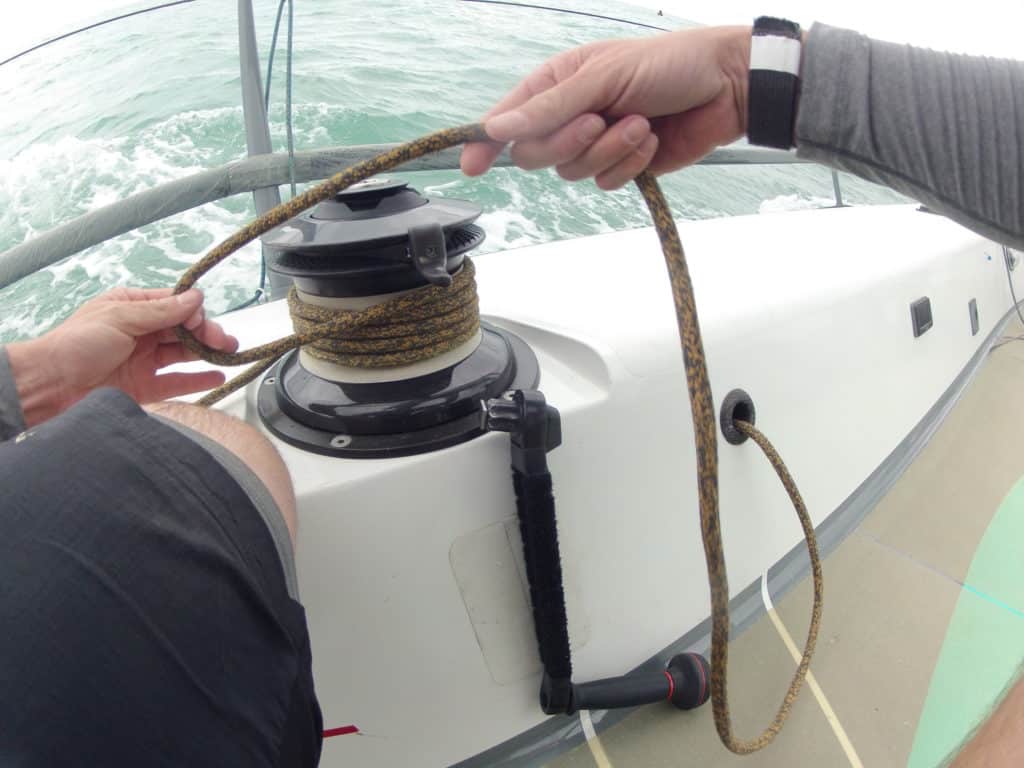
The number of wraps you start with is really a function of rope diameter, drum diameter, and drum surface quality. Smaller-diameter line may require more wraps to prevent the line from slipping on the drum. In general, though, two wraps is a good starting point, and as load increases, you can add more.
Don’t be surprised if, for example, the jib winch requires two wraps on one side and three on the other. The way sailboat winches load, you gain or lose half of a wrap because of where the line starts and finishes on the winch. And with sheets moving at high speed, make sure there’s no slack in the lazy sheet before you start pulling because you can easily end up with an override.
If you do happen to get an override, don’t keep it a secret from the rest of the crew—it’s better that they know, especially if you’re around other boats and need to dip or tack. If you have time, the best method to remove the override is to reverse the lead direction of the sheet (or halyard) and pull the override out, either by hand or by using another winch. Be careful when the override clears itself and gets reloaded. If the override is on the jibsheet and time is short, the best option is to cut the sheet at the clew when tacking. After the tack, reattach the sheet. If you cut the sheet at the winch, it will likely end up being too short. Trust me, I’ve seen it happen.
Winch gearing is all based on required line speed, which means being in the right gear to trim the sail in smoothly at the same rate the apparent-wind angle changes. Driving a sail in and stalling it isn’t fast. On a three-speed winch, first gear is your gross tune for pulling in the majority of the line: one rotation of the handle generally equals one drum turn. In second gear, you’re finishing your trim with the line carrying a lot more load: more winch-handle rotations are required for one drum rotation. Third is your high-load, fine-tune gear.
If your winch has a first-gear button, you’re in luck for jibing asymmetric sails or big genoas. Keeping your momentum going is key. Anticipate when you need to change gears before the load gets too high.
There are a few things you can do to make it easier when using a handle-driven winch with a first-gear button. For example, never put the winch handle directly over the button. This prevents the button from popping up to give you third gear. Also, if you leave the winch handle in the winch, try to leave it pointing to leeward—this helps prevent the handle from swinging down by itself (if you hit a wave, for example) and disengaging first gear.
Speaking of winch handles, a longer handle is a great “extra” gear. Most manufacturers produce both 8-inch and 10-inch handles. If you need more speed, use the short handle. If you need just grunt, say for the backstay, the 10-inch handle gives you 20 percent more power.
There are a few options for the actual handle-grip style and locking mechanism, but in short, the double handle is good for big loads when speed is not as important. The single handle is easy and quick, which is better for smaller boats and lower loads. The speed-grip handle is, in my opinion, the best all-around because it covers both options.
In terms of locking mechanisms, I prefer the newer handles with quick one-handed grip levers that are fast and easy to engage and disengage. If the handle is wobbly or hard to disengage from the winch, it’s probably time to buy a new handle.
A lot of winch technique comes down to experimentation and communication between the trimmer and the grinder. The grinder must be observant of the sail’s needs and anticipate what is required. For example, catching the curl on a spinnaker early requires less grinding and less steering by the helmsman, which equates to speed. If you’re grinding, always watch the telltale signs: the sail itself, the breeze, the helm, and the opposition.
Every boat’s layout is different, so the most efficient stance varies. However, the goal is to get your body over the winch and have a secure position for your legs. A huge amount of your power comes from your core and legs, so you need to be well braced. Where you are depends on many variables, but in light air try to be forward and to leeward. In heavy air, maximize your weight to windward. Either way, stay in a mobile position when you’re not grinding; your body weight is critical to the kinetics of the boat, such as rocking the boat down out of a jibe and roll tacking.
This article first appeared in the March/April 2014 issue of Sailing World. To read more sailing tips, click here.
Winch Wraps
Sean Clarkson
- More: Sailing How To
- More How To

The Wisdom of Augie Diaz

Why S-Turns, Roll Jibes and Roll Tacks Are Fast

The Path to Consistent Boatspeed

Headsail Trim Tips For Floating Leads

Brauer Sails into Hearts, Minds and History

Anticipation and Temptation

America’s Offshore Couple

Jobson All-Star Juniors 2024: The Fast Generation
- Digital Edition
- Customer Service
- Privacy Policy
- Cruising World
- Sailing World
- Salt Water Sportsman
- Sport Fishing
- Wakeboarding
Attainable Adventure Cruising
The Offshore Voyaging Reference Site
- Offshore Sailboat Winches, Selection and Positioning
We have already published two chapters on offshore sailboat cockpits in our How To Buy a Cruising Boat Online Book, but even so there are still a bunch of selection criteria I have not covered, so let’s dig into winches, both those in the cockpit and generally.
Why It Matters
With offshore sailboats the devil is absolutely in the details and never more so than when we come to winch setup. A poorly-positioned winch:
- Can result in repeated injuries, particularly to shoulders, neck and back.
- Will force the crew into an awkward position so they can exert far less force on the handle than they would be able to otherwise.
- This in turn can require the installation of electric winches, with all of the associated expense and potential dangers.
- Can encourage crew members to adopt unsafe positions, often outside of the cockpit and in the way of the boom.
Given that, let’s look at how to identify boats with winches done right:
Login to continue reading (scroll down)
Please Share a Link:
More Articles From Online Book: How To Buy a Cruising Boat:
- The Right Way to Buy a Boat…And The Wrong Way
- Is It a Need or a Want?
- Buying a Boat—A Different Way To Think About Price
- Buying a Cruising Boat—Five Tips for The Half-Assed Option
- Are Refits Worth It?
- Buying a Boat—Never Say Never
- Selecting The Right Hull Form
- Five Ways That Bad Boats Happen
- How Weight Affects Boat Performance and Motion Comfort
- Easily Driven Boats Are Better
- 12 Tips To Avoid Ruining Our Easily Driven Sailboat
- Learn From The Designers
- You May Need a Bigger Boat Than You Think
- Sail Area: Overlap, Multihulls, And Racing Rules
- 8 Tips For a Great Cruising Boat Interior Arrangement
- Of Cockpits, Wheelhouses And Engine Rooms
- Offshore Sailboat Keel Types
- Cockpits—Part 1, Safe and Seamanlike
- Cockpits—Part 2, Visibility and Ergonomics
- Choosing a Cruising Boat—Shelter
- Choosing A Cruising Boat—Shade and Ventilation
- Pitfalls to Avoid When Buying a New Voyaging Boat
- Cyclical Loading: Why Offshore Sailing Is So Hard On A Boat
- Cycle Loading—8 Tips for Boat and Gear Purchases
- Characteristics of Boat Building Materials
- Impact Resistance—How Hull Materials Respond to Impacts
- Impact Resistance—Two Collision Scenarios
- Hull Materials, Which Is Best?
- The Five Things We Need to Check When Buying a Boat
- Six Warnings About Buying Fibreglass Boats
- Buying a Fibreglass Boat—Hiring a Surveyor and Managing the Survey
- What We Need to Know About Moisture Meters and Wet Fibreglass Laminate
- US$30,000 Starter Cruiser—Part 2, The Boat We Bought
- Q&A, What’s the Maximum Sailboat Size For a Couple?
- At What Age should You Stop Sailing And Buy a Motorboat?
- A Motorsailer For Offshore Voyaging?
- The Two Biggest Lies Yacht Brokers Tell

As has been so often the way this past year or so, you put up articles that are downright spooky in their timing. I just got home after a spending a few hours templating my winch and clutch layout on my coachroof – so this article has been a huge sanity check.
I think I’ve managed to tick all the important boxes. My boat has a grand total of 11 winches festooned over it, 4 forward on or near the mast for the halyards and reefing lines (and I’ve listened to your stern admonitions on this despite almost all local opinion going the other way), then 3 on the coachroof just forward of the cockpit, and finally 2 each side on the cockpit coaming.
Because my staysail track is already on the coachroof, the sheets go to the 2 outboard winches up there. In effect this gives me the ‘three winches each side’ you suggest. The same winches are also used for the minor mainsail trimming controls outhaul and vang, and the two traveller control lines.
The centre coach roof winch is used for the mainsheet only – not ideal but I’m going to live with it as the easiest solution to get me back into the sea. (The coachroof is low enough that standing astride the cockpit seats we get a good position to operate them.)
The cockpit primaries are jib sheet only, but the secondaries have four different lines, furlers, preventers, whisker pole and running backstay terminating on them. Trying to shift the mainsheet back there as well just struck me as too hard – even though I can see the advantages. The blocks and jammers needed to make it work are going to be complicated enough as it is.
I just counted them all up – a total of 30 different lines! Deciding on how I wanted to run them all has been one of the most drawn out and troublesome decisions I’ve had to make so far, and I want to convey just how much your input here at MC has influenced my thinking for the better. I couldn’t quite get to the ideal, but close enough that I’m really looking forward to getting it finally done!

Agree about the timing!
Only 11! Bah! 🤣 My old girl has thirteen – seven in the cockpit, two on the mast and – (this is where I have doubts) – four on the coachroof, under the gooseneck (reef, outhaul, topping lift, kicker). I can scrap the kicker and topping lift by fitting an hydraulic strut as per MC, and move the reefing winch to the mast. Then we will be even!

Now, now, boys, let’s play nice 🙂
Winches “r” us! Old picture from two years ago. The halyard, reefing and mainsheet winches are now self tailing and I just have to raid the piggy bank and talk to Mr Harken about replacing the six flat top monsters in the cockpit… your advice about not going for electric winches is very welcome!

Glad it was useful. As you say, getting this right is a real brain stretcher. Don’t worry too much about the mainsheet, there are always going to be compromises. In our case the less than idea winching position for the staysail comes to mind.
The other thing to realize is that you are not going to get this right the first time no matter how hard you try, and that realization can actually be a stress reducer, at least when we remember that changing this stuff is not that horrible, particularly on a fibreglass boat. Point being that getting a really good deck layout is a process, not a destination. After 30 years of steady improvement (starting from a good place) MC is about 95% right, but I can still think of little tweaks that would improve things further.

any thoughts on how much of a compromise are standard winches with Barton Winchers compared to self-tailing winches?
I have no experience with them yet, but I’ve got a pair of winches nearly for free and been contemplating getting rid of the staysail boom and using these standard winches with Winchers to sheet the staysail. Say, if you were forced to choose, which of these would be the lesser evil: staysail boom or non self-tailing winches?
I had a staysail boom for 29 years and whilst it was master of the foredeck when the sail was set, one could always drop the staysail on entering an anchorage. One does lose some horsepower but one can hank on a bigger staysail… on the other hand trying to sheet a staysail every tack with sub optimal winches is a pain in the neck. IMHO, fwiw…
Thank you for your opinion, Andrew.
Maybe I should have said that I’m talking about a staysail on a cutter. If need to short-tack, I tend to drop the staysail altogether and use just the jib-top, which is sheeted to self-tailing winches. So, I’m not sure how much of a pain in the neck it would be in practice. Definitely more work than when it tacks by itself, of course.
Tacking the staysail on a cutter, even one the size of MC, is so easy that I would always get rid of the boom. But then I’m a total deck clutter hater: https://www.morganscloud.com/2011/02/25/clear-the-decks-for-action/

Hi John, Andrew, Alex and all, John, agree completely about the staysail being a doddle to tack. When timing is good, snubbing the sheet before it fills pretty much precludes a need to winch. At most, a few inches is needed. For me, a chance to roll up the jib-topsail and short tack into an anchorage is just plain fun: no real work, total control (little worry about close-to-land gusts), good visibility, a chance to look around, no waves: what is not to like. My best, Dick Stevenson, s/v Alchemy
I agree, and as long as the water is smooth, a faster option than many would expect.
Hi John, Yes, agreed. It amazes me how easy it is to move a well-designed hull in flat water when there is little wind. I sometimes think that every boat should have as one of its base reported stats the force necessary (dynameter?) to pull it through the flat water on a calm day at, say, 6 knots. I imagine that would be an informative piece of information relatively easy to come by. My best, Dick
This was the home of the staysail boom – not in use in this picture.

Loverly photo of a loverly boat, thanks.
I tried the Barton years ago and found that while better than nothing they are not even close to a self tailing winch. That said, I would do most anything to get rid of a staysail boom, probably including using the Barton option and selling my first born child.
Thank you John. This answer is graphic enough to leave no doubt as to which way the boom should go.

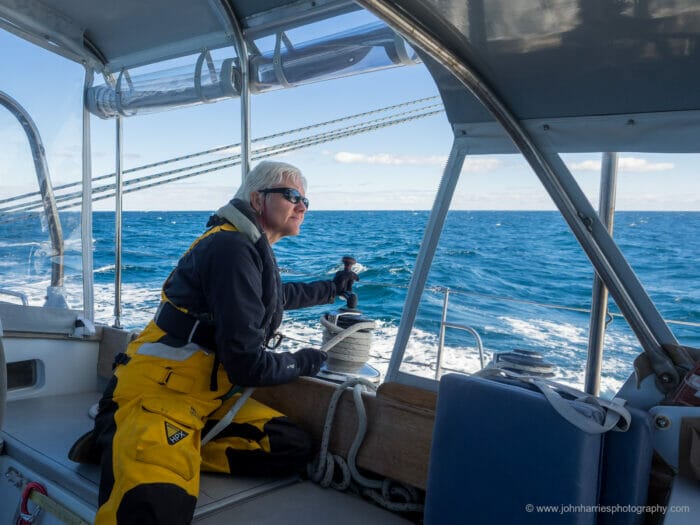
Hi Phyllis The details in this picture are really interesting. What is orange fixture on your Spinlock left belt, and what kind of gloves are you using and do you like them? Would they be good for photography in Antarctica? How do you like the Musto Ocean gear? Thanks!
Picture of you at mast in today’s post:
https://etugri87v3i.exactdn.com/wp-content/uploads/2021/02/JHH5-12909-700×[email protected]
Best wishes, Charles Charles L Starke MD FACP
Hi Charles,
If you put those questions into the search box, or check the topics page you will find short posts that answer them with the exception of the orange fixture which was a pre AIS POB alarm.

Hi John, Thanks for the article. Interested in your thoughts regarding winch placement on the Boreal 47.2: central winch in cockpit for halyards, centerboard, vang, reef lines (single line for first & second reef tack/clew, 3rd reef has line for clew and hook/cringle for tack). Two inboard winches for Genoa, staysail sheets. I am not sure whether the main sheet goes to central or aft winches. Maybe JFE will chime in. Best, David
Lot’s of tradeoffs there. So beyond what I can really do in a comment. Suffice to say that I generally prefer the Mk1 boats. My big problem with the Mk2 boats is the friction in the system from all the turns in the lines. On the positive side, the inboard primary winches look like they would be very efficient to use on the jib, and an improvement on the problem I identified in the article above.

Hi John, The set-up of the cockpit of the 47.2 (what you call mk2) is indeed very different from the earlier generation of Boréal. For us it is important to stress the fact that the 44.2 has the same principles of cockpit lay-out as the “original” 44 : one helmpost, all lines at the mast… That way we have a solution for the adapts of both philosophies…
Hi Jean-François,
Having now looked at renderings of both boats, I’m warming to the 47.2 and I think prefer it to the 44.2 because of the longer effective waterline for the same beam.

Hi David, I’m almost positive the smaller outboard winches are for the main sheet. I think the red for main and hard to see dark blue for jib are meant to show that.

Hi Michael,
Yes, I’m sure you are right. And a good position it is too, although there will be a lot of friction because of the convoluted lead which will make say jibing where a bunch of sheet must be pulled in quickly, a bit slow. My guess is all these Mk 2 boats are going to end up with electric winches for this reason, although an Ewincher might work too.
Hi John, Hi Michael, The genua winches are indeed the bigger winches you see on the inner side the cockpit… The ergonomy behind is that during a tack manoeuvre, one person can release the genua from one side AND pull it on the outer side… There is only more block (however at 90 %) than on the layout on the Mk1. Of course there is more friction than if the block was not there but the sytem really works fine. I hope that very shortly you can come and test it for yourself… Speaking of electrics : The ergonnomy is such that all lines can be brought back to the big central winch. If you electrify this one you can do all manoeuvres with that one electric winch. (the winch is oversized to a 65 size). JFE
Thanks for the confirmation on that. Given that you can stand over the winches in a safe and secure position, I totally get that winching the genoa will actually be easier and more efficient than on the Mk 1 boats, or my boat, definitely a good step forward. On the other hand, if I were having a 47.2 built I would ask you to put the reefing and halyard winches on the mast since I just don’t like the idea of using an electric winch from that far away from the action. That said, way, way, better than under the dodger since on the 47.2 you can at least see what you are doing.
I think I’m right in saying you would make that change, although the channels for the lines running aft would remain? If so, that’s probably good for resale value.
Anyway, I’m really looking forward to going sailing with you once this is over.

At the start of this article I became a little depressed. Must we really accept headsail sheet winches on the leeward coming as the only option? The suggested seat-height, kneeling, and other recommended ergonomics; and MC’s cockpit jackline solution mentioned elsewhere improve the situation but the operator still has her centre of gravity to leeward of her centre of support with the winch handle carrying the rest of the load. I really dislike sheeting to leeward and value the ability to place a foot to leeward of the load very highly. Perhaps it’s because I’ve sailed smaller boats than MC that bounce around more and on which crew weight position makes more of a difference. Full approval from me that Boreal at least, have brought them inboard. I have yet to see a better system than my old 1/4 tonner, which offered near-midship sheeting and a windward sheeting option, with the crew able to get a foot to leeward of the winch, all within the cockpit, and with no extra turnblocks. Might be hard to achieve in a larger cruising boat, but totally worth striving for IMHO.

Sure, I agree that leeward coming winches are less than ideal ergonomically. That said, bringing them inboard has downsides too. All these things are compromises. That said, wait for the A40 renderings…

Amen to the round-up problem being exacerbated by vang and main sheet controls out of reach of the helm! I’ve experienced this, for example, while pushing my luck too far with the spinnaker up in squall zones, and it is not fun. In my most serious round up, with the boat pinned on her ear, I was only able to depower the main by, while keeping the tiller hard to windward with my arms, stretching my leg across the companion way and releasing the vang clutch with my foot. I haven’t thought of a way to mitigate this hazard yet, except by sailing more conservatively. I am hesitant to move anything because the current set-up allows me to work the jib (or spinnaker) sheets, main traveler lines (and the topping lifts and after guys for two poles) while standing in one place (tiller between legs), so I can tack and jibe safely while single-handing. I have five winches on the cockpit coaming (primaries, secondaries and a spare), and two on the coach roof under the dodger. I’m also a fan of working the main halyard, reefing outhauls, and downhaul (Cunningham) at the mast, and have it set up so that I feel secure there even when it’s rough – cross bars between the forward and aft lowers give me a place to brace my back. I have four winches on the mast, two each side, that I use for the main, jib, staysail and spinnaker halyards, as well as for tensioning my removable inner forestay. A clutch for each halyard (and the inner forestay) is very handy, for example while hoisting, and of course allows winch sharing. I set my reefing outhauls using a winch on the forward end of the boom with a clutch for each of the outhauls. A bag below the boom winch collects the lazy ends which keeps the deck clear. The winch mount on the boom has always served well, and it seems it’d be more complicated to have it anywhere else, but I wonder if I am overlooking something?
Sounds like a good system. And good on you for realizing the issues of not having the main sheet to hand. Even if you don’t change that because of other reasons (perfectly valid) understanding the problem mitigates the dangers.
And no, I don’t think you are overlooking anything. Halyard and reefing winches moved aft over the years, I think, just because that looks good to those with less offshore experience who are the larger part of the market for new boats, not because it’s a more functional layout. Same reason most new boats have fat sterns, two cabins jammed under the cockpit and no deck accessible storage: it looks good at a boat show.
The evolution at Boreal is a good example of this phenomena at work. When the principles were designing a boat for themselves (the Mk1 boats) based on a lot of offshore miles, the winches were on the mast. Now that they must compete with other “expedition boats” the winches are in the cockpit.

Bonjour Messieurs,
I understand the friction issue, but for a shorthanded passage I am happy to have most of the lines coming back to the cockpit on the Mk2. This feels safer to me than having to move to the mast everytime that a sail must be reefed, and only the third reef should need intervention at the mast in the Mk2. This was one of my requirements for our boat and it was heard by JFD. Being novice, I may be in the wrong of course, and only time and experience will let me see the light on that topic. In which case, we could still electrify the other four smaller winches, or at least two of them, since at the current time, only the central main winch is electric on our boat. But this is a very interesting topic indeed, and I am glad that John provided his insights on it. Thank you so much.
Salutations de Montréal, Yan
My thoughts on why it may not in fact be safer to lead everything back are here: https://www.morganscloud.com/2020/09/11/second-level-thinking-about-offshore-voyaging-boats/
That you must go forward for the third reef, when the conditions will be most challenging, but will not be practising that regularly in easier conditions is much of why I worry about this trend.
That said, if one must have the lines lead aft, I think that the the Mk2 way is better than having them all jammed up under the dodger. Also, if you find you have a friction problem an Ewincher way solve it much more easily, and safer, than electrifying all winches: https://www.morganscloud.com/category/rigging-sails/ewincher-review/

This is part of why, in our re-jigging of Maverick V ‘s mainsail handling, we’re keeping all halyards and reefing at the mast. At some point, you’re going to have to go out on deck in rough stuff – so it’s probably best for that to be a routine, one that you practice so often that it’s easy and normal, rather than a rare special event.
The other reason is that, with kids often hanging out in the cockpit, I want as few loaded lines as possible that they have to watch for. It’s easy enough to teach them to stay clear of the traveller, mainsheet, and leeward jibsheet, but if there’s an 8-line jumble of spaghetti in the way, it’s harder for them to learn what’s loaded up (and thus must be avoided).
We tried running the main halyard back to the cockpit for a bit, and that caused more problems than it solved. Friction wasn’t an issue, but keeping control of the halyard while dropping or reefing the main became a 2-person job. It’s going back to its as-designed spot, a winch on the starboard cabin top beside the mast, this spring.
Our winches are mostly tail-it-yourself style, but we are replacing the #8 reefing winches and horn cleats on the boom with #18 Andersen self-tailers and Lewmar DC clutches so that Katy can grind those in by herself. I am quite impressed with the Andersen build quality and, at least around here, they are among the least expensive options.
Sounds smart to me. I have never used Andersen winches, but have heard good things for years.

Just a note about Barlow and Barient winches. I recently inherited a few, and recently had a very satisfactory experience with Hutton-Arco in Australia, which stocks parts for both brands. Their service was knowledgeable, friendly and fast.
moc.sehcniwnottuh@selaS
Another Barlow note: Rather than replace my big 1970’s non-tailing Barlow primaries, I converted them (about ten years ago) to self-tailing using the Winchmate kit. It took some fussing to get them to operate as smoothly as I wanted, but David Leitch was very helpful and we got there, and the $ savings were substantial. They have worked well. http://winchmate.com/
That’s good to hear, thanks.

I generally agree with the advice but am not sure I agree on the placement of primaries for all cockpit shapes. If you look at the second picture with Phyllis, it is extremely hard to effectively brace yourself fore and aft when kneeling on a cockpit seat (athwartships relative to the boat), especially when heeling. This means that there are 2 portions of the winch stroke which are really hard. The first is where the handle is furthest from your body, your leverage is not good, you are leaning significantly downhill and your body kinematics are not good at sideways motion. This one will always be true and the best solution is to be able to get over the top of the winch as you state. The second problem area is when needing to pull the handle back towards you, you often see people jerking backwards in awkward motions or trying to go back and forth in a different area using both speeds of the winch to avoid going around.
The best solution that I have found is to be able to stand behind the winch facing forwards. This gives you a good view of the sail but also lets you compensate for heel with your legs. Of course, the problem then becomes how do you actually create this standing area assuming you are not on a really big boat where everything can be done standing. On smaller boats, the best way that I know of is when a T shaped cockpit is employed and the winch is just before the cross in the T as far inboard as possible. It is quite easy to screw up this layout either with the sheet being in the way or interfering with the helm but done well I personally much prefer it. If you don’t have a cockpit that permits standing facing forward or aft at the primaries, then I think the suggested location is the best compromise. One other trick which I got from you but believe we differ on how much we like it is that a ratcheting winch handle can help if the winch is in the described location.
Of course if winching the primaries is the only goal and you can ignore other requirements, then a centralized setup like an IMOCA is best but that seems a bit extreme to me.
I agree, the best possible solution is to bring the winch into the cockpit where you can stand over it. The reason I did not go there is that, as you say, it’s just not practical on most existing cruising boats, which is our primary readership. (While I generally prefer the Mk 1 Boreals, I do like the primary winch positions on the Mk2.)
So given that and that I don’t like to see people getting into the habit of standing outside the cockpit, I would stick with my recommendation above, which I have found to work well. One thing that can screw that up is if the seat that one is kneeling on is too low.
Also, I kind of agree on the ratchet handle, in that while it has never worked well for me I think it might work well on a smaller boat with lower winch ratios. The problem on our boat is that since our primaries are a bit oversized and the ratio high, because of the size of the boat, it just takes too long with a ratchet handle, and conversely making a full circle and getting some momentum going works well.
And that brings up another point: I think that if people have trouble winching through a full circle in the position Phyllis is in, that’s an indicator that the winch is not powerful enough, not a problem induced by the position itself. Also, if they feel insecure, that may be because the coaming is too low and/or angled outboard too far. The latter is something I will write about more in a future piece that I have about half done.
My observation of cruising boat designs in the size range of interest leads me to believe that a decent percentage of them have T shaped cockpits but I don’t have any actual numbers to back that up. Of these, probably something like half would work well with winches setup for standing without major surgery, I have sailed on a few different boats doing this and I definitely liked it more but you usually can’t stand as outboard as is ideal so it is still not as good as a pedestal in the middle of the cockpit. I agree completely on not standing outside the cockpit. I am actually contemplating moving our primaries to exactly this position at the front of the T on our boat although it is not super high on the priority list. There are molded in spots for winches in the right spot, they were just not originally populated. Several owners have reported to the owners forum that they have made the change and it has been a big improvement. At the same time, I would update to winches with spring loaded self-tailers as the current winches are an appropriate ratio but push us into larger than needed sheets and those still want to fall out sometimes.
Your comments on speed and ratcheting handles got me thinking and I believe that one of the tricks is that humans do not have constant power output over a very wide range of speed. At low speed, our torque output does not increase as much as our speed dropped and at high speed, our torque output falls quite quickly until you just can’t spin any faster even at no torque. If we assume that winches are the same efficiency regardless of gear ratio, which is not a terrible assumption, then we want to be operating close to our peak power output point as the energy output of the system remains the same regardless. In the real world, it is very hard to do this because our leverage changes depending on where we are in the rotation and the load on the sheet changes depending on several factors. Ideally, the ratio would actually vary based on where you are in rotation but that becomes a very fancy winch and we should all just buy Ewinchers first as they solve this and other issues. The worst would obviously be a gear ratio that is not deep enough so you struggle to grind but going overly deep is not good either. Ergonomics will play a big part in the right winch gear ratio and also lead to a much less fatigued sailor if done right, I think you want to be just short of bogging down in the worst case scenario and then rely on the multiple speeds to help improve efficiency in lower load situations.
Good point about bringing the winches inboard on T shaped cockpits. I have been thinking a lot about this in relation to the Boreal 47.2 and am warming to it. No question that standing over a winch is best. I will write more on that soon.
Also interesting about our torque output. I think that explains well our different experience with ratcheting handles. Also it confirms my doubts about the new four speed winches we are seeing on some boats.
I hadn’t realized that there are now 4 speed winches available, interesting. I wonder what the ratios are? If you are only looking for max power or efficiency in an application with variable load, having more gears is always good as you can better fine tune speed and torque. However, the real world includes things like size, weight, cost, reliability, control logic, etc that don’t always make that a good idea. I think that the auto industry provides an interesting view into this, it used to be that everyone drove cars with 3 speed gearboxes and now many are 10 speed or even infinite within a band (CVT’s). It isn’t like they are only just learning the laws of physics, they are optimizing differently and there have been technical advances too. 3 speeds used to be considered a reasonable compromise, sure you were often not in the powerband of the engine or it was revved up real high when you didn’t need a lot of power but it got the job done cheaply. At the same time, the tractor trailers often had 12+ gears, sometimes in 2 sequential boxes, because they were extremely power limited so needed to be able to get the right ratio and with professional drivers, they could. As people demanded more performance from cars, transmissions crept up to be 4 or 5 speeds but didn’t go higher. From a sales standpoint, I suspect that it was due to users not really understanding the complex product and just focusing on how many horsepower it has. From a performance standpoint, engines had gotten to silly high power levels so the performance was fine and actually, they would have accelerated more slowly if they had to shift more as shifting is time consuming. The car companies have continued to push performance but also are now having to push efficiency and finally we have seen a very quick jump to approximately double the number of gears. This would not have made sense without also vast improvements in how quickly gears shift. Can you imagine going along efficiently at 60mph and 1500 rpm, pulling out to pass someone, mashing the throttle and waiting 3 seconds while it slowly shifted down through 2 gears so you were at 4000 rpm? Since this was not acceptable, they used to just have you cruise along at 3000 rpm burning more fuel and then you might drop 1 gear at max but often none. The setups now do a great job of allowing you to cruise along at a low and efficient rpm but then very quickly shift to a high rpm for power and the control logic is good enough that it doesn’t bother the user like slushboxes of old.
Applying this to sailboat winches, I am not sure exactly what is right. My guess is that the average user would not be particularly good about knowing when to change gears but the top users would be, just watch people ride a bike or drive a manual transmission car and see how many are not doing the right thing. Then there is the question of how gears are changed, if it is time consuming or tricky, that can negate all of the positives. If someone really wanted to nerd out on this, they could use a stationary excercise bike with a true power readout to map out speed versus power by simply varying the resistance.
One other lever that people have to pull is of course winch handle length, I am aware of 2 lengths but there may be more. If someone finds that they have slightly deeper of a ratio than they need, it could be that going to the shorter handle is better. Depending on the ratios, you may find that in the other gears, it is less optimal though so you need to optimize over the whole range of conditions. I suspect that America’s Cup teams have the data and optimize around this stuff but for everyone else, they use some rules of thumb and move on.
That’s really interesting and get’s me thinking about all sorts of winch related stuff including that I have noticed over the years that long duration winching, even at comparatively low loads, can be more exhausting than short duration at high load, even though similar amounts of work are getting done. The classic example is winching in the jib top furling line on MC feels more onerous than bringing in the lee sheet after a tack. That was the basis of my scepticism of 4 speed winches. But then again I have never tried one, so I could easily be wrong about that.
Thanks for your insights into human power development and ergonomics Eric; most interesting. Your observations seem to have many parallels to bicycling, where a dozen or so gears 10%-13% apart have been found optimal. It will be interesting to see how far down this path winch manufacturers will go. Will we see a 10-speed winch at some point? In the meantime, short and long handles for light & heavy jobs seems like a wonderful progressive step (simple & cheap.) While thinking about handles, the Ewincher offers another solution. E-bike makers are just cottoning onto the fact that they don’t need to provide so many gears so closely spaced. The e-assist makes up the difference between more widely-spaced gears. An Ewincher might prove a more reliable, fault tolerant, and redundant option than a future 4-10 speed winch.
I agree on Ewincher, See our in depth review: https://www.morganscloud.com/category/rigging-sails/ewincher-review/

Good article, John!
Our winch plan on Beatrix (44′ cutter) is very similar to your suggestions.
Part of selecting winches should be a consideration of maintenance issues. Servicing is a n important (and often neglected) task that should be done at once or twice a year.
When I re-winched about 20 years ago the sales guys at Fisheries Supply and I took apart an Anderson, a Harken, and a Lewmar to check the ease of servicing. Anderson was by far the easiest and Lewmar was the worst. We chose Harken, partly because they had a 15% off RRP program at the time which, combined with my 40% commercial discount, saved us a LOT of money, but most important was that they are good winches and Harken had a good customer service reputation.
For the primaries, we have 2 big 3-speed Harken 56.3ST winches. The insides resemble a Porsche transmission. ( I’m happy with the 3-speed winches but 2-speed would have been fine.) Kathy does all the servicing (she’s the “winch wench”) and she does it regularly. Unserviced winches eventually break teeth or become hard to use.
We also carry spare parts: all plastic components like the upper jaw, plus various washers, springs, pawls, and detent balls. Occasionally a tiny part is lost during servicing. The plastic upper jaws are all original. Where the winches are duplicates we don’t need a complete spares kit for each one.
Last, and not totally relevant to the topic, Sunbrella winch covers keep out dust and UV when not in use.
Cheers Jeff
I agree maintenance is important, although I have never found that the Lewmar winches were a problem, but then we have the older ones that I think were better in this regard.
That said, I don’t think a full maintenance is required every six months, or even once a year. Maybe on a race boat, but not on a cruising boat. My experience is that a full strip and clean every three to five years is fine.
If we did a full strip and clean every six months on MC, that would be fantastically onerous, given that it takes three full days for two of us to do all the winches on the boat properly.

A little bit of planning and practical geometry allowed us to put larger primaries (Lewmar 44s, rehabbed, freshwater-only “Ocean Wave” models from the ’90s) between our Andersen 40 primaries and our single speed Andersens we use for the staysail sheets. The heights differed enough so that the biggest winch, the Lewmar, clears the rest with the biggest winch handle. We can get right over the winches on the centerline standing in the footwell and all lines run fair through blocks from forward. The rest of the winches are at the mast (more Andersen 40s). The largest winch handle clears the Lewmar by 3 mm or about 1/8th of an inch.
If we need to winch the staysail sheet, it’s usually just one or two cranks, so the inability to do a full circle was no real compromise. We have no coamings on our rather strange boat, and so often attempt to think in non-obvious ways, such as “height of winch tops” to solve problems. We carry spares for both the Lewmars and the Andersens, both of which were easily obtainable and we strip down all winches for cleaning and related service (the occasional pawl replacement, mostly) every two seasons.

Hi Marc, this sounds like an interesting setup – do you have some photos available?
There are two photos in this blog post of interest…we had a busy month aboard. https://alchemy2009.blogspot.com/2019/07/good-grief-we-are-aboard.html
Thanks Marc! This is truly an unusual setup, but seems perfect for the functions intended. (hope you never have to use it to winch in a drogue…)
That’s actually what the aftmost Andersen 40s would handle, not that I anticipate that with enthusiasm as we’ll have to practice deploy the drogue in order to practice retrieving it! We are installing our drogue chainplates before launch in the next 60 days or so.

I find Pontos [now Karver] 4 speed winches a dream to use for the headsail primaries in my old age, and agree an Ewincher is perhaps the only satisfactory solution if the boat builder has stupidly put the mainsheet winch on the coach-house.
That’s interesting. I was sceptical about the 4 speed idea figuring that upping the ratio would just make the grinding job longer, albeit easier.

I truly love this site and it never fails to give me information I desperately need (even as it highlights more tasks to add to my already MASSIVE ‘to-do’ list!). While I realize that there are endless configurations of gear and systems, would it be possible to post a few “generic” evolutions for we somewhat crazy new-old boat owners? For example, “this is what I look for when inspecting and servicing my wheel steering system”. It certainly won’t look exactly like mine, but given that it performs the same function it should have useful similarities… and generate lots of horror story comments…
Hi Martin, Edson has maintenance manuals ( https://edsonmarine.com/product-tech-support-manuals-guides-and-maintenance-sheets/ ) that will give you most everything you need to inspect steering systems and to determine their current state and guide further care. My best, Dick Stevenson, s/v Alchemy
Thanks for the kind words.
Although we don’t have an article specifically on checking steering systems we do have over 1150 articles. I would guess that over half of those are on some aspect of boat maintenance. They are also categorized and searchable (see top menu) so a lot of that is already done. And we have an online book specifically on maintenance: https://www.morganscloud.com/category/maintenance-refits/book-maintaining-cruising-boat/
- BOAT OF THE YEAR
- Newsletters
- Sailboat Reviews
- Boating Safety
- Sailing Totem
- Charter Resources
- Destinations
- Galley Recipes
- Living Aboard
- Sails and Rigging
- Maintenance
- Best Marine Electronics & Technology
How to Use Sailing Winches
- By Mike Lee
- Updated: June 14, 2013
Sailing winches are almost always taken for granted, yet these compact pieces of mechanical machinery are incredibly powerful. Even the winches on a 30- or 40-foot sailboat are capable of pulling 2 tons or more. The thing about winches is that they’re so reliable that most sailors rarely pay much attention to them—until something goes wrong. Using sailing winches correctly should always be a priority.
To understand the capability of winches, let’s crunch some numbers. Say your boat has a “number 42” primary winch, which is an industry standard. The “42” represents a 42:1 power ratio. If an average person applies 50 pounds of load using a 10-inch winch handle, the result will be 2,100 pounds of pull (42 x 50 = 2,100). That figure puts the power potential into suitable perspective. With this much power in play, you must consider whether you’re operating your winch safely. When it comes to sailing winches, the most common mistake is not having enough wraps around the drum to hold the line load safely. In most cases, three wraps just aren’t enough. With too few wraps, several issues can arise.
For example, say that you’re coming out of a tack with a little load on the new sheet. It’s still easy to grasp, so you lock it into the self-tailer. But as the wind freshens and the jib fills, the sheet load greatly exceeds what it was coming out of the tack. Now you want to bear away and ease the sheet. But with only three wraps on the drum, just releasing it from the self-tailer may suck your fingers into the winch. This is a very painful way to learn about winch loads.
Furthermore, beyond the personal hazard, higher loads and few wraps can also equal a damaged winch, as those greater sheet loads will be transferred to the self-tailing arm rather than to the drum. Replacing a bent or broken self-tailing arm is not an inexpensive proposition.
On the flip side, to err on the side of caution can also present problems. For instance, easing a sheet with too many wraps might result in an override that takes some time to unjam. The takeaway message here? There’s a fine line between too many and too few wraps. As is often the case in sailing, you can “feel” when it’s right. So pay attention to the loads on the winch, respect the powerful consequences, and wrap accordingly.
Sending someone up the mast? This requires even greater winch safety, as a life is literally in your hands. It’s a good idea to have an experienced sailor demonstrate for new crewmembers how to send someone aloft properly. Once again, it’s important to have a sufficient number of wraps to hold the person, yet not so many that the halyard overrides. Whenever possible, instead of trusting the self-tailer, always have a second person tailing the halyard. When lowering the mast climber back to the deck, ensure a smooth ride down by taking one or two wraps off the drum. You want to avoid bouncing and jerking the person the length of the spar.
Whenever you’re grinding a winch, if the load becomes excessive or extreme, simply stop cranking. This is especially important with winches powered electrically or hydraulically; with such winches, the operator can’t actually feel the increased tension. Take the time to observe the line. If it stops moving, this almost always means that something is jammed somewhere. A 2,100-pound load on a sheet that’s tangled around a deck hatch can quickly become a major problem if it isn’t immediately addressed.
With power winches, the loads are even greater. A small, electric winch motor can produce about 9 pounds of load, but because such engines spin so fast, the speed needs to be reduced. Enter a 24:1 reduction gear. However, the gear not only reduces the speed of the motor but also increases the torque—in this instance, to 216 pounds. Now multiply that by our previous 42:1 power ratio; suddenly, in theory, that little powered winch should be able to pull 9,072 pounds. (We say “in theory” because with a proper circuit breaker, the amperage draw should trip well before that load is reached. Also, the parts in a 42 winch are really designed to handle loads only produced by a sailor working a winch handle. If something does fail, it’s better if it’s a winch part and not anything more critical—like the mast.)
Of course, proper technique is only one part of winch safety. The other is making sure that they’re properly maintained. The little clicking noise you hear deep inside a working winch comes from the ratchet pawls. The pawls lock the drum in place to keep it from moving backward, and they essentially bear the entire load placed on a winch. When servicing a winch, it’s important to inspect the pawls to make sure they aren’t packed with gunk or cracked, which will cause them to stick in the socket. When that happens, there’s nothing to bear the load; essentially, it’s the same as trying to hold the jib sheet with a bare hand. At least once a season, check the pawls.
The winch’s mounting bolts also require periodic inspection. Over time, a surprising number of such bolts do loosen up, some to the point that they can be retightened by hand. Get in the habit of inspecting those bolts each spring, and while you’re at it, also test the deck section on which the winch is mounted. On older boats with cored decks, water may seep through the fastening holes and cause rot. In most cases, simply tapping the deck with a screwdriver tells the tale. A soft deck will make a different, easily distinguished sound from that made by a solid one. A rotten deck core won’t hold winch loads very long. Deck surgery is then required.
Remember: A single winch can generate huge loads, and these are often larger than most sailors realize. So always apply the correct number of wraps, avoid or correct jams, and keep up with basic maintenance. Treat your sailing winch with respect, and you’ll get plenty of trouble-free service from it.
Mike Lee is a marine-industry pro with over 25 years of technical and sailing experience.
- More: deck hardware , How To , seamanship
- More How To
How to Protect Your Spars from Corrosion
Sailing totem refit series: the forward head makeover, fatty goodlander: dealing with chafe while cruising, how to rig everything in your favor, one mile offshore with christian williams, winds of change.
- Digital Edition
- Customer Service
- Privacy Policy
- Email Newsletters
- Cruising World
- Sailing World
- Salt Water Sportsman
- Sport Fishing
- Wakeboarding
Using winches
Remember the old Charlton Heston movies in which sweaty, ragged sailors pulled in ropes, grunting "Heave, ho," like an ancient tug of war, while a barbaric foreman cracked a whip? Nowadays, you can use a winch to pull in that line (and leave your whip at home). You use winches, another way to provide mechanical advantage to adjust ropes under load, mainly on bigger boats , where loads on lines can get really heavy.
ajtiM^ Winches use a system of gears inside a round cylinder called a drum to give you the necessary pulling power. Always wrap the line clockwise around the drum, using more wraps as the load on the line increases. Put as many wraps around the drum as you need — the wraps provide the friction so you can hold a heavily loaded line in your hand.
The winch drum spins as you pull the rope wrapped around it if the rope isn't under load. But when the load builds (such as on a jib sheet when the sail fills during a tack), you need to turn the drum with a removable handle called a winch handle. This process is called grinding (and the folks who do it on big racing boats are called grinders).
While one person grinds, the other person pulls in (or tails) the line that feeds off the drum. One person can do both jobs, but doing so is less efficient. Some winches are self-tailing, meaning that they have a built-in mechanism that grips the line and holds it in place so that one person can grind without needing anyone to pull the rope. However, grinding is often a two-person process, as Figure 5-16 shows.
Here are some tips for grinding and tailing properly:
1 Choose the right speed. Many winches have two or more speeds or gears. You change gears by changing the direction you turn the handle so that you can shift speeds if the grinding gets harder.
1 Grind in a full circle, using two hands if necessary. If you can't complete a circle, turn as far as you can and then ratchet the winch handle back to your starting point.
1 If you feel the rope slipping, then either you aren't pulling hard enough or you need to add a wrap on the drum. When you're pulling in a slack or lightly loaded rope by hand, you usually need only one or two wraps. But after the line becomes so loaded that you can no longer pull it by hand and need to grind with the winch handle, you need about four wraps. When you're rapidly pulling in the slack out of a lightly loaded rope, you should add enough wraps for grinding just before the line gets loaded up. This is because when you're rapidly pulling in a lightly loaded line spinning around a winch, having too many wraps may cause a tangle called an override. In the next section, we discuss adding a wrap to a loaded winch and avoiding overrides.
1 Stand in a comfortable position over the winch. You can grind a winch sitting beside it (some winches are placed where standing over them is impractical), but you won't be able to grind as hard.
1 When you're not grinding the winch, remove the handle and place it in its holder. These expensive items have never passed the float test, and having the handle already removed is safer if you must quickly release the rope on the winch. You never find winches on dinghies , so you don't have to worry about losing that handle in a capsize.
Figure 5-16:
Jeff Johnson grinding a winch with Peter tailing.

Adjusting lines safely on a loaded winch
A line under tremendous load can be dangerous to ease (let out) or trim. Think first. The last thing you want is to burn your hands as a rope goes whizzing through them. Don't sail with any finger rings because they can get caught on a line. Be especially careful with winches when you're wearing gloves. Make sure that your gloves fit snugly, because extra fabric can get caught and pinched by the line spooling onto the winch drum.
When you need to add a wrap to a loaded winch, carefully hold the line with both hands. Maintain tension on the line as you take both hands all the way around the winch, turning your hands to keep your fingers from getting caught, as Figure 5-17 shows.
Figure 5-17:
Keep pulling on the line as you use both hands to add a wrap on a highly loaded winch.

To ease a line slowly and safely, hold onto the line with your right hand and put your left hand on the wraps on the winch. Slowly let the line out counterclockwise, a couple of inches at a time, keeping some pressure on the line and varying the pressure your left hand applies to the coil of line on the winch.
To take all the wraps off a winch quickly (common in a tacking maneuver on bigger boats that use winches for their jib sheets), pull up on the line with a slight counterclockwise rotating motion. Before you take off the wraps, make sure that the long tail of the jib sheet is free to run, not tangled around your foot (or a body part of your crew!).
When releasing a jib sheet on a winch during a tacking maneuver, wait until the load has just eased on the sheet before removing all the wraps on the winch drum. Watch for the jib to begin luffing as an indication that the helmsman has begun turning the boat. If you cast all the wraps off the winch drum too early, you risk burning your hands as the highly loaded rope runs out. Wait too late, and the jib fills backward and your hands could suffer the same abuse.
At some point, probably when you're already having a bad day, you're going to get an override — a misfed line that effectively creates a knot around the winch, shown in Figure 5-18. Overrides can be caused by improper winch placement so the rope feeds on it incorrectly or by having too many wraps when you pull in a slack line.
Figure 5-18:
An override (left) and a properly wrapped winch

In light air, you may be able to untangle the mess by pulling the rope's end up and around the winch the "wrong" way (counterclockwise). In stronger winds, taking the load off the rope going to the winch and then untangling the mess is usually best.
Before the sail is sheeted hard, you may be able to head up, take the load off the sheet and manually untangle it. Otherwise, to take the load off the override, rig another line to do the same job. Or you can tie another line to the tangled line (forward of the tangle) with a rolling hitch (see Chapter 19) and then tighten the new line so that you have slack in the tangled part. The final option, when danger is imminent or none of the other methods work, is to cut the infringing rope with a knife. Be sure to cut the line near its end (near the clew of the jib on a jib sheet, for example) so that it's still usable (and only a little bit shorter). Avoid cutting a halyard if at all possible, because it requires a major rerigging exercise.
Continue reading here: Leaving the Dock And Coming Back
Was this article helpful?
Recommended Programs

Myboatplans 518 Boat Plans
Related Posts
- Jibing Turning away from the wind
- Heading up and bearing away
- Rounding up - Sailing Fast
- Hoisting the jib - Sailing Fast
- Understanding Apparent Wind
- Roll jibe - Sailing Fast
Readers' Questions
What do grinders do in sailing?
Grinders are crew members who operate a winch to help raise and trim the sails. They use a hand-over-hand technique to turn the winch handle which winds the halyard, raising the sail and releasing it to trim. In addition, grinders are used to steady the boat and to provide additional power when the boat is sailing in heavy wind.

How to Service a Two-Speed Winch on a Sailboat
Winches are often used in and left exposed to the elements, including salt water spray. routine maintenance will keep your equipment working as intended and ready when you need it. [how-to video].
On any given sailboat, there are at least 2 or 3 winches and on larger boats, there can be many more. I have 6 on my 41-foot sloop and one is a powered winch.
At upwards of $6,000 or more per winch, keeping them functioning reliably is as much of a financial necessity as an operational one.
Here’s a step-by-step overview for servicing a two-speed winch on a sailboat… including a full how-to video showing how I serviced my starboard jib winch.
Mechanical Advantage
Whether you are raising a sail, trimming a sail, hauling crew up the mast on a halyard, or maybe adjusting a spring line used to raft up with another boat, you use a winch for the mechanical advantage it provides in handling a given load. That is, raising a sail that weighs 100 pounds may only need about 25 pounds of force when cranking the winch.
The high speed gear ratio may be 3:1 , for example, while the low speed ratio could be 10:1 . (That is, it takes less force to turn using the low speed gears but you have to crank the winch handle more times than with the high speed gears.) These are just examples and the specifics of your winch may vary.
The effort required to crank a winch under load depends on several factors including drum size, length of the winch handle, gear ratios, and friction from all the fairleads and turning blocks on the line in use. In a simplistic example assuming no friction, raising a 100 pound load with a gear ratio of 10:1 requires 10 pounds of force.
Speaking of friction, it may also be introduced by worn winch gears and grit and dirt in the internal workings. That, as much as anything else, is a reason to service your winches.
Servicing a Sailboat Winch
Performing winch maintenance on your sailboat is simply disassembling the winch, inspecting and cleaning the parts, then lubricating and reassembling the unit. You may or may not have to replace parts but at a minimum, one should replace the pawl springs as described below.
Before you begin and especially if this your first time doing this, I recommend you find a box bigger than the base of your winch . Then cut a hole in the bottom so you can slip the box over the winch. Try to tape the box in place so it can’t move but also so that removing the winch drum is not compromised.
The purpose of the box is to catch and contain any parts that might fall out of the winch unexpectedly. This is especially true for winches that sit on a coaming or near the gun’l. It would be at least an annoyance to have to go buy replacement parts that dropped overboard assuming you know what parts you may have lost.
In addition to the suggested containment box, you will want to have:
- a set of dental probes
- one or more toothbrushes
- a basin of some sort
- some solvent with which to degrease and clean the parts
Some people suggest using kerosene or gasoline. I think those are much too volatile to use for this purpose. I use paint thinner and it works just fine.
You will likely want to spread some newspaper and/or a plastic drop cloth to protect the fiberglass and other materials in the area in which you are working. Knowing that I will be immersing parts into a solvent, I like to wear nitrile gloves to protect my hands.
The first step is to unscrew the top cap . You will probably need a screw driver and hammer to tap lightly on the cap to loosen it and then finish by unscrewing by hand. Briefly inspect each part as it comes off and then place the parts into a secure container. Note that you may want to have a separate container or basin with the solvent in it.
With slight variation depending on make and model, the disassembly steps are:
- Loosen and unscrew the top cap
- Remove the stripper arm
- Remove the drum
- Remove the roller bearings, spacer, and bottom fender washer
- Remove the axle pins and gear clusters at the base
- Remove the keyed retainer clips at the top
- Remove the central shaft
You may wish to photograph each step and each part as the disassembly progresses.
Next you will clean each part in the solvent, using the dental picks to clean any solid clumps or gummy residue. Much like a dentist does, use the probe to feel for pits, accumulations, or other defects. Clean what you can and determine if a given part needs to be replaced due to wear or defect.
The gear clusters are each a set of two gears, one rotating inside another with a pair of pawls that allow the gears to only spin in one direction. Be sure to clean both gears and all the recesses.
Replacing Pawl Springs
Particularly check the pawls for defects. The pawls are what keep the winch from back-spinning under load. They are essential and must be up to the task.
The “springs” are little more than stiff wire bent into a V-shape with a loop at the apex for a spring force.
It is not worth reusing them. Springs can be had inexpensively . Just replace them when you reassemble the winch.
Reassembling the Winch
When all the parts are well cleaned and the solvent has been wiped away or evaporated, you may begin reassembly. Each part should be adequately but not excessively lubricated. Over-lubing promotes clumping and the accumulation of grit and salt particles.
The only exception to lubrication is the O-ring under the stripper arm. Some O-rings may not tolerate grease well and they really do not need grease for their sealing function.
Start by slipping the pawl springs into the notch on the pawl. Then slide the pawl into its gear until the spring stops it. Compress the spring to allow the pawl to slip into its socket all the way. Some technicians recommend lubing the pawls with oil instead of grease so they do not stick. There are also light winch greases which can be applied in a very thin coat. There should not be gobs of grease anywhere, just a coating.
Next slide the (smaller) gear with the pawls into the (larger) mating gear. Make sure the inner gear turns as expected.
Install the gear clusters first, being mindful of the correct orientation. When both clusters have been installed, spin them to verify smooth and even rotation. Now replace the fender washer, one roller bearing, the spacer, and then the second roller bearing in that order. Next insert the central shaft and the keyed retainer clips.
Slip the winch drum over the entire assembly. Reinstall the O-ring on the stripper arm position it as desired while meshing with the keyed retainer clips. Finally screw on the top cap finger tight. And you’re done!
Your winch should give you many years of service with this simple maintenance procedure. While racing boats may service their equipment after every race or practice, cruisers can reasonably service their winches at intervals of a couple of years OR until one detects unusual resistance or operation. Should the latter happen, don’t wait to service the winch or you risk more serious damage or even personal injury.
I enjoy performing as much of my own maintenance when I can. It helps me stay in touch with my boat and it gives me more reason to be aboard!
Video How-to: Performing Winch Maintenance
Watch the video below to see how I serviced my starboard jib winch.
Subscribe to my YouTube Channel for more how-to videos, sailing excursions and more!
Love the boat life? Check out these picks for your boating lifestyle:

Boat Baby Bodysuit with Custom Year

Boat Mom Nautical Anchor Shirt – White Print

Boat Mom Nautical Anchor Shirt – Pink Print

Custom Boat Dad Sweatshirt

Capt. Rob Chichester
Related posts.
A Step-by-Step Guide to Protecting Your Boat’s Surfaces
February 20, 2024

A Step-by-Step Guide to Cleaning Your Boat’s Teak
February 19, 2024

Shakedown Cruise Your First Boat Ride of the Season
June 1, 2023
- New Sailboats
- Sailboats 21-30ft
- Sailboats 31-35ft
- Sailboats 36-40ft
- Sailboats Over 40ft
- Sailboats Under 21feet
- used_sailboats
- Apps and Computer Programs
- Communications
- Fishfinders
- Handheld Electronics
- Plotters MFDS Rradar
- Wind, Speed & Depth Instruments
- Anchoring Mooring
- Running Rigging
- Sails Canvas
- Standing Rigging
- Diesel Engines
- Off Grid Energy
- Cleaning Waxing
- DIY Projects
- Repair, Tools & Materials
- Spare Parts
- Tools & Gadgets
- Cabin Comfort
- Ventilation
- Footwear Apparel
- Foul Weather Gear
- Mailport & PS Advisor
- Inside Practical Sailor Blog
- Activate My Web Access
- Reset Password
- Customer Service

- Free Newsletter
Tartan 30: An Affordable Classic

Ericson 34-2 Finds Sweet Spot

How to Sell Your Boat

Cal 2-46: A Venerable Lapworth Design Brought Up to Date

Solar Panels: Go Rigid If You have the Space…

Leaping Into Lithium

The Importance of Sea State in Weather Planning

Do-it-yourself Electrical System Survey and Inspection

When Should We Retire Dyneema Stays and Running Rigging?

Rethinking MOB Prevention

Top-notch Wind Indicators

The Everlasting Multihull Trampoline

What Your Boat and the Baltimore Super Container Ship May Have…

Check Your Shorepower System for Hidden Dangers

DIY survey of boat solar and wind turbine systems

What’s Involved in Setting Up a Lithium Battery System?

Waste Not is the Rule. But How Do We Get There?

The Scraper-only Approach to Bottom Paint Removal

How to Handle the Head

The Day Sailor’s First-Aid Kit

Choosing and Securing Seat Cushions

Cockpit Drains on Race Boats

Re-sealing the Seams on Waterproof Fabrics

Safer Sailing: Add Leg Loops to Your Harness

Waxing and Polishing Your Boat

Reducing Engine Room Noise

Tricks and Tips to Forming Do-it-yourself Rigging Terminals

Marine Toilet Maintenance Tips

Learning to Live with Plastic Boat Bits
- Sails, Rigging & Deck Gear
Six-Brand Winch Test: Anderson On Top

Anyone who has been on the bitter end of the sheet when a big genoa starts to fill—whipping and shaking with terrifying violence—knows how important it is to have a winch to convert that flailing energy to forward propulsion.

Winches are to sailboats what the inclined plane was to the Egyptians.
They make the difficult easy, place the impossible within reach.
The equivalent of a dozen or more men needed to heave on a square rigger’s halyard or brace is represented on a modern sailboat by a small, precision-made, cylindrical machine packed with levers and gears.
The refinement of gearing and the development of smooth-operating self-tailers has promoted modern winches from two-man to one-man workhorses with amazing power.
Their only negative is their proclivity to induce fidgety idlers to rotate them mindlessly, just to hear the pawls ratchet. These idlers usually can be broken of this annoying habit by shouting, “Winchclicker! Winchclicker!! Winchclicker!!!” If that fails, they generally are put ashore (if in harbor) or put to death (if on a long sea voyage).
Let’s take a close look at two common sizes of winches. They’re all expensive, because they are well-made precision equipment. They’re also among the most frequently retrofitted items; it’s worth repeating here that an oft-heard saying aboard a lot of sailboats is that the winches they came with are not big enough.
In the two categories selected, these winches are from six manufacturers—Andersen (Denmark), Antal (Italy), Barton (England), Harken (United States), Lewmar (England) and Setamar (Germany).
Small Winches The first category is very small winches. Those represented in this evaluation are among the smallest made by five of the manufacturers. One maker, Antal, makes excellent small winches in several sizes, but could not supply one for testing.
Small, single-speed winches, either with a handle or simply snubbing winches, are invaluable on small boats, for halyards, jib sheets, spinnaker sheets, reefing gear, vangs, etc., and handy, too, for many tasks aboard larger boats. Small winches do not come with the self-tailing mechanism; most manufacturers (Andersen is the exception) start the self-tailers with #16s, which also happens to be the minimum size for two-speed gearing.
Small winches are said to have a gear ratio of 1:1. That means they are direct drive. The only power advantage is that provided by a winch handle. It’s simple leverage, with two sets of pawls (one pair to restrain the drum; the other pair to permit the handle to ratchet freely). One turn of the crank is one turn on the drum. On a small boat, the single-digit power ratio provided by the handle often is ample for sheets. Non-geared winches take in line rapidly. Such winches often are used for halyards on somewhat larger boats. (The power ratio is the length of the handle divided by the radius of the drum.)

Snubbing winches, which do not accept a handle, turn in one direction only. They need only a single set of ratchet pawls. If enough wraps are applied, snubbing winches give the user time to get a new grip or to simply hold the line lightly while friction between the drum and the line takes the load.
They provide little mechanical advantage, but snubbing winches facilitate a good utilization of intermittent muscle power, They also have good line retrieval speed, which always is a consideration when dealing with winches.
Simple and trouble-free, they are of great value when the line load is no more than one’s weight or pulling strength. A halyard can be sweated up very taut by the “heave and hold” method of pulling hard on the line perpendicular to the mast with one hand while grabbing slack on the winch with the other hand.
With either small, direct-drive winches with handles or simple snubbers, the line retrieval rate is an undiluted derivative of the drum diameter, i.e. one revolution of the winch hauls in a length of line equal to the drum’s diameter multiplied by that popular symbolic 16th letter in the Greek alphabet. As a practical matter, line in equals line out.
Because they are simple devices, these small winches were not tested.
The Roaring 40s The second category is the very popular “Number Forties.” Winches are given numbers that correspond to their lowest and most powerful gear ratio. The power ratio of a geared winch is the length of the handle divided by the radius of the drum, multiplied by the gear ratio.
The big winches in this test are Andersens, Antals, Bartons, Harkens, Lewmars and Setamars. We tried to include the Australian-made Murray bottom-action winches, but could not find a U.S. distributor.
The versatile #40s—or their close equivalents—serve as genoa sheet winches on 30- to 35-foot boats, for spinnaker sheets and mainsheets on boats up to 48′, and for halyards, topping lifts, vangs, etc., on much larger sailboats.
The #40s in this collection are all two-speed. Three-speed winches usually are found on racing boats; they come in bigger sizes and get complicated and expensive.
All but one of these winches are self-tailing. In the beginning, several decades ago, self-tailing winches were troublesome…as is usual with most new things. Now perfected, the self-tailing mechanisms represent the only way to go on either racing or cruising boats.
Because winches are such beautifully made gear and rarely get worn out, marine consignment shops across the country are clogged with standard winches—mostly Barients—that once were highly coveted (as well as highly priced). We know of at least one instance in which dozens of perfectly usable standard winches were sold as scrap metal.
There even are a few early-model self-tailers (from various manufacturers) showing up now in the consignment shops; they’re okay for moderate duty but, generally speaking, are not good buys because the self-tailing mechanisms often are not as refined as those on current models. In plain English, that means they slip under heavier loads. Many also have abrasive drum surfaces that devour line.
The Test The Practical Sailor test, designed to establish efficiency ratings for winches, involves mounting each winch on the workbench.
To measure the force exerted, a 15″ torque wrench was used instead of a standard 10″ handle. (The extra length of the torque wrench required adjustments in the calculations.)
Sta-Set X, a modern, rather slippery line, was used, with some of the early tests repeated using Regatta braid, a fuzzy-finish line. The theory that because of varying friction a slippery line might produce different numbers than a fuzzy line proved specious.
At the other end of the bench, a tripled length of 1/2″ shock cord held by two eye straps provided the resistance. Shackled to the shock cord was a carefully calibrated Dillon dynamometer with a handy red max needle. The Sta-Set was attached to the other shackle on the dynamometer and thence to the winch. Four wraps were used. A minimum of three generally is recommended for all but extreme loads. The exception was the Setamar, which requires just one partial wrap of at least 220°.
Pulls of 10 and 20 pounds were for the trimmer easy work. Additional pulls of 30 pounds produced some sweat. A pull of 40 pounds probably would be regarded by an average person as a maximum effort; 50 pounds would be something only a bench-pressing girlfriend would do without making some kind of noise.
The numerous pulls produced figures whose averages indicate how close each winch came to meeting its power ratio.
An additional step in the testing was to determine how easy it is to free the line from the self-tailer and ease the line, as one would do in easing a sheet or halyard when coming off a beat onto a reach or run. In the case of the Setamar, this becomes complicated and is controlled by the handle.
The Results First of all, the fact that the smooth-skinned Sta-Set performed the same as fuzzy Regatta braid indicates that the gripping action of the self-tailing mechanisms on all of these winches probably is no longer at issue. There were difficulties when self-tailers were first introduced; that was before it was recognized that the diameter of the drum and the base diameter of the self-tailer were very critical dimensions.
Click here to view the Winches Value Guide .
There appeared to be no slippage. However, the sharpness of the teeth on the self-tailers’ disks may well affect wear on the line.
Dealing first with the small winches, there are lots of places on small boats where the ultra-simple Barton snubbing winch (about $50) would be useful. The almost equally simple Lewmar #6 ($92 in anodized aluminum) has an efficient mechanism; it also comes (for more money) in chromed or polished bronze. The #6 Harken ($108 for aluminum) turns on sleeved bearings and is the smoothest operating.
For small-boat sheets or bigger-boat halyards and vangs, the small single-speed Setamar ($364) makes eminently good sense. The ability to ease a sheet or halyard by turning the handle in the opposite direction, before freeing the line entirely, constitutes, in our opinion, a valuable safety factor. As was pointed out in an earlier, more detailed review (in the February 15, 1997 issue), the drum-less Setamar winches are very ingenious and may represent the design approach of the future. However, they currently are too expensive.
The Andersen #6 ($102), all-stainless, beautifully made, with Andersen’s ribbed drum and needle bearings, commands categorization as top-of-the-heap and Best Buy.
Summarizing now about the large winches, it’s tough to choose between Andersen and Lewmar. But first, let’s review the others.
The little Barton G23 is not comparable with the big 40s. It was included not only because it’s Barton’s biggest winch, but also because it may point to the future. An “Ugly Ducking”, if there ever was one (see photo), the Barton is made largely of reinforced plastic (including plastic needle bearing), but with a stainless steel axle, pawls and planetary drive gears made of sintered stainless, and a stainless sleeve on the plastic drum. The winch is a powerhouse and, along with being very light and corrosion free, requires almost no service. An occasional flushing with an optional light hit of WD40 is all it needs. It’s a $400 workhorse.
Although handsome winches and very finely made, both the Harken and Antal suffer from what appear to be unnecessarily complicated innards that produce some fall-off in efficiency. They suffer especially in their geared high speed modes and make the initial retrieval of line quite slow compared with the Setamar, Andersen and even the Lewmar.
In addition, the Practical Sailor tests revealed that the Harken drum surface caused abrasion on the Sta-Set line that was easily detected visually after only three or four “pulls.” The Harken and Antal have the most abrasive drums.
The Setamar? It’s so different, it’s difficult to compare with the more conventional #40s. It has a number of strong points. The principal ones are that it retrieves line fast (as fast as the Andersen) and easing of a loaded line can be controlled very safely with the handle (after shifting the top ring). Other benefits are that no wraps are needed; it is small and very lightweight, and line wear is the lowest of all.
The Setamar negatives: It is not a thing of beauty; is complicated to strip and clean (which it requires often); takes some “getting used to,” and it is far too costly.
Both the best and the Best Buy is the Andersen, but there’s almost no gap between it and the Lewmar.
The Lewmar, a first-rate value, is part of a line that was completely redesigned a few years ago to simplify the gearing, reduce the number of parts and make the winch both stronger and easier to service.
The Lewmar ranks first in efficiency, a hair ahead of the Andersen, and is easy to disassemble. If it had a drum as good as the Andersen, it would be a toss-up.
The Andersen has a direct drive high gear that retrieves line fast, a good low gear mechanism that may come second to the bearing-packed Harken, but its real forte is the polished stainless steel drum. The drum, a masterpiece of metal-working, is ribbed, which produces very little abrasion because it moves the coiled line up the drum much better than an abrasive drum. The drum should last virtually forever.
A peculiarity of the Andersen is that when the line is heavily loaded, easing the line can be a bit jerky as the line skips from rib to rib. Although initially disconcerting, it is not even a minor problem.
There’s nothing second-rate about any of these winches. They all work very, very well and last a long time if properly cared for. The choice may involve gear ratios, serviceability or even cosmetics (we still believe a good part of a sailboat’s appeal is aesthetic).
If it’s something different you want, try Setamar. If you don’t need a large winch, don’t overlook the “new-tech” Bartons. But for efficiency, serviceability, construction and appearance, our top choice is the Andersen.
Contacts- Andersen, Scandvik, Inc., 423 4th Pl. SW, Vero Beach, FL 32961-0068; 561/567-2877. Antal, Euro Marine Trading, Inc., 62 Halsey, Newport, RI 02840; 800/222-7712. Barton, Imtra Corp., 30 Samuel Barnet Blvd., New Bedford, MA 02745; 5008/005-7000, www.imtra.com. Harken, 1252 E. Wisconsin, Pewaukee, WI 53072; 262/691-3320; www.harken.com. Lewmar, New Whitfield St., Guilford, CT 06437; 203/458-6200; www.lewmar.com. Setamar, Setamar USA, Box 840, 17 Burnside St., Bristol, RI 02809; 401/253-2244.
RELATED ARTICLES MORE FROM AUTHOR
Leave a reply cancel reply.
Log in to leave a comment
Latest Videos

Fuel Contamination? The Baltimore Francis Key Bridge Collapse

Safety At Sea For You & Your Family – The Joe...

What’s The Best Vinyl Window Cleaner for Your Boat?

40-Footer Boat Tours – With Some Big Surprises! | Boat Tour
- Privacy Policy
- Do Not Sell My Personal Information
- Online Account Activation
- Privacy Manager
Sailboat Parts Explained: Illustrated Guide (with Diagrams)
When you first get into sailing, there are a lot of sailboat parts to learn. Scouting for a good guide to all the parts, I couldn't find any, so I wrote one myself.
Below, I'll go over each different sailboat part. And I mean each and every one of them. I'll walk you through them one by one, and explain each part's function. I've also made sure to add good illustrations and clear diagrams.
This article is a great reference for beginners and experienced sailors alike. It's a great starting point, but also a great reference manual. Let's kick off with a quick general overview of the different sailboat parts.
General Overview
The different segments
You can divide up a sailboat in four general segments. These segments are arbitrary (I made them up) but it will help us to understand the parts more quickly. Some are super straightforward and some have a bit more ninja names.
Something like that. You can see the different segments highlighted in this diagram below:

The hull is what most people would consider 'the boat'. It's the part that provides buoyancy and carries everything else: sails, masts, rigging, and so on. Without the hull, there would be no boat. The hull can be divided into different parts: deck, keel, cabin, waterline, bilge, bow, stern, rudder, and many more.
I'll show you those specific parts later on. First, let's move on to the mast.

Sailboats Explained
The mast is the long, standing pole holding the sails. It is typically placed just off-center of a sailboat (a little bit to the front) and gives the sailboat its characteristic shape. The mast is crucial for any sailboat: without a mast, any sailboat would become just a regular boat.
I think this segment speaks mostly for itself. Most modern sailboats you see will have two sails up, but they can carry a variety of other specialty sails. And there are all kinds of sail plans out there, which determine the amount and shape of sails that are used.
The Rigging
This is probably the most complex category of all of them.
Rigging is the means with which the sails are attached to the mast. The rigging consists of all kinds of lines, cables, spars, and hardware. It's the segment with the most different parts.
The most important parts
If you learn anything from this article, here are the most important parts of any sailboat. You will find all of these parts in some shape or form on almost any sailboat.

Okay, we now have a good starting point and a good basic understanding of the different sailboat parts. It's time for the good stuff. We're going to dive into each segment in detail.
Below, I'll go over them one by one, pointing out its different parts on a diagram, listing them with a brief explanation, and showing you examples as well.
After reading this article, you'll recognize every single sailboat part and know them by name. And if you forget one, you're free to look it up in this guide.

On this page:
The hull is the heart of the boat. It's what carries everything: the mast, the sails, the rigging, the passengers. The hull is what provides the sailboat with its buoyancy, allowing it to stay afloat.
Sailboats mostly use displacement hulls, which is a shape that displaces water when moving through it. They are generally very round and use buoyancy to support its own weight. These two characteristics make sure it is a smooth ride.
There are different hull shapes that work and handle differently. If you want to learn more about them, here's the Illustrated Guide to Boat Hull Types (with 11 Examples ). But for now, all we need to know is that the hull is the rounded, floating part of any sailboat.
Instead of simply calling the different sides of a hull front, back, left and right , we use different names in sailing. Let's take a look at them.

The bow is the front part of the hull. It's simply the nautical word for 'front'. It's the pointy bit that cuts through the water. The shape of the bow determines partially how the boat handles.
The stern is the back part of the hull. It's simply the nautical word for 'back'. The shape of the stern partially determines the stability and speed of the boat. With motorboats, the stern lies deep inside the water, and the hull is flatter aft. Aft also means back. This allows it to plane, increasing the hull speed. For sailboats, stability is much more important, so the hull is rounded throughout, increasing its buoyancy and hydrodynamic properties.
The transom is the backplate of the boat's hull. It's the most aft (rear) part of the boat.
Port is the left side of a sailboat.
Starboard is the right side of a sailboat
The bilges are the part where the bottom and the sides of the hull meet. On sailboats, these are typically very round, which helps with hydrodynamics. On powerboats, they tend to have an angle.
The waterline is the point where the boat's hull meets the water. Generally, boat owners paint the waterline and use antifouling paint below it, to protect it from marine growth.
The deck is the top part of the boat's hull. In a way, it's the cap of the boat, and it holds the deck hardware and rigging.
Displacement hulls are very round and smooth, which makes them very efficient and comfortable. But it also makes them very easy to capsize: think of a canoe, for example.
The keel is a large fin that offsets the tendency to capsize by providing counterbalance. Typically, the keel carries ballast in the tip, creating a counterweight to the wind's force on the sails.
The rudder is the horizontal plate at the back of the boat that is used to steer by setting a course and maintaining it. It is connected to the helm or tiller.
Tiller or Helm
- The helm is simply the nautical term for the wheel.
- The tiller is simply the nautical term for the steering stick.
The tiller or helm is attached to the rudder and is used to steer the boat. Most smaller sailboats (below 30') have a tiller, most larger sailboats use a helm. Large ocean-going vessels tend to have two helms.
The cockpit is the recessed part in the deck where the helmsman sits or stands. It tends to have some benches. It houses the outside navigation and systems interfaces, like the compass, chartplotter, and so on. It also houses the mainsheet traveler and winches for the jib. Most boats are set up so that the entire vessel can be operated from the cockpit (hence the name). More on those different parts later.
Most larger boats have some sort of roofed part, which is called the cabin. The cabin is used as a shelter, and on cruising sailboats you'll find the galley for cooking, a bed, bath room, and so on.
The mast is the pole on a sailboat that holds the sails. Sailboats can have one or multiple masts, depending on the mast configuration. Most sailboats have only one or two masts. Three masts or more is less common.
The boom is the horizontal pole on the mast, that holds the mainsail in place.
The sails seem simple, but actually consist of many moving parts. The parts I list below work for most modern sailboats - I mean 90% of them. However, there are all sorts of specialty sails that are not included here, to keep things concise.

The mainsail is the largest sail on the largest mast. Most sailboats use a sloop rigging (just one mast with one bermuda mainsail). In that case, the main is easy to recognize. With other rig types, it gets more difficult, since there can be multiple tall masts and large sails.
If you want to take a look at the different sail plans and rig types that are out there, I suggest reading my previous guide on how to recognize any sailboat here (opens in new tab).
Sail sides:
- Leech - Leech is the name for the back side of the sail, running from the top to the bottom.
- Luff - Luff is the name for the front side of the sail, running from the top to the bottom.
- Foot - Foot is the name for the lower side of the sail, where it meets the boom.
Sail corners:
- Clew - The clew is the lower aft (back) corner of the mainsail, where the leech is connected to the foot. The clew is attached to the boom.
- Tack - The tack is the lower front corner of the mainsail
- Head - The head is the top corner of the mainsail
Battens are horizontal sail reinforcers that flatten and stiffen the sail.
Telltales are small strings that show you whether your sail trim is correct. You'll find telltales on both your jib and mainsail.
The jib is the standard sized headsail on a Bermuda Sloop rig (which is the sail plan most modern sailboats use).
As I mentioned: there are all kinds, types, and shapes of sails. For an overview of the most common sail types, check out my Guide on Sail Types here (with photos).
The rigging is what is used to attach your sails and mast to your boat. Rigging, in other words, mostly consists of all kinds of lines. Lines are just another word for ropes. Come to think of it, sailors really find all kinds of ways to complicate the word rope ...
Two types of rigging
There are two types of rigging: running and standing rigging. The difference between the two is very simple.
- The running rigging is the rigging on a sailboat that's used to operate the sails. For example, the halyard, which is used to lower and heave the mainsail.
- The standing rigging is the rigging that is used to support the mast and sail plan.
Standing Rigging

Here are the different parts that belong to the standing rigging:
- Forestay or Headstay - Line or cable that supports the mast and is attached to the bow of the boat. This is often a steel cable.
- Backstay - Line or cable that supports the mast and is attached to the stern of the boat. This is often a steel cable.
- Sidestay or Shroud - Line or cable that supports the mast from the sides of the boat. Most sailboats use at least two sidestays (one on each side).
- Spreader - The sidestays are spaced to steer clear from the mast using spreaders.
Running Rigging: different words for rope
Ropes play a big part in sailing, and especially in control over the sails. In sailboat jargon, we call ropes 'lines'. But there are some lines with a specific function that have a different name. I think this makes it easier to communicate with your crew: you don't have to define which line you mean. Instead, you simply shout 'mainsheet!'. Yeah, that works.
Running rigging consists of the lines, sheets, and hardware that are used to control, raise, lower, shape and manipulate the sails on a sailboat. Rigging varies for different rig types, but since most sailboats are use a sloop rig, nearly all sailboats use the following running rigging:

- Halyards -'Halyard' is simply the nautical name for lines or ropes that are used to raise and lower the mainsail. The halyard is attached to the top of the mainsail sheet, or the gaffer, which is a top spar that attaches to the mainsail. You'll find halyards on both the mainsail and jib.
- Sheets - 'Sheet' is simply the nautical term for lines or ropes that are used to set the angle of the sail.
- Mainsheet - The line, or sheet, that is used to set the angle of the mainsail. The mainsheet is attached to the Mainsheet traveler. More on that under hardware.
- Jib Sheet - The jib mostly comes with two sheets: one on each side of the mast. This prevents you from having to loosen your sheet, throwing it around the other side of the mast, and tightening it. The jib sheets are often controlled using winches (more on that under hardware).
- Cleats are small on-deck hooks that can be used to tie down sheets and lines after trimming them.
- Reefing lines - Lines that run through the mainsail, used to put a reef in the main.
- The Boom Topping Lift is a line that is attached to the aft (back) end of the boom and runs to the top of the mast. It supports the boom whenever you take down the mainsail.
- The Boom Vang is a line that places downward tension on the boom.
There are some more tensioning lines, but I'll leave them for now. I could probably do an entire guide on the different sheets on a sailboat. Who knows, perhaps I'll write it.
This is a new segment, that I didn't mention before. It's a bit of an odd duck, so I threw all sorts of stuff into this category. But they are just as important as all the other parts. Your hardware consists of cleats, winches, traveler and so on. If you don't know what all of this means, no worries: neither did I. Below, you'll find a complete overview of the different parts.
Deck Hardware

Just a brief mention of the different deck hardware parts:
- Pulpits are fenced platforms on the sailboat's stern and bow, which is why they are called the bow pulpit and stern pulpit here. They typically have a solid steel framing for safety.
- Stanchons are the standing poles supporting the lifeline , which combined for a sort of fencing around the sailboat's deck. On most sailboats, steel and steel cables are used for the stanchons and lifelines.
Mainsheet Traveler
The mainsheet traveler is a rail in the cockpit that is used to control the mainsheet. It helps to lock the mainsheet in place, fixing the mainsails angle to the wind.
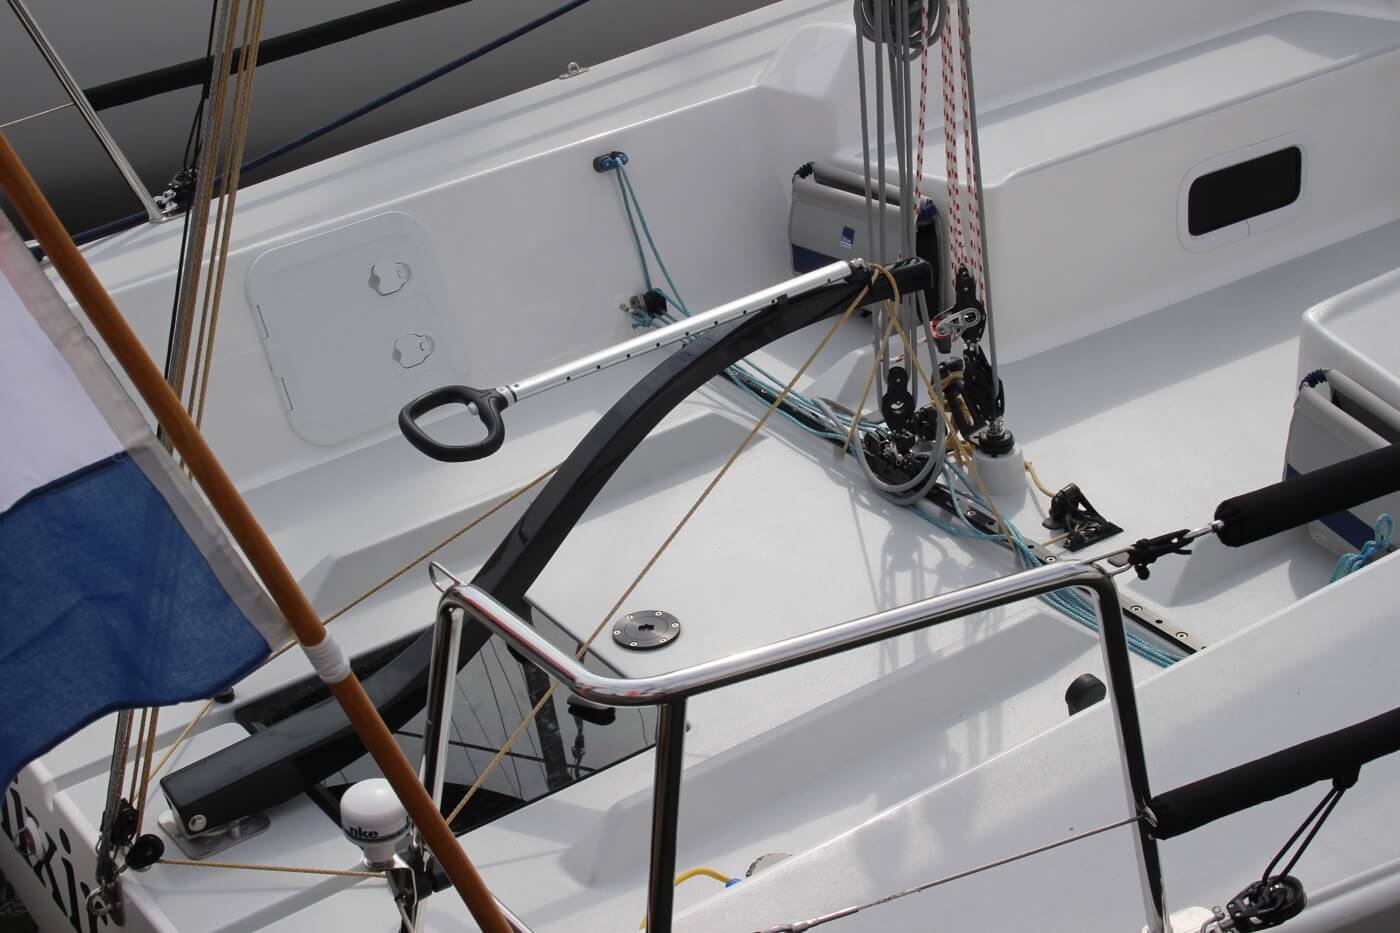
If you're interested in learning more about how to use the mainsheet traveler, Matej has written a great list of tips for using your mainsheet traveler the right way . It's a good starting point for beginners.
Winches are mechanical or electronic spools that are used to easily trim lines and sheets. Most sailboats use winches to control the jib sheets. Modern large sailing yachts use electronic winches for nearly all lines. This makes it incredibly easy to trim your lines.
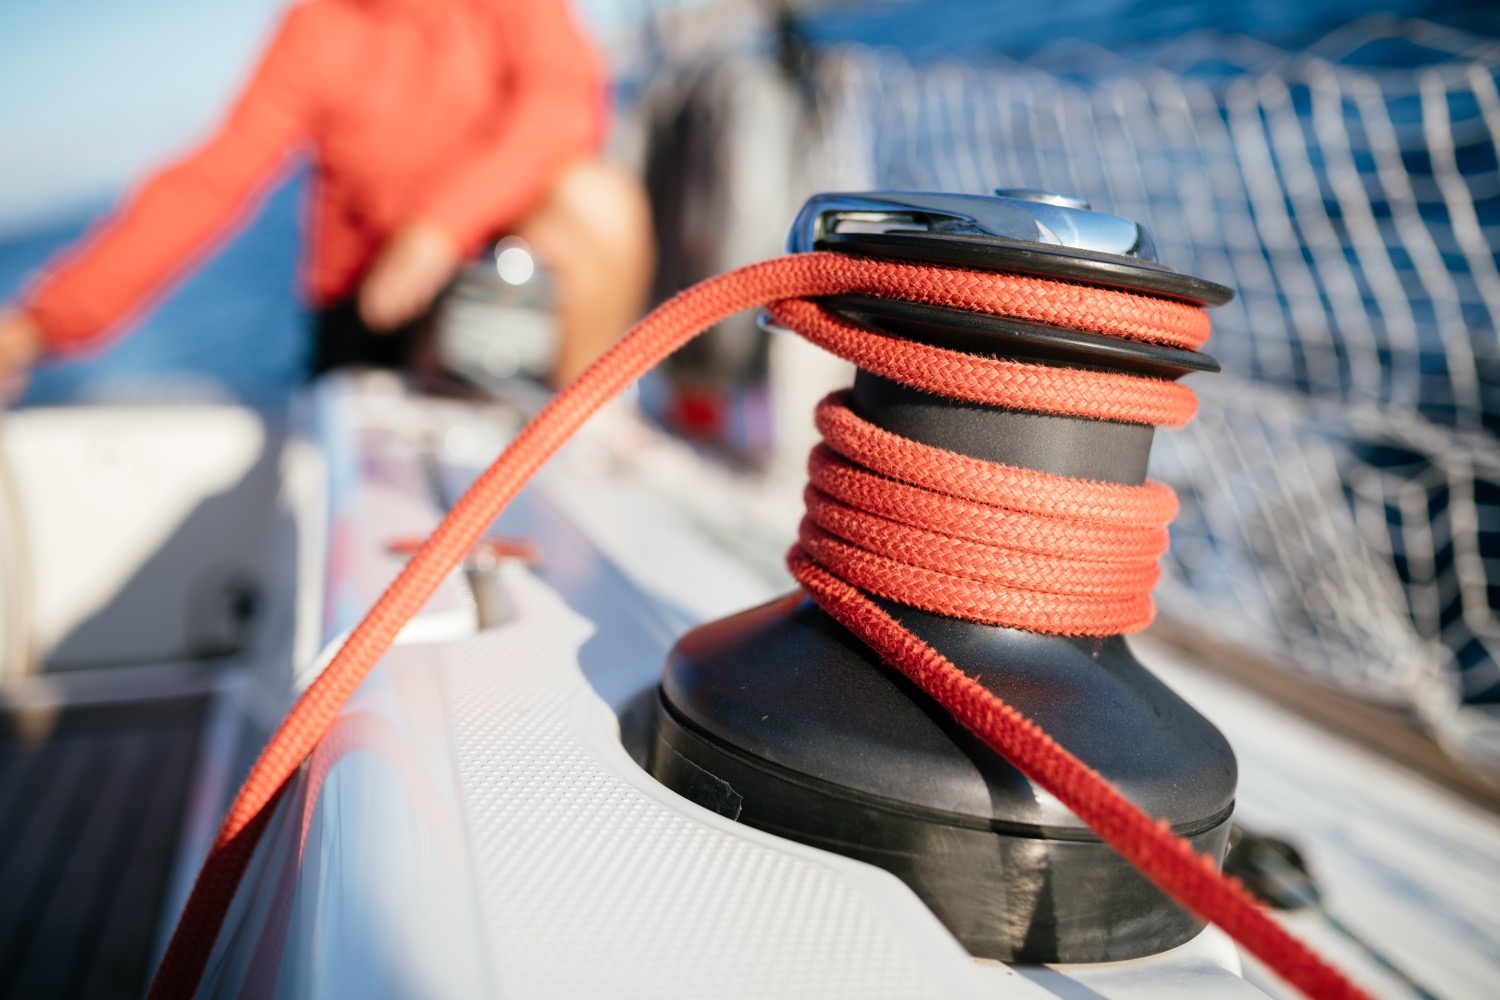
You'll find the compass typically in the cockpit. It's the most old-skool navigation tool out there, but I'm convinced it's also one of the most reliable. In any way, it definitely is the most solid backup navigator you can get for the money.
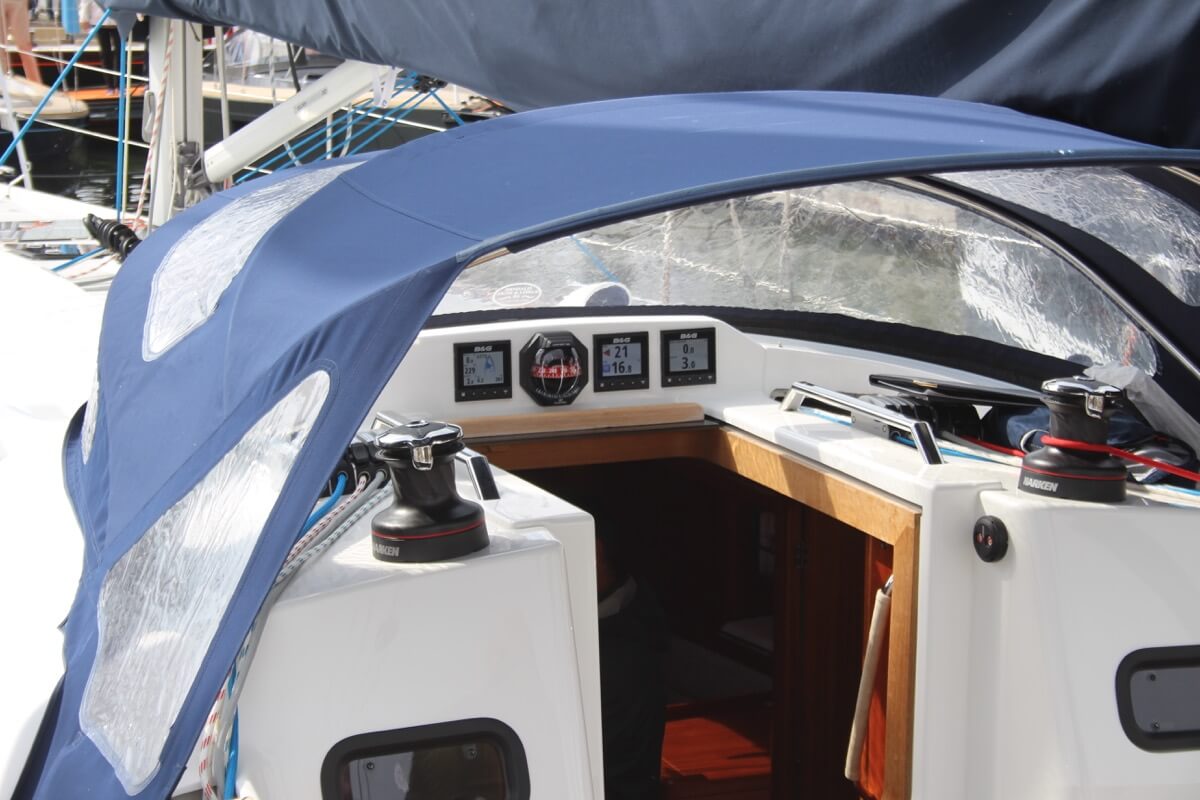
Want to learn how to use a compass quickly and reliably? It's easy. Just read my step-by-step beginner guide on How To Use a Compass (opens in new tab .
Chartplotter
Most sailboats nowadays use, besides a compass and a map, a chartplotter. Chartplotters are GPS devices that show a map and a course. It's very similar to your normal car navigation.
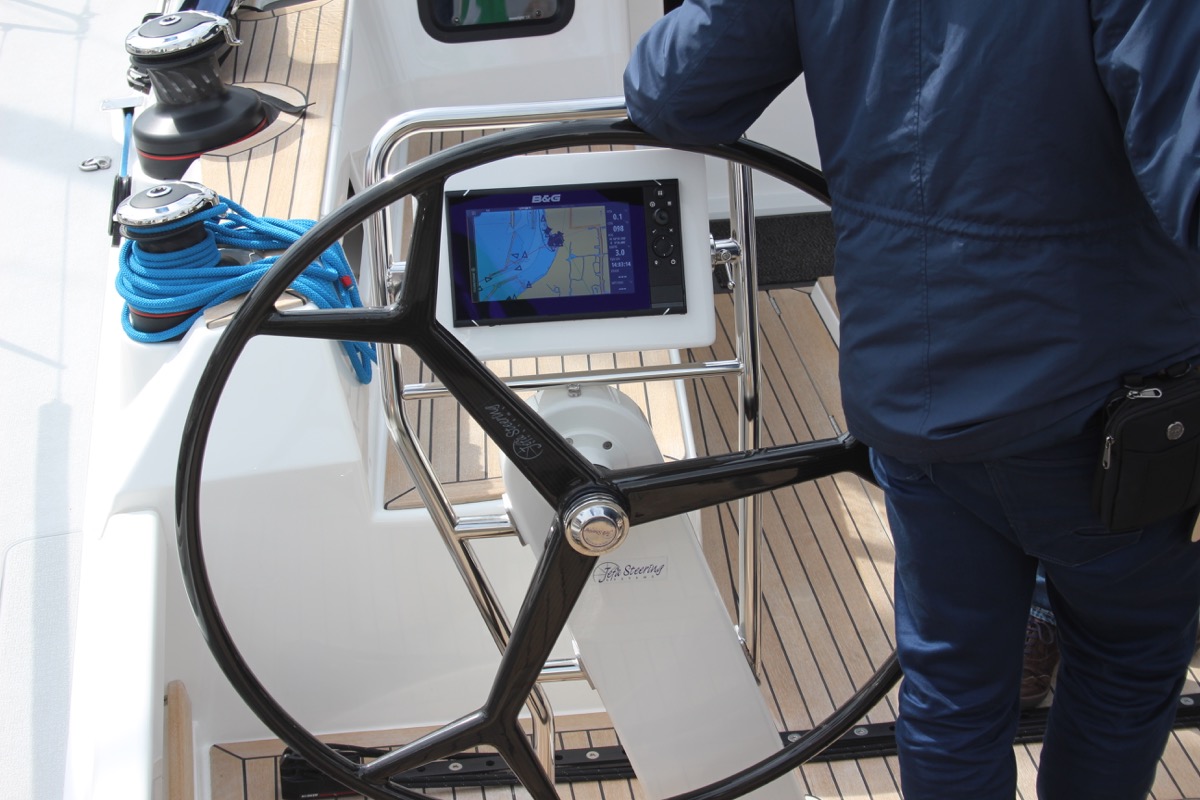
Outboard motor
Most sailboats have some sort of motor to help out when there's just the slightest breeze. These engines aren't very big or powerful, and most sailboats up to 32' use an outboard motor. You'll find these at the back of the boat.
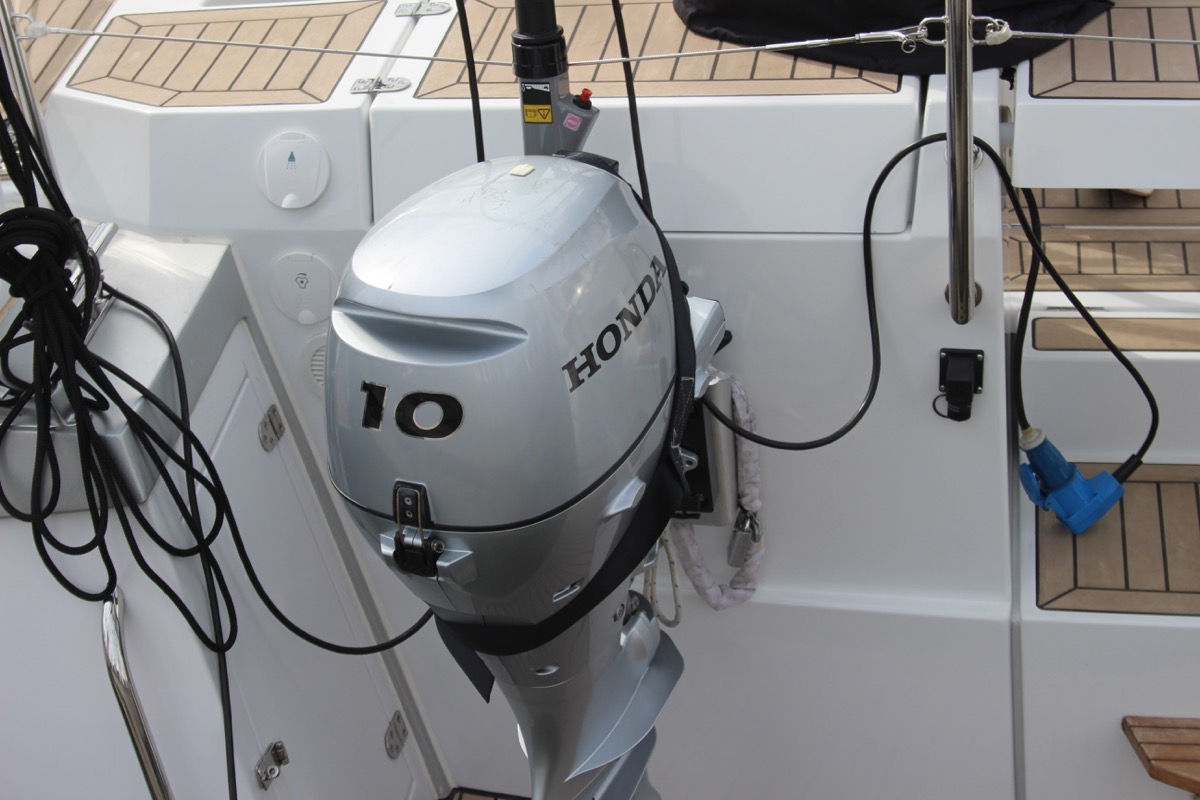
Most sailboats carry 1 - 3 anchors: one bow anchor (the main one) and two stern anchors. The last two are optional and are mostly used by bluewater cruisers.
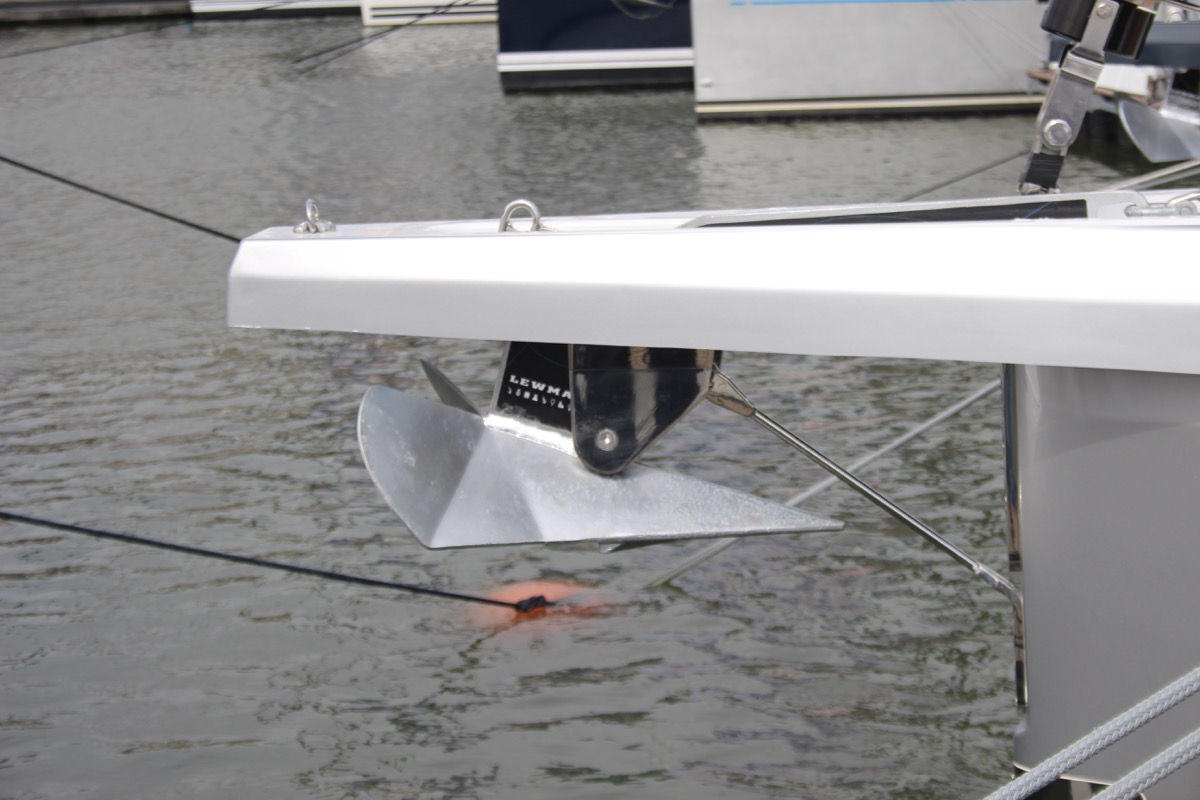
I hope this was helpful, and that you've gained a good understanding of the different parts involved in sailing. I wanted to write a good walk-through instead of overwhelming you with lists and lists of nautical terms. I hope I've succeeded. If so, I appreciate any comments and tips below.
I've tried to be as comprehensive as possible, without getting into the real nitty gritty. That would make for a gigantic article. However, if you feel I've left something out that really should be in here, please let me know in the comments below, so I can update the article.
I own a small 20 foot yacht called a Red witch made locally back in the 70s here in Western Australia i found your article great and enjoyed reading it i know it will be a great help for me in my future leaning to sail regards John.
David Gardner
İ think this is a good explanation of the difference between a ”rope” and a ”line”:
Rope is unemployed cordage. In other words, when it is in a coil and has not been assigned a job, it is just a rope.
On the other hand, when you prepare a rope for a specific task, it becomes employed and is a line. The line is labeled by the job it performs; for example, anchor line, dock line, fender line, etc.
Hey Mr. Buckles
I am taking on new crew to race with me on my Flying Scot (19ft dingy). I find your Sailboat Parts Explained to be clear and concise. I believe it will help my new crew learn the language that we use on the boat quickly without being overwhelmed.
PS: my grandparents were from Friesland and emigrated to America.
Thank you Shawn for the well written, clear and easy to digest introductory article. Just after reading this first article I feel excited and ready to set sails and go!! LOL!! Cheers! Daniel.
steve Balog
well done, chap
Great intro. However, the overview diagram misidentifies the cockpit location. The cockpit is located aft of the helm. Your diagram points to a location to the fore of the helm.
William Thompson-Ambrose
An excellent introduction to the basic anatomy and function of the sailboat. Anyone who wants to start sailing should consider the above article before stepping aboard! Thank-you
James Huskisson
Thanks for you efforts mate. We’ve all got to start somewhere. Thanks for sharing. Hoping to my first yacht. 25ft Holland. Would love to cross the Bass Strait one day to Tasmania. 👌 Cheers mate
Alan Alexander Percy
thankyou ijust aquired my first sailboat at 66yrs of age its down at pelican point a beautifull place in virginia usa my sailboat is a redwing 30 if you are ever in the area i wouldnt mind your guidance and superior knowledge of how to sail but iam sure your fantastic article will help my sailboat is wings 30 ft
Thanks for quick refresher course. Having sailed in California for 20+ years I now live in Spain where I have to take a spanish exam for a sailboat license. Problem is, it’s only in spanish. So a lot to learn for an old guy like me.
Very comprehensive, thank you
Your article really brought all the pieces together for me today. I have been adventuring my first sailing voyage for 2 months from the Carolinas and am now in Eleuthera waiting on weather to make the Exumas!!! Great job and thanks
Helen Ballard
I’ve at last found something of an adventure to have in sailing, so I’m starting at the basics, I have done a little sailing but need more despite being over 60 life in the old dog etc, thanks for your information 😊
Barbara Scott
I don’t have a sailboat, neither do l plan to literally take to the waters. But for mental exercise, l have decided to take to sailing in my Bermuda sloop, learning what it takes to become a good sailor and run a tight ship, even if it’s just imaginary. Thank you for helping me on my journey to countless adventures and misadventures, just to keep it out of the doldrums! (I’m a 69 year old African American female who have rediscovered why l enjoyed reading The Adventures of Robert Louis Stevenson as well as his captivating description of sea, wind, sailboat,and sailor).
Great article and very good information source for a beginner like me. But I didn’t find out what I had hoped to, which is, what are all those noisy bits of kit on top of the mast? I know the one with the arrow is a weather vane, but the rest? Many thanks, Jay.
Louis Cohen
The main halyard is attached to the head of the mainsail, not the to the mainsheet. In the USA, we say gaff, not gaffer. The gaff often has its own halyard separate from the main halyard.
Other than that it’s a nice article with good diagrams.
A Girl Who Has an Open Sail Dream
Wow! That was a lot of great detail! Thank you, this is going to help me a lot on my project!
Hi, good info, do u know a book that explains all the systems on a candc 27,
Emma Delaney
As a hobbyist, I was hesitant to invest in expensive CAD software, but CADHOBBY IntelliCAD has proven to be a cost-effective alternative that delivers the same quality and performance.
https://www.cadhobby.com/
Leave a comment
You may also like, guide to understanding sail rig types (with pictures).
There are a lot of different sail rig types and it can be difficult to remember what's what. So I've come up with a system. Let me explain it in this article.

The Ultimate Guide to Sail Types and Rigs (with Pictures)

The Illustrated Guide To Boat Hull Types (11 Examples)

How To Live On a Boat For Free: How I'd Do It

How To Live on a Sailboat: Consider These 5 Things
Own your first boat within a year on any budget.
A sailboat doesn't have to be expensive if you know what you're doing. If you want to learn how to make your sailing dream reality within a year, leave your email and I'll send you free updates . I don't like spam - I will only send helpful content.
Ready to Own Your First Boat?
Just tell us the best email address to send your tips to:

- Sailboat Hardware
Sailboat Winches
Our sailboat winches selection offers the best options available in the market to help you pull the halyards, sheets or any other loaded line on your sailboat, regardless if it is racing, club/racing or cruising.
Our sailing winch collection includes classic bronze Harken winches and modern Performa models, which feature an exceptional grip and avoid overrides. Our Antal, Creation, and Lewmar winches also offer superior performance at a great price. Evo winches feature a very installation-friendly configuration as well as a simple interior. Andersen winches offer a bulletproof stainless steel construction that exceeds the standard durability of any other drum material. They’re ideal for liveaboards and offshore passage makers sailboats.
Shop our sailboat winches and sailboat winch parts now!

Harken Radial 2 Speed Electric ST Size 70 Polished Bronze Horizontal 12 Volt DF Ctrl Box

Harken Radial 2 Speed Electric ST Size 70 Polished Bronze Horizontal 12 Volt DF Ctrl Box Left Mount

Harken Radial 3 Speed Electric ST Size 70 All Chrome Winch Horizontal 12 Volt DF Ctrl Box

Harken Radial 3 Speed Electric ST Size 70 All Chrome Winch Horizontal 12 Volt DF Ctrl Box Left Mount

Harken Radial 3 Speed Electric ST Size 70 All Chrome Winch Horizontal 24 Volt DF Ctrl Box

Harken Radial 3 Speed Electric ST Size 70 All Chrome Winch Horizontal 24 Volt DF Ctrl Box Left Mount

Harken Radial 3 Speed Electric ST Size 70 All Chrome Winch Vertical 12 Volt DF Ctrl Box

Harken Radial 3 Speed Electric ST Size 70 All Chrome Winch Vertical 24 Volt DF Ctrl Box

Harken Radial 3 Speed Electric ST Size 70 Polished Bronze Winch Horizontal 24 Volt DF Ctrl Box

Harken Radial 3 Speed Electric ST Size 70 Polished Bronze Winch Horizontal 24 Volt DF Ctrl Box Left Mount

Harken Radial 3 Speed Electric ST Size 70 Polished Bronze Winch Vertical 12 Volt DF Ctrl Box

Harken Radial 3 Speed Electric ST Size 70 Polished Bronze Winch Vertical 24 Volt DF Ctrl Box

Harken Radial 2 Speed Size 70 Hydraulic Self Tailing All Chrome Winch

Harken Radial 2 Speed Size 70 Hydraulic Self Tailing Polished Bronze Winch

Harken Performa 2 Speed Electric ST Size 80 Alum Winch Horizontal Left Mount 12 Volt HR80.3STEP12HLM

Harken Performa 3 Speed Electric ST Size 80 Alum Winch Horizontal 12 Volt

Harken Performa 3 Speed Electric ST Size 80 Alum Winch Horizontal 24 Volt

Harken Performa 3 Speed Electric ST Size 80 Alum Winch Horizontal Left Mount 24 Volt

Harken Performa 3 Speed Electric ST Size 80 Alum Winch Vertical 24 Volt

Harken Performa 3 Speed Electric ST Size 70 Alum Winch Horizontal 12 Volt
What is a Sailboat Jib?

Last Updated by
Daniel Wade
June 15, 2022
A sailboat jib is a triangular headsail located forward of the mast. The jib typically has less sail area than the mainsail.
Typical single-masted sailboats usually have a jib, which is located between the bow and the mast. The jib takes advantage of the forward part of the boat. The jib is not the only kind of headsail, but it is the most common.
Table of contents
Do Sailboats Need a Jib?
Many sailors often wonder if it's even worth hoisting the jib, especially on a windy day. The truth is that you typically don't need the jib to sail, though you're losing up to 50% of your sail area if you don't.
Under typical conditions, most sailors hoist the mainsail and the jib and reef them as necessary. On windy days, you may get on fine with just the mainsail. Whether or not to hoist the jib is entirely up to your judgment.
Trimming the Jib
The trim of the jib is usually controlled using two jib sheets , one on either side of the mast. This makes sense, as it would be hazardous and time-consuming to unwind a single sheet each time you turn, walk along the deck, and wrap it around the other side of the mast.
If you're sailing with the wind to your port side, you'll manipulate the jib using the starboard jib sheet. The opposite also applies when the wind is to your starboard side. Make sure to secure the correct sheet on the winch and free up the opposite sheet.
Can a Sailboat have Multiple Jib Sails?
Yes, sailboats sometimes have multiple jib sails. That said, not all headsails are jibs. Schooners often use two or three headsails. These include the jib, a smaller jib topsail, and sometimes a fore staysail.
The most common kind of American cruising sailboat is the single-mast sloop, which typically employs a single jib. That's why the vast majority of sailboats you see will only have one headsail.
What are Jib Sails Made Of?
Early jib sails were made of organic canvas-like cotton or a mix of organic fibers. Traditional jib sail material usually contains a mix of cotton, hemp, and other fibrous plant material.
Today, synthetic fabrics have largely replaced traditional canvas materials in sailmaking. Synthetic sails are lighter and stronger than their organic counterparts, and they resist water and weather better as well.
Polyester Jib Sails
Modern jib sails are made of a woven blend of polyester and other synthetic material. A material called Dacron is one of the most common sail fabrics due to its low cost, excellent UV resistance, and its tendency not to stretch. Dacron jib sails can be expected to last many years with minimal attention and few failures.
Nylon is another common sail material. Like polyester, nylon is an inexpensive and robust synthetic material that's great for sailmaking. Nylon is extremely lightweight, making it ideal for spinnakers. However, nylon stretches too easily for some applications, and it's prone to damage by some chemicals.
Kevlar Jib Sails
Kevlar is a relatively common sail material. It's considered a 'premium' fabric due to its cost and spectacular qualities. Kevlar has an excellent strength-to-weight ratio and resists stretching better than Nylon or Polyester. Due to its high cost, Kevlar sails are usually only found on racing sailboats and luxury yachts.
Parts of the Jib
The jib on a sailboat has many parts and mounting points, and it's important to understand where they are, what they do, and what they're called. The parts of the jib are similar to the mainsail, and you'll likely recognize them easily.
The foot is the horizontal section that runs across the base of the sail. It's usually a strip of reinforced sail material which keeps it from fraying. Think of the foot as the bottom of the jib.
The clew is the bottom corner of the jib, and it's located on the aft section of the foot. It usually contains a grommet. Since the jib is a triangular sail, the clew is the corner of its base 90-degree angle.
The leech is the long straight section of the jib that runs parallel with the mast. The leech runs from the clew at the foot of the sail to the very top.
Note that the orientation of the leech on the jib follows the direction of the mainsail and not the shape. In both cases, the leech is located on the aft part of the canvas.
The head of the jib is located at the very top and usually forms the smallest angle of this triangular sail. The head also contains a grommet similar to the clew.
Like the mainsail, the luff is located on the forward part of the jib. The luff is the longest section of the sail, stretching from the tip of the sail to the very bottom and forward end.
The tack is located directly forward of the clew on the opposite (forward) end of the foot. The tack, like the clew and the head, has provisions for rigging.
Traditionally, headsails like the jib are entirely unsupported by spars. However, many sailboat owners opt to install a jib boom to extend their bowsprits or improve off- wind sailing . A jib boom operates much like a traditional mainsail boom.
The jib boom mounts to the forward part of the bowsprit and pivots from its pedestal. A jib boom is useful when projecting the sail, but a spinnaker can typically be used to achieve the same result.
Some sailors caution against the use of jib booms, as they offer few benefits for windward sailing. Additionally, they take up space on the bow and pose the same hazards as a mainsail boom.
Jib vs. Genoa: What's the Difference?
The jib is often confused with the genoa: another common kind of headsail. The jib and the genoa look similar and perform the same function, but the genoa is larger.
A working jib typically makes up less than half of the total sail area, though it's sometimes around the 50% mark. The genoa, on the other hand, is usually equal to or larger than the mainsail.
The Genoa-type headsail is wider than the jib at the base. As a result, it doesn't fit between the tip of the bowsprit and the mast. Genoa sails stretch around the mast and extend far past it. This gives the genoa a distinct oversized look.
Reefing the Jib
Reefing is how you reduce the area of the sail. Reefing is necessary for windy conditions or when reducing speed. Jib reefing is a bit more complicated than mainsail reefing, as the jib doesn't always have a boom.
One way to reef the jib is to wind it around a roller furling starting with the luff. You can also reef the jib vertically using its reefing points and a few pieces of rope.
Roller Furlings
Roller furlings are an increasingly popular way to reef and stow headsails. Roller furling systems work for jibs and genoas and streamline the process significantly.
How a Roller Furling Works
A roller furling begins with a drum mounted at the base of the headstay and a swivel at the top, allowing the whole stay to rotate. The jib feeds through a groove in the headstay, which allows you to wind it up around the stay whenever necessary.
Roller furlings allow you to easily reduce sail area from the cockpit. Simply loosen the sheets and wind the furling using a line, and watch the jib shrink right in front of you. Roller furlings eliminate most haphazard trips across the deck to the bow and eliminate the need to hoist and lower the jib.
Electric Roller Furlings
Today there are numerous electrically-controlled roller furlings available. These devices are almost as easy to install as manual roller furlings, and they offer an additional level of convenience.
Electric roller furlings reduce deck clutter and decrease the labor required to sail your boat. However, electric furling systems are costlier than the majority of manual roller furling.
Related Articles
I've personally had thousands of questions about sailing and sailboats over the years. As I learn and experience sailing, and the community, I share the answers that work and make sense to me, here on Life of Sailing.
by this author
Sailboat Parts
Learn About Sailboats
Most Recent

What Does "Sailing By The Lee" Mean?
October 3, 2023

The Best Sailing Schools And Programs: Reviews & Ratings
September 26, 2023
Important Legal Info
Lifeofsailing.com is a participant in the Amazon Services LLC Associates Program, an affiliate advertising program designed to provide a means for sites to earn advertising fees by advertising and linking to Amazon. This site also participates in other affiliate programs and is compensated for referring traffic and business to these companies.
Similar Posts

Affordable Sailboats You Can Build at Home
September 13, 2023

Best Small Sailboat Ornaments
September 12, 2023

Discover the Magic of Hydrofoil Sailboats
December 11, 2023
Popular Posts

Best Liveaboard Catamaran Sailboats
December 28, 2023

Can a Novice Sail Around the World?
Elizabeth O'Malley

4 Best Electric Outboard Motors

How Long Did It Take The Vikings To Sail To England?

10 Best Sailboat Brands (And Why)
December 20, 2023

7 Best Places To Liveaboard A Sailboat
Get the best sailing content.
Top Rated Posts
Lifeofsailing.com is a participant in the Amazon Services LLC Associates Program, an affiliate advertising program designed to provide a means for sites to earn advertising fees by advertising and linking to Amazon. This site also participates in other affiliate programs and is compensated for referring traffic and business to these companies. (866) 342-SAIL
© 2024 Life of Sailing Email: [email protected] Address: 11816 Inwood Rd #3024 Dallas, TX 75244 Disclaimer Privacy Policy
Everything You Need To Know About Sailboat Jibs
If you’re considering entering the world of sailing or are a beginner at having your own boat, then there are several terms you will need to know and understand to get the most out of your new pastime.
One of these terms that you may have heard, especially concerning sailboats, is a jib. But what is a jib?
A jib is a type of sail that is found on sailboats (see also ‘ Two-Mast Sailboat Types ‘) and understanding what they are and what they do is very important. That’s why we’ve taken the time to write this article to tell you everything you need to know about sailboat jibs.
Let’s get started!
What Is A Sailboat Jib?
A sailboat job is a headsail that is found on sailboats. It’s a triangular sail that is found forward of your mast. It’s typically not as large and has less of a sail area than your mainsail but it is still important to sailing.
Most sailboats that have a single mast will usually have a jib and you’ll find this between the bow and the mast. Jibs are fixed on a stay, which can be a wire, rod (see also ‘ Rod (Unit Of Measurement) Length Compared To Fishing Rod ‘), or rope, and they run forward from the mast to the deck or bowsprit.
A jib is just one of many different types of headsails.
Do Sailboats Need A Jib?
You might be asking yourself that as your sailboat has a mainsail, does it even need a jib? This is a common question asked by many sailors, especially on windy days when the mainsail can get a good force behind it.
The answer is that you probably don’t need the jib to sail and your sailboat will be able to sail without it. However, if you don’t hoist the jib, you will reduce the amount of your sail area by up to 50 percent.
We would recommend that you hoist the jib if you feel you need to. If it’s a windy day and you have the wind at your back, then the mainsail may be all you need and you can leave the jib.
On typical days that have average amounts of wind, most sailors will choose to hoist both the mainsail and the jib and will reef them whenever it is deemed necessary.
We consider this to be the best option and as you become more experienced with sailing, you will find deciding when and where to hoist the jib will become an easier decision to make.
Trimming The Jib
Before we look at trimming the jib, let’s take a little time to define what we mean.
What Is Trimming In Sailing?
When we talk about trimming a jib, or any other sail, we are referring to the process by which sails are controlled.
Sails have lines known as “sheets” attached to them, and when we adjust the tension of these lines to move the sail, this is known as trimming.
How To Trim A Jib
The jib on a sailboat is usually controlled by using two jib sheets that are positioned on either side of the mast. Using two separate sheets makes moving and manipulating the jib easier as you can adjust it from either side.
If there was only one sheet, you would need to constantly reposition the sheet to the appropriate side.
When the wind is to your port side, you will manipulate your jib by adjusting the tension of the starboard side sheet and vice versa. When you adjust the starboard jib sheet, remember to secure it on the winch and free the port side jib sheet to get the best movement.
Is It Possible For A Sailboat To Have Multiple Jib Sails?
Yes, it’s perfectly possible for a sailboat to have more than one jib sail. However, remember that not all headsails are jibs, so some sailboats might have a jib and other types of headsails as well.
Although multiple jibs aren’t unheard of, it’s more likely that an American sailboat will only have one. The most popular cruising sailboat in the States is the single-mast sloop and these typically only have one jib.
Next time you’re at a harbor or on the waves and have the opportunity to see other sailboats, it’s more likely that the sailboats around you will only have one jib.
What Material Are Jib Sails Made From?

Historically, jib sails were made of organic materials that had a canvas feel to them, such as cotton.
Traditionally, they’ve been made from materials such as cotton, hemp, and other plant material that have similar properties. A mix of these materials was usually made to get the best mix of strength and durability.
In modern times, synthetic fibers and fabrics have become more common and have largely replaced the more traditional canvas materials.
This is largely because synthetic fibers have several advantages over their organic counterparts. They’re often lighter and stronger, for example, as well as being more durable and able to resist water.
Let’s look at some of the most popular materials used for jib sails.
This is one of the most common materials used for sails. Most modern jib sails are made from polyester that is woven into a blend with other synthetic materials.
The most common type of polyester used in sails is Dacron and this is because it has many inherent properties that make it perfect for sailing.
Dacron doesn’t stretch, has excellent UV resistance, and is also cheap to manufacture, making it a low-cost option.
Dacron sails have become popular because they will last for several years without the need for much maintenance, they’re reliable, and they’re cost-effective.
This is another synthetic material that is commonly used for sails. It shares many characteristics with polyester as it is also inexpensive and durable.
It’s more lightweight than polyester and is ideal for sailboats such as spinnakers that work best with lighter sails.
Nylon isn’t perfect, however, and it can be too stretchy for some sail applications. It also reacts to and can be damaged by certain chemicals, so some people prefer to avoid nylon sails.
Kevlar is an extremely strong and heat-resistant synthetic fiber that has a wide application of uses beyond sailing. Its tightly woven structure means that it is commonly used for personal armor, as well as firefighter uniforms and motorcycle safety clothing.
When comparing the strength-to-weight ratio of Kevlar and steel, Kevlar is five times stronger. It resists stretching and won’t be damaged by even the worst conditions.
All of this makes Kevlar a very expensive material compared to polyester and nylon. For many sailboats, this cost is prohibitive and Kevlar sails are usually only used on expensive ships such as luxury yachts and racing sailboats.
What Are The Parts Of A Jib?

Now that we know more about what a jib is, what it’s used for, and what it’s made from, let’s look at a jib in closer detail.
Jibs have many different parts and mounting points, so if you’re going to sail with one it’s important that you know what they all are and what their purposes are.
Thankfully, many of these parts and terms are similar to what you’ll find on a mainsail so you may already know most of them.
This is the horizontal section that you will see running across the base of the sail. You can usually identify it quite easily because it normally has a reinforced strip of material to prevent it from fraying or becoming damaged.
It’s an easy term to remember because the foot is at the bottom, just as it is with many other items and living things.
You will find the clew at the bottom of the jib. It’s at the aft (back) section of the sail’s foot and is also easy to identify. Most clews will have a metal grommet at the clew.
If you imagine a jib sail in your mind, you should have the image of a triangle that has a straight side and bottom that meet at a right angle. The clew is at this 90-degree angle.
If we keep the image of our triangular jib in our minds, the leech is the long straight section that is placed parallel to the mast. It begins at the clew, found at the 90-degree angle at the bottom, and runs to the very top of the sail.
The orientation of the leech on the jib always follows the direction of the mainsail. The leech is always on the aft part of the sail.
As the foot of the jib is at the bottom, it only follows that the head is at the top. The head of a jib sail is the very top of the triangle and is also usually the smallest of the three angles. This is also easy to identify as, like the clew, it will have a grommet.
We learned that the leech is the part of the jib that is parallel to the mast (see also our article on sailboat masts ) and is the aft part of the sail. In contrast, the luff is the forward part of the sail and is also the longest edge.
It’s the slanted edge that runs from the head of the sail down to the forward end.
The clew is at the corner of the jib where the foot and leech meet. The tack is found directly forward of this and is the opposite corner of the foot, where the foot and luff meet.
The tack, clew, and head, all have provisions so that the jib can be rigged.
Usually, headsails like jibs are hoisted and rigged without being supported by wood, metal, or carbon poles. Known as spars, these poles are fixed and used to support the mainsail but many sailboats don’t use them for jibs.
Instead, sailboat owners decide to use jib booms to support their jib. These can be used to extend bowsprits or improve off-wind sailing. They’re similar to mainsail booms and work in very similar ways.
A jib boom is mounted to the forward part of a bowsprit and pivots from the pedestal. It can be used when projecting the sail but there are other methods for this too, such as using a spinnaker instead.
Not every sailor is a fan of jib booms, however. Some find that they don’t offer many benefits when it comes to windward sailing and choose to avoid them.
They can also take up additional room on the bow and come with the same hazards as a mainsail boom. Whether you choose to use a jib boom or not will be a matter of personal preference.
Final Thoughts
Jibs are a type of headsail that is often seen on sailboats. We hope this guide to jibs has answered all of your questions. Happy sailing!
Related Posts:

- Forums New posts Unanswered threads Register Top Posts Email
- What's new New posts New Posts (legacy) Latest activity New media
- Media New media New comments
- Boat Info Downloads Weekly Quiz Topic FAQ 10000boatnames.com
- Classifieds Sell Your Boat Used Gear for Sale
- Parts General Marine Parts Hunter Beneteau Catalina MacGregor Oday
- Help Terms of Use Monday Mail Subscribe Monday Mail Unsubscribe

Jib Line Overlaps
- Thread starter tailboom
- Start date May 17, 2023
- Catalina Owner Forums
- Catalina 22

Great day yesterday. My first solo sail on a beautiful light wind day on my new '84 C22. Only issue I encountered were jib line overlaps on both winches. The jib lines kept bunching on the bottom of the winch versus the top. My jib lines feed the winch through a car block located toward the aft of the rail (see photo). Thinking about changing the angle by moving the block car toward the front of the rail. Other suggestions?
Attachments

Davidasailor26
Hard to say from the perspective of the picture but that entry angle doesn’t look too bad to me. Generally speaking an entry from below the winch is fine, as long as the angle isn’t more than 12 degrees or so (5-10 is ideal, as a rule of thumb). You do not want the sheet to come in from above, as having the line ride toward the top of the winch is much more likely to overwrap. The exit angle from the winch looks less good. Be sure that when you’re taking the sheet in or out you’re holding the tail at a higher angle and it should keep the wraps around the bottom third of the drum. Also be sure not to have more than a wrap or two when you’re sheeting in fast. Only add one or maybe two more if you need the friction after the sheet is loaded.
Thanks for the advice, I'll give that a try.

Stu Jackson
Also don't over do thew number of wraps on the winch itself. I did that on our C22 eons ago and learned to keep them to two or three. I also bought and used Winchers on our C22 & C25.

It is a bit difficult to see in the photo, however it appears the tail is crossing over the sheet, this will apply downward pressure on the wraps. Ideally the tail should be in a straight line with the sheet as it enters the winch. Although in practice any angle less than 180° will work, so long as the tail doesn't cross the sheet. The solution is to either add a turning block aft of the winch, the sheet then leads aft from the jib through the turning block and back to the winch. Add a cleat aft of the winch to secure the tail.

Looks like you have self tailing winches.. you needn't use the cam cleat at all. The aft block seems to give you a nicely angled lead to the winch.. the forward block on the rail is adjusted to optimize the trim on the jib to get all telltales to break evenly.
A quick observation, some of the recent posts are confusing the photos from the OP, @tailboom with @Joe 's response and suggestions. Let's try to focus on the OP's question.

dlochner said: A quick observation, some of the recent posts are confusing the photos from the OP, @tailboom with @Joe 's response and suggestions. Let's try to focus on the OP's question. Click to expand
Gene Neill said: I'm confused. One of the pics in the OP's post is actually Joe's pic! And in that post, the OP says "My jib lines feed the winch through a car block located toward the aft of the rail (see photo)." Just like Joes pic shows, but not the OP's! I'm deleting both my posts, I don't understand what the heck is going on here. LOL Click to expand
Thanks to all for the replies…even a bit of confusion…it makes me feel like I’m sailing (ha ha). Since I didn’t have this problem when sailing with a crew, I think maybe I’m pulling downward on the “sheets” (used wrong terminology previously) due to trying to simultaneously handle the tiller and work the jib. I’ll try paying more attention to my angle when I’m out next week to see if its operator error. The winches are Arco 6s and my plan was to install Barton Self Tailing on the existing winches to eliminate the add-on cam cleats (which need to be on stands), but that won’t work unless it bunches upward and I use more wraps.

Sailfanatic
Well I was afraid of possible confusion. Those pics were take after I upgraded to the self tailing winches. Before I had 2 speed Barlow standards. So.... I totally understand how ST winches work. Obviously, I do not use the cam cleats when I'm using the winch jaws to secure the sheet. I was just trying to show the poster my set up when I had the standard winches. In truth, if racing I prefer the standard set up, using the riser mounted cam cleats. Lot faster to get the line on and off the drum without messing with the jaw ring, you just snap it down or up snap to release. I still often use the riser mounted cleats, it's just way more convenient when tacking back and forth and I don't need to grind in the sheet. (it's a small boat, most times I can hand strip the line as the boat goes through the turn.) The cross over look is caused by the line going through the turning block to reach the winch. On the starboard side it disappears when uncleated. The port side doesn't have the cross over because the line enters from outside and exits from the inside. If you notice, I have the Garhaurer EZ glide lead system. Installing the turning block aft was an attempt to help that system work better, which it did. It just makes it easier to move the sliding car backwards.
tailboom said: Thanks to all for the replies…even a bit of confusion…it makes me feel like I’m sailing (ha ha). Since I didn’t have this problem when sailing with a crew, I think maybe I’m pulling downward on the “sheets” (used wrong terminology previously) due to trying to simultaneously handle the tiller and work the jib. I’ll try paying more attention to my angle when I’m out next week to see if its operator error. The winches are Arco 6s and my plan was to install Barton Self Tailing on the existing winches to eliminate the add-on cam cleats (which need to be on stands), but that won’t work unless it bunches upward and I use more wraps. Click to expand
Joe said: What you can do is learn to steer your boat with the tiller between your knees. Click to expand

danstanford
Too many wraps before the tension comes on. Try two wraps only which should let you take all the load then when you need to winch add the extra wraps and feed into self-tailer portion.
- This site uses cookies to help personalise content, tailor your experience and to keep you logged in if you register. By continuing to use this site, you are consenting to our use of cookies. Accept Learn more…
IMAGES
VIDEO
COMMENTS
The Jib is a triangular sail that does not overlap the mainsail. It is typically between 100% and 115% of the foretriangle size and is commonly seen on modern vessels with fractional rigs. The foretriangle is the triangular area formed by the mast, deck, and forestay. Learn more terms here.
Adjusting the jib sheet is a key part of using a jib on a sailboat. The jib sheet is a rope or line that is attached to the clew of the jib and runs to the cockpit or winch, allowing the sail to be adjusted to the appropriate position and angle. It is important to ensure that the jib sheet is securely attached to the clew of the jib before sailing.
Winches can be used for all sorts of other functions in a sailboat, many that have no relation to sailing at all. I use my jib winch for hauling in spring lines or breast lines on breezy days when the wind is setting my boat off the dock. A few wraps from a dock line and even the most ardent vessels will relent and come alongside a pier or ...
Underway demonstration of techniques for wrapping and releasing the jib winches of a cruising sailboat during tacking maneuvers.
Note the orientation of the line stripper. Move the parts to a safe work area. 2. Work on one winch at a time, and double check that you have the right service kit for each one. Seemingly identical winches that were manufactured just a few years apart in age can have significantly different parts. 3.
Loading a sailboat winch in the correct direction is the first step. Many big-name sailors have fallen victim to this. ... Don't be surprised if, for example, the jib winch requires two wraps on ...
Offshore Sailboat Winches, Selection and Positioning. Cockpit of Morgan's Cloud, a McCurdy and Rhodes 56. Note that Phyllis is comfortably and safely positioned within the cockpit but still has good sight lines to trim the jib. She is also close to a sheltered watchstanding position under the dodger. We have already published two chapters on ...
Say your boat has a "number 42" primary winch, which is an industry standard. The "42" represents a 42:1 power ratio. If an average person applies 50 pounds of load using a 10-inch winch handle, the result will be 2,100 pounds of pull (42 x 50 = 2,100). That figure puts the power potential into suitable perspective.
When releasing a jib sheet on a winch during a tacking maneuver, wait until the load has just eased on the sheet before removing all the wraps on the winch drum. Watch for the jib to begin luffing as an indication that the helmsman has begun turning the boat. If you cast all the wraps off the winch drum too early, you risk burning your hands as ...
At upwards of $6,000 or more per winch, keeping them functioning reliably is as much of a financial necessity as an operational one. Here's a step-by-step overview for servicing a two-speed winch on a sailboat… including a full how-to video showing how I serviced my starboard jib winch. Mechanical Advantage
One maker, Antal, makes excellent small winches in several sizes, but could not supply one for testing. Small, single-speed winches, either with a handle or simply snubbing winches, are invaluable on small boats, for halyards, jib sheets, spinnaker sheets, reefing gear, vangs, etc., and handy, too, for many tasks aboard larger boats.
Sail Area. Efficient sail handling begins with the selection of the correct winch. To help you select from the winches described on this site the chart below is designed as a quick reference to match application, yacht size and winch. Cross reference your yacht size (for masthead rigs) or sail area (fractional rigs) with application, to ...
Sep 26, 2011. 228. Hunter 33_77-83 Cedar Creek Sailing Center, NJ. Oct 8, 2013. #10. newage1461 said: I am thinking about replacing the winches on my H-30 with self tailing ones. The current winches are Lewmar 22's. Most brands now offer size 20 then jump to 30.
Winches are mechanical or electronic spools that are used to easily trim lines and sheets. Most sailboats use winches to control the jib sheets. Modern large sailing yachts use electronic winches for nearly all lines. This makes it incredibly easy to trim your lines. Compass. You'll find the compass typically in the cockpit.
Devoti Sailing. Dripper Guard. Dynamic Dollies. Dynamic/Seitech Dollies Compatible Parts. Type 1: Boats up to 250 lbs Dollies. Type 2: Laser, Byte & Invitation Dollies. Type 3: Curled Gunwale Boats Dollies. Type 4.1: Small/Med Bowsprit Boats Dollies. Type 4.2: Heavier Sprit Boats Dollies.
A sailboat jib is a triangular headsail located forward of the mast. The jib typically has less sail area than the mainsail. Typical single-masted sailboats usually have a jib, which is located between the bow and the mast. The jib takes advantage of the forward part of the boat. The jib is not the only kind of headsail, but it is the most common.
A sailboat job is a headsail that is found on sailboats. It's a triangular sail that is found forward of your mast. It's typically not as large and has less of a sail area than your mainsail but it is still important to sailing. Most sailboats that have a single mast will usually have a jib and you'll find this between the bow and the mast.
The block cleats look small, but with the smaller head sail on the B&R fractional rigs there isn't nearly the pressure on the jib sheets as there are boats with greater than 100% head sails (in fact, the 376 manual states that with the small head sail one may not even need to use winch handles to properly set the head sail while tacking or gybing).
On boats that have the jib block on the deck near the gunnel with winch mounted on the combing the sheet entry to the winch is on an angle in the 8 degree range. When the boat deck and the winch are on the same plane for a boat then shims are needed to create that winch angle. Good application of shims I do not like the cam-cleat arrangement.
My first solo sail on a beautiful light wind day on my new '84 C22. Only issue I encountered were jib line overlaps on both winches. The jib lines kept bunching on the bottom of the winch versus the top. My jib lines feed the winch through a car block located toward the aft of the rail (see photo). Thinking about changing the angle by moving ...