

Please verify you are a human
Access to this page has been denied because we believe you are using automation tools to browse the website.
This may happen as a result of the following:
- Javascript is disabled or blocked by an extension (ad blockers for example)
- Your browser does not support cookies
Please make sure that Javascript and cookies are enabled on your browser and that you are not blocking them from loading.
Reference ID: 3157767f-fb42-11ee-9d42-7c013860cc4a
Powered by PerimeterX , Inc.
Sign up now for our WhatsApp newsletter and receive a FREE SVB set of playing cards!
- Spare parts
- SVB@Youtube
- Saved Guides
- My Skipper profile
- My boat on Portmaps.com
- General settings:
- Newsletter and messages
- NEW WhatsApp & SMS
- Compare list
Are you missing items that you have already placed in your shopping cart? Log in to see your saved items.
- Sailing, Rigging & Deck
Sailing made easy: Everything you need to know about roller furling systems

What does a furling system on board sailing yachts do? A furling system allows you to set, recover and partially reef your foresail (genoa or jib) conveniently and practically from the cockpit. These systems are now fitted as standard on most sailing boats thanks to the ease and effectiveness of the system and greater safety when furling and setting. Find out everything there is to know about roller furling systems in this SVB guide: what they are, the main differences, features and advantages, which ones to choose, how they work and why to have them on board.
Roller Furling Systems for Sailboats
- Advantages of a furling system
- How it works
- The ideal furling system
Installation and Maintenance
- Retrofitting
- Maintenance
Ultimate sailing convenience: The advantages of roller furling systems on sailboats
The use of furling systems has undoubtedly revolutionised cruising and regatta sailing since they first became available some years ago. These practical systems allow the sail to be furled without time-consuming hoisting or lowering each time you go sailing. Using a practical furling system, the foresail can be easily furled from the cockpit, without you or your crew risking life or injury on deck, as it eliminates the need for a crewmember to manually change or reef the jib or genoa. A furling system is certainly an efficient, easy and enjoyable way to deploy or stow sails on a yacht. However, whether or not such a system is appropriate for you largely depends on the size of your vessel and the sort of sailing boat you own.
Nevertheless, the obvious benefits outweigh the disadvantages, which is why a furling system is now standard equipment on almost all sailing yachts. The convenience of not having to recover, set, change or stow your sail is a big advantage! A roller furling system minimises or eliminates the need to carry additional headsails, resulting in not only increased room below deck, but also the removal of the laborious task of lowering and removing your jib or genoa after each voyage.
Roller reefing is useful when overlapping genoas obscure visibility. By reefing the genoa a few turns you can have a clearer view ahead leeward, which shortens the sail and increases visibility - important for safety and peace of mind. A furling system allows you to reef the headsail completely or partially. This way, even if you don't have experienced crew members on board, you can still safely manoeuvre your boat and cope with any wind gusts.

Roller Furling

How does a furling system work?
Roller furling - how it works.
A roller furling system allows you to roll or wrap your foresail around the headstay. This not only makes sailing easier, but also improves safety by allowing reefing without the crew having to go on deck in bad weather. To understand how to use a roller furling system, it's first important to know how it works, what specific steps to take when using it and to observe important safety measures. Using a roller furling systems is a relatively straight forward affair, but correctly furling the staysail is not as easy as it may first seem!
The setup of a roller furling system consists of a wire, foil, or spar around which the sail is spun. This is controlled by a furling line that is pulled or released from the cockpit. The foil is actually an aluminium track, up which the sail is fed all the way to the top. At the top of the track and at the bottom, the sail is on a swivel, which allows the sail to spin out while a drum rotates. The drum takes up the extra slack from the furling line as the sail is opened by pulling gently on the sheet and is furled by pulling the furling line. It is advisable to keep slight back tension on the sail while furling by leaving one wrap of the sheet on the winch. Pull the furling line to wrap the sail tightly around the forestay/headstay. To partially furl (reef) the sail, pull the furling line until the desired size of the headsail is reached, then belay the line. The headsail can thus be continuously adjusted to any size.
During furling or unfurling you should maintain a light pull on the sheet and furling line at all times. This keeps the furling line neatly spun and unspun around the drum and reduces the risk of an "override", where the furling line binds on itself and makes further unfurling difficult. Take special care that the furling line is of the correct length. It should still be able to make about 3 to 5 turns around the drum after the sail is fully furled and pulled tight. Generally, the optimum length is between one and a half and two times the length of your boat.
Ensure that the foresail halyard maintains an angle of 5° to 10° to the forestay when the sail is set on the furling system. To ensure proper reefing system function, the halyard must not run parallel to the forestay. Pay particular attention to the specifications in the assembly instructions. Alternatively, special fairlead blocks can be installed to allow the desired angle.
If the drum of the roller furling system gets in the way of manoeuvring the anchor at the bow, it can be raised with an eye/fork extension or two stainless steel chain-plates attached via a hinge to the mainsail at the bow.

How do I choose the right roller furling system for my boat?
If you want to install a furling system on your boat, there are a few things to consider first. This includes the size and weight of your boat, the area of the headsail and the diameter and length of the forestay. In order to find the right furling system, most manufacturers offer general guidance based on a boat’s overall length and class.
Having instant control of the sail with maximum surface area, as well as the capacity to navigate larger boats with a high level of safety and control, especially while sailing solo, are strong reasons that have impressed boat owners all over the world for many years. A clear view ahead, as well as the ability to recover and set sail fast, add to the appeal of furling systems.
Roller furlers are safe and convenient, but they are also heavy systems that can inevitably cause forestay sag. If sag is too much, it will affect sailing performance, especially when the wind picks up, but also in particular when sailing upwind. In addition to adjusting the backstay, some rig types also allow the tension of the upper shrouds to be increased in order to influence the leeward slope.
How can I retrofit a roller furling system?
The first thing to do before you start to fit your roller furling system is to familiarise yourself with the installation manual. It contains detailed and illustrated instructions that will enable you to assemble a roller furling system correctly. It should be noted, however, that the assembly steps may vary depending on the model and on the profile configuration and the number of parts to be installed.
The manufacturers PROFURL , NEMO and FURLEX offer comprehensive instructions on how to install a roller furling system. Take a good look and then decide for yourself whether you think you can install the system on your own. If in doubt, please get help from friends and/or boat neighbours who have already carried out such an installation. Local sailmakers and service providers in the harbours are also happy to provide guidance and tips. Please also bear in mind that the existing headsails must be adapted to the requirements of the furling system. This work can only be carried out by a specialist company (sailmaker). Although some manufacturers allow upright mounting as an option, we always recommend that you mount your furling system in a horizontal position. Do this especially if your vessel is in winter storage, as it ensures better stability and potential loads on the mast can be reduced.
Does a furling system require regular maintenance?
Furling systems are designed to minimise the need for maintenance and servicing. Nevertheless, this does not mean that maintenance is totally unnecessary. If you want to maintain the functionality and efficiency of your furling system, regular maintenance should be carried out.
To maintain full functionality of your roller furling system, you should clean it regularly with fresh water to remove salt deposits and dust from the drum and the inside. Some roller furlers require additional lubrication during operation. Be sure to follow the instructions in the user manual.
Further reading: Roller Furling Systems, Jib Furlers and Accessories
Don't compromise on the quality of your new foresail furling system. Even if you are on a tight budget - SVB has the right product for you! Discover our selection of NEMO , PROFURL and FURLEX foresail furling systems in various sizes - all available for you to select according to boat type, forestay diameter and length. In our categories Roller Furlers, Jib Furlers & Accessories you will not only find high-quality furling systems, but also matching accessories, such as drums, swivels and profiles from brands like PFEIFFER , TOP-REFF , BARTON and OLEU WATERSPORTS all at unbeatable prices! Are you looking for individual spare parts for your FURLEX roller furling system? No problem! Check out our spare parts finder for FURLEX furling systems !
Share our guide on social media
- BOAT OF THE YEAR
- Newsletters
- Sailboat Reviews
- Boating Safety
- Sailing Totem
- Charter Resources
- Destinations
- Galley Recipes
- Living Aboard
- Sails and Rigging
- Maintenance

The Hard Road to Convenient Sailhandling
- By Michael Lovett
- Updated: March 26, 2009
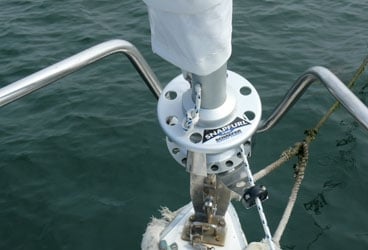
schaeffer furler 368
A major breakthrough occurred at last year’s Newport Folk Festival, and it wasn’t of the musical sort. While rock-and-roll luminary Levon Helm was belting it out on stage, I was nearby singing the praises of sailing with roller furling.
The festival takes place at Fort Adams, near the mouth of Rhode Island’s Narragansett Bay, where pleasure boats of all shapes and sizes vie for prime anchoring spots within earshot of the main stage. As I entered the crowd of boats on AO, Cruising World’s motor-less Albin 26, I prepared my unwitting crewmates for the possibility of catastrophe. Up to now, the process of anchoring involved a hasty dousing of the genoa followed by a clumsy foredeck ballet involving trying not to slip on the headsail while giving the anchor the old heave-ho. With 20,000 spectators, this was sure to be the day I’d tumble into the drink with anchor in hand.
But it wasn’t, because we had that new roller furler installed. When we found our spot among the revelers, I simply pulled the furling line, watched the headsail wrap cleanly around the headstay, and strolled up to the bare foredeck to nudge the anchor overboard. Easy as spreading out a blanket on the lawn.
Months before, when we were deciding what type of roller furler to add to AO, the Schaefer Marine Snapfurl CF-700 stood out as a logical choice, not merely because Schaefer had agreed to donate the unit for the purpose of our hands-on story but because the CF-700 is intended for a modest-sized sailboat. Designed for smaller boats-with headstays measuring less that 38 feet long-the CF-700 is compact, reliable, and relatively simple to install. Ideally, you simply snap the plastic foil over your existing headstay, slide the furling drum into position, and raise the headsail.
Of course, nothing is ever that easy.
Still, the project is well within the abilities of a fairly handy sailor with access to two extra sets of hands-in my case, these hands were supplied by CW senior editor Mark Pillsbury and Steve Majkut, Schaefer’s marketing director. The job also requires a few tools: a screwdriver, cordless drill, wrench, hacksaw, tape measure, wire snips, and a bosun’s chair.
Getting Started The first step was to take some measurements. I ran a tape measure up on a halyard to find the headstay length-this would tell us how long to cut the foil later on-and checked to make sure the existing end fittings on the stay would fit the furler’s specifications. (Nota bene: Look up the mast to verify that the headstay attaches to the mast with a standard fitting such as a swaged-on eye or tang. I didn’t inspect the mast fitting on AO closely enough, and as you’ll soon see, it came back to haunt us.)
While taking measurements, I did make one troublesome discovery: AO’s awkwardly shaped bow pulpit was going to interfere with the drum unit and prevent it from being mounted flush to the stem head. Steve suggested that we add a 6-inch toggle fitting between the drum and the bow. This addition served to raise the drum up above the obstruction, but it also required us to shorten the headstay and lop off a significant portion of the headsail. A local rigger fashioned us a new, shorter headstay. (Even if AO’s irregular bow pulpit hadn’t necessitated replacing the existing headstay, it would’ve been worth it to get a new one anyway, since inspecting the stay with the furler installed is difficult.) Next, it was time to cut the foil down to size. To determine the appropriate length for the foil, deduct the length of the furler unit from the length of the headstay. Be careful when loosening the coiled lengths of foil for the first time: They unwind with a vengeance, lashing out at any unsuspecting bystanders. Use the hacksaw to sever both halves of the foil at the appropriate length.
Even if you choose to install the furler over an existing headstay, you’ll still need to detach the headstay from the stem head. Needless to say, secure the rig with a spare halyard that’s been led to a winch and tensioned before pulling the pin, or, if possible, do the job with the mast off the boat. Because we were replacing AO’s headstay outright, we chose to assemble the headstay, foil, and furler unit in the shop before taking it all down to the dock, where all we had to do was attach the respective ends to the mast and stem head. If we’d been installing the system over an existing headstay, we’d have slipped the head swivel over the turnbuckle, snapped the two foil halves together over the headstay, slipped the drum unit over the turnbuckle, screwed the foil into the feeder assembly on the drum unit, then pinned the drum and headstay to the stem head.
Up the Mast Our preassembly shortcut would’ve saved us time on the dock if not for one nasty hiccup. When we hoisted Steve up the mast to detach the old headstay and attach the new one, he discovered that AO employed a T-shaped fitting at the mast connection. The Sta-Lok fitting on the new headstay wasn’t going to fit, so we had our rigger make another new headstay, this time with the correct T fitting. Once we had the proper fitting, attaching the headstay foil was a snap.
Using a spare line, Steve pulled the top of the furling unit up to him as I walked the bottom of the foil and the drum along the dock; then he secured it to the mast.
While he was up there, Steve used a cordless drill and screwdriver to install a halyard lead just below where the line exits the sheave in the mast. This simple fitting controls the angle at which the halyard meets the forestay, preventing it from wrapping around the foil and locking up the furler when the sail is rolled up. That done, we lowered Steve to the deck, adjusted the turnbuckle at the end of the stay to tension the forestay, then pinned the headstay foil and furler to the stem head (via the toggle, in our case). With the system in place, we could let off on the halyards and check the tension on the stay a final time. Steve quickly installed the furling-line hardware- lightweight padeyes that clamp onto the stanchions and lead the furler line back to a cleat in the cockpit. You could install a dedicated furling-line cleat if you wanted, but we used the boat’s existing spinnaker cleat.
Setting Sail Early on in the process, we decided to hold off on modifying our headsail until we had the furler in place and knew that the foil length wasn’t going to change. Given the X factors we encountered, this was definitely the right choice. When the time came, we got a new luff measurement and dropped the sail off at the North Sails loft in Portsmouth, Rhode Island. Sailmakers replaced the old hanks with Number 6 luff tape, shortened the luff, and added protective Sunbrella material along the leech and foot of the sail. We’d installed the furler so that it rolled up in a clockwise manner, so the Sunbrella cover was sewn on the port side of the sail-that way it will always be on the outside of the furled sail. While they had it, the people at North went the extra mile to reinforce some of the sail’s deteriorating seams, which should help us get a few more miles out of a headsail that’d been looking pretty tired.
With the sail cut to size and the furling system installed, we’d reached the home stretch. I took the sail down to the boat, fed the luff into the foil, attached the head to the head swivel, the head swivel to the halyard, and raised the genoa. All I had left to do was pull the furling line and wind up the sail. Of course, when I started tugging, nothing happened. D’oh-forgot to prewrap the furling line around the drum before hoisting the sail. Compared with previous setbacks, this was nothing. In a few minutes, I had the line wrapped around the drum, and I was furling and unfurling the genoa with great satisfaction.
Was this the world’s most troubled furler installation? Perhaps, but probably not. Every boat is going to throw a few curveballs. But I’ll tell you what: The few extra hours we spent wrangling that CF-700 into place have paid tremendous dividends on the water. Now anytime I want to go for a sail, I simply hop aboard, uncleat the furling line, trim the genoa sheet, and pop-we have headsail!
Michael Lovett is CW’s web editor and an associate editor at Sailing World
- More: DIY Sailboat Projects , How To , sail handling , sails and rigging
- More How To
How To Prioritize Your Sailboat’s Spring Checklist
How to Protect Your Spars from Corrosion
Sailing Totem Refit Series: The Forward Head Makeover

Fatty Goodlander: Dealing with Chafe While Cruising
TradeWinds Debuts 59-foot TWe6 Smart Electric Yacht

Good Bread for Good Health

Center of Effort

The Halfway Point: Sailing to Bermuda
- Digital Edition
- Customer Service
- Privacy Policy
- Email Newsletters
- Cruising World
- Sailing World
- Salt Water Sportsman
- Sport Fishing
- Wakeboarding
Installing a new roller furling system
Upgrade your sailboat's rigging and sail setup with a new roller furling system, making it easier and safer to manage your sails while sailing short-handed or with family.
Installing a New Roller Furling System
Welcome to another informative article in our Boat Modifications and Upgrades section. Today, we will be discussing the installation of a new roller furling system on your sailboat. This article is perfect for those who are looking to upgrade their current rigging and sail setup, or for those who are starting from scratch with a new boat. We will cover everything you need to know about roller furling systems, from the benefits of having one to the step-by-step installation process.
Table of Contents
What is a roller furling system, benefits of a roller furling system, choosing the right roller furling system, tools and materials needed, step-by-step installation guide, maintenance and troubleshooting.
A roller furling system is a mechanical device that allows you to easily roll up your sails, specifically the headsail or genoa, around a rotating foil or rod. This system makes it much easier to manage your sails, especially when sailing short-handed or with a family. With a roller furling system, you can quickly and easily furl or unfurl your sails without having to leave the cockpit, making it a safer and more convenient option for many sailors.
There are several benefits to installing a roller furling system on your sailboat, including:
Ease of use : Roller furling systems make it much easier to furl and unfurl your sails, especially when sailing short-handed or with a family. This can be a huge advantage when you need to quickly adjust your sail area in changing wind conditions.
Safety : With a roller furling system, you can manage your sails from the safety of the cockpit, reducing the need to go forward on deck in rough conditions. This can be especially important when sailing with children or inexperienced crew members.
Sail protection : By keeping your sails furled when not in use, you can protect them from UV damage and prolong their lifespan. This can save you money in the long run by reducing the need for sail repairs or replacements.
Improved sail shape : Many roller furling systems allow you to adjust the tension on the luff of the sail, which can help you maintain a more efficient sail shape in various wind conditions.
Versatility : Roller furling systems can be used with a variety of sail types, including genoas, jibs, and even code zero sails, making them a versatile addition to your sailboat.
Before you can install a roller furling system, you need to choose the right one for your boat. There are several factors to consider when making this decision, including:
Boat size : Roller furling systems are designed for specific boat sizes, so it’s important to choose one that is compatible with your boat. Be sure to check the manufacturer’s recommendations for your specific boat model and size.
Sail type : Some roller furling systems are designed specifically for use with certain sail types, such as genoas or jibs. Make sure the system you choose is compatible with the type of sail you plan to use.
Budget : Roller furling systems can vary widely in price, so it’s important to choose one that fits within your budget. Keep in mind that more expensive systems may offer additional features or higher-quality components, but a basic system may be sufficient for your needs.
Ease of installation : Some roller furling systems are easier to install than others, so consider your own skill level and the complexity of the installation process when making your decision.
Manufacturer reputation : Finally, be sure to choose a roller furling system from a reputable manufacturer with a history of producing high-quality, reliable products.
Before you begin the installation process, gather the following tools and materials:
- Roller furling system kit (including foil, drum, swivel, and all necessary hardware)
- Halyard and sheets (compatible with your chosen roller furling system)
- Measuring tape
- Hacksaw (for cutting the foil to length, if necessary)
- Drill and drill bits (for drilling holes in the foil, if necessary)
- Screwdrivers (flathead and Phillips)
- Adjustable wrenches
- Allen wrenches (if required by your specific roller furling system)
- Marine sealant (for sealing any drilled holes)
- Safety gear (gloves, safety glasses, etc.)
Read the manufacturer’s instructions : Before you begin, carefully read the installation instructions provided by the manufacturer of your chosen roller furling system. These instructions will provide specific details and recommendations for your particular system, which may differ from the general steps outlined below.
Remove the existing headsail : If you have an existing headsail on your boat, remove it before beginning the installation process. This will give you better access to the forestay and make it easier to install the roller furling system.
Measure and cut the foil : Measure the length of your forestay and compare it to the length of the foil provided with your roller furling system. If necessary, use a hacksaw to cut the foil to the appropriate length. Be sure to file any rough edges and apply marine sealant to the cut end to prevent corrosion.
Assemble the foil and drum : Following the manufacturer’s instructions, assemble the foil sections and attach the drum at the bottom. Be sure to use the appropriate hardware and tighten all connections securely.
Attach the foil to the forestay : With the foil and drum assembly complete, attach the foil to the forestay using the provided hardware. Be sure to follow the manufacturer’s recommendations for proper attachment and alignment.
Install the halyard swivel : Attach the halyard swivel to the top of the foil, following the manufacturer’s instructions. This swivel will allow the halyard to rotate freely as the sail is furled and unfurled.
Attach the sail : With the roller furling system in place, attach your sail to the foil using the appropriate hardware and connections. Be sure to follow the manufacturer’s recommendations for proper sail attachment and alignment.
Install the halyard and sheets : Finally, install the halyard and sheets for your roller furling system, following the manufacturer’s instructions. Be sure to use the appropriate hardware and connections, and adjust the tension on the halyard and sheets as needed for optimal sail performance.
Test the system : With everything installed, test the roller furling system by furling and unfurling the sail several times. Make any necessary adjustments to the system to ensure smooth operation and proper sail shape.
To keep your roller furling system in good working order, be sure to perform regular maintenance and inspections. This includes:
- Checking all hardware and connections for signs of wear or damage
- Lubricating moving parts as recommended by the manufacturer
- Inspecting the foil for signs of corrosion or damage
- Checking the halyard and sheets for signs of wear or chafe
If you encounter any issues with your roller furling system, consult the manufacturer’s troubleshooting guide or contact a professional for assistance.
Installing a roller furling system on your sailboat can greatly improve your sailing experience by making it easier and safer to manage your sails. By following the steps outlined in this guide and consulting the manufacturer’s instructions for your specific system, you can successfully install a roller furling system and enjoy the many benefits it offers. Happy sailing!

performance in cruising catamarans
Roller Furler Installation and Use
- Install the furling line onto the drum by first feeding it through the fairlead on the cleat and then through the middle size hole on the top of the drum. Tie a figure eight knot in the end of the line. Examine the lay of the wire in the luff of your reacher. You want to roll the line on the drum in the direction that tightens the lay of the wire when the line is pulled and the sail is rolled up. Damage to the luff wire may result if the furling line is rolled on the wrong way.
- Attach furling drum to the tack of the sail by inserting the clevis pin on top of the drum through the tack of the sail.
- Attach the top swivel to the head of the sail in the same manner as the furling drum was installed. The end of the swivel with out the two “J” shaped rods goes on the sail.
- On the bottom of the furling drum is a screw pin shackle. Remove the snap shackle fro the bridle traveller block replacing it with screw pin shackle (on new rigs there will be no snap shackle.) If the snap shackle is used the furler will turn the shackle rather than roll up the sail.
- Tie the halyard around the clevis pin at the other end of the top swivel from the sail.
- Tie the sheets to the clew of the sail.
- Hoist the sail until the halyard is good and snug.
- To furl the sail, release all tension on the sheets. Pull the small diameter line on the furling drum. This rolls the sail around its luff wire. When the sail is completely rolled up cleat the line to prevent the sail from unrolling.
- To keep the furling line from going overboard stuff it behind the compression tube into the end of the trampoline sleeve.
- To unfurl the sail, pull the furling line out of the trampoline sleeve and then uncleat it. Pulling on the appropriate sheet will unfurl the sail.
- The sail will last longer if it is stowed loose. This allows air to get it. The sail an be stowed temporarily by lowering its furled and coiling it up like a hose.
- The reacher does not have a protective leech that keeps the sun from damaging the sail if left up while the boat is not in use. Therefore, remove the furled reacher when not using the boat. If the sail is damp, put it away unfurled so that air can get to it.
More Assembly Instructions
Basic Assembly | Assembly Check List | Tuning Manual | Jiffy Reefing | Mast Rotator | Genoa Instructions | Trampoline Installation | Mainsail Traveller Control | Roller Furler Installation and Use | Installing Deck Snaps on Cockpit Tent | Reacher Running Rigging Installation
Roller Boom Furling: The Ultimate Guide for Sailors
by Emma Sullivan | Aug 12, 2023 | Sailboat Maintenance

Short answer: Roller boom furling
Roller boom furling is a system used on sailboats to easily roll and reef the mainsail. It involves a rotating boom equipped with a built-in roller mechanism, enabling quick and convenient sail adjustment. This method enhances safety, efficiency, and ease of use for sailors.
Roller Boom Furling: A Comprehensive Guide to this Innovative Sailing Technology
Sailing enthusiasts are always on the lookout for innovative advancements that can enhance their sailing experience. One such technology that has revolutionized the way sails are managed is Roller Boom Furling. This comprehensive guide aims to shed light on this fantastic innovation, giving you a clear understanding of its functions and benefits.
So, what exactly is Roller Boom Furling? In simple terms, it is a system that allows sailors to easily furl and unfurl their mainsails with minimal effort. By utilizing a rolling mechanism integrated into the boom, this technology eliminates the need for crew members to manually handle heavy and cumbersome sails .
But how does it work? The Roller Boom Furling system consists of several key components working in perfect harmony. The primary elements include a hardened aluminum boom with an internal rolling mechanism, controlled by a powerful hydraulic or electric motor. Attached to this boom are specialized sail slugs that securely hold the mainsail in place while allowing it to roll up smoothly. Additionally, there is a control panel located within easy reach of the helm station, enabling precise control over the furling process.
Now let’s delve into the advantages of Roller Boom Furling. Firstly, its convenience cannot be overstated. With just the push of a button or flick of a switch, sailors can effortlessly furl or unfurl their mainsails in seconds. No more struggling with tangled lines or wrestling with stubborn sails; Roller Boom Furling takes care of it all.
Furthermore, this technology enhances safety on board by minimizing risks associated with sail handling . In challenging weather conditions or when unexpected situations arise, having full control over your main sail without requiring excessive manpower ensures quick reactions and smoother maneuverability.
Accuracy is another significant advantage brought by Roller Boom Furling systems. Manual furling methods often result in uneven roll-ups, leading to distorted shape and reduced performance . This technology streamlines the process, ensuring consistent and precise sail roll-ups every time. The result? Optimized sail performance, better boat balance, and improved overall efficiency.
However, it’s important to note that Roller Boom Furling is not limited to just convenience and safety benefits. This technology also has a positive impact on sail longevity. By exerting controlled tension throughout the furling process, Roller Boom Furling systems reduce wear and tear on the sails, extending their lifespan significantly. This translates into cost savings in the long run as sailors can enjoy their sails for many additional seasons.
Despite its undeniable advantages, it’s essential to consider a few factors before adopting Roller Boom Furling for your vessel. Compatibility with existing rigging systems, overall weight considerations, and budget constraints should all be taken into account during the decision-making process. Consulting with reputable sailing professionals or manufacturers can help you make an informed choice based on your unique requirements.
In conclusion, Roller Boom Furling is a game-changing technology that has transformed the way mainsails are managed while sailing. Its convenience, safety features, accuracy in sail handling, along with increased sail longevity make it an appealing choice for both cruising enthusiasts and racing crews alike. Embracing this innovative sailing technology promises to not only enhance your sailing experience but also elevate your performance on the water. So why wait? Join the revolution today!
How Does Roller Boom Furling Work? Exploring the Mechanics Behind this Game-Changing System
Roller boom furling has revolutionized the way sailing enthusiasts approach their craft. This innovative system has taken the sailing world by storm, offering enhanced convenience and ease of use. But how exactly does roller boom furling work? Let’s dive into the mechanics behind this game-changing system.
At its core, roller boom furling replaces traditional mainsail handling methods with a more streamlined and efficient mechanism. Gone are the days of wrestling with heavy mainsails or struggling to stow them neatly. Roller boom furling simplifies the entire process, making it a breeze for sailors of all skill levels.
The key component of roller boom furling is a drum-like device that sits horizontally along the boom itself. This drum contains a heavy-duty spring-loaded mechanism that can be activated with a simple pull or push. The mainsail is connected to this drum by means of an attached flexible panel commonly known as an “in-mast sail.”
Here’s where things get interesting: when you activate the roller boom furling system, this mechanism employs its internal gears and springs to smoothly roll up the in-mast sail around itself. This compactly stores the sail within the drum, creating a tidy and space-saving solution.
But what about unfurling? Well, fear not! Roller boom furling wouldn’t be complete without offering effortless deployment as well. By pulling on another control line connected to the drum, you can quickly release the bundled-up sail from its storage position . The inherent flexibility of materials used in modern sails ensures smooth unfurling without any hiccups.
Now let’s talk about some fascinating technical aspects that make roller boom furling so efficient and reliable:
1. Drum Design: The drum in which the sail is stored is carefully crafted using high-strength materials such as aluminum or carbon fiber composite to ensure durability while keeping weight down. This allows for optimal balance and performance on the boat .
2. Spring Mechanism: The internal spring-loaded mechanism within the drum plays a crucial role in achieving smooth and controlled furling. Its tension can be adjusted to accommodate different sail sizes, wind conditions, and sailor preferences, thereby providing customizable functionality.
3. Gearing System: To ensure consistent and reliable performance, roller boom furling incorporates a precisely designed gear system. This system allows for effortless rolling and unrolling of the in-mast sail while minimizing friction and wear on the overall setup.
4. Control Lines: The control lines connected to the drum are intelligently positioned along the boom for easy access and manipulation. By strategically locating these lines, sailors can effortlessly engage or disengage the roller boom furling mechanism without compromising their comfort or safety.
It’s important to note that roller boom furling systems have come a long way in terms of technological advancements over the years. Today, they offer improved reliability, ease of use, and durability compared to earlier iterations.
The benefits of roller boom furling are abundantly clear – it simplifies sail handling, reduces physical strain on sailors, enables quick adjustments based on changing wind conditions, and enhances overall sailing experience by eliminating hassle during maneuvers.
In conclusion, roller boom furling is an ingenious system that has transformed traditional mainsail handling into an efficient and elegant process. By understanding its mechanics and appreciating its various technical aspects such as drum design, spring mechanisms, gearing systems, and control lines – sailors can fully appreciate the convenience this game-changing system brings to their sailing adventures. So go ahead; embrace this innovative technology to elevate your sailing experience to new heights!
Step-by-Step: Understanding the Process of Roller Boom Furling for Efficient Sail Handling
Roller boom furling is an innovative technique widely utilized in sail handling for its efficiency and ease of use. If you’re new to the world of sailing or want to brush up on your knowledge, this step-by-step guide will walk you through the entire process of roller boom furling.
Step 1: Understanding Roller Boom Furling Before we delve into the process itself, it’s essential to grasp the concept behind roller boom furling. Unlike traditional sail handling techniques that require manual effort and coordination, roller boom furling simplifies everything with a single mechanical device. By utilizing a rotating drum built within the boom, this system allows you to effortlessly roll and unfurl your sails regardless of their size.
Step 2: Preparing for Sailing The first step towards efficient sail handling with roller boom furling begins even before you hit the water. Make sure your roller reefing gear is well-maintained and properly installed . Inspect all components for any signs of wear or damage, ensuring that they are in excellent working condition.
Step 3: Unfurling the Sail As you approach your sailing destination, it’s time to prepare for unfurling the sail using roller boom furling. Begin by releasing any halyard tension or backstay pressure on your mainsail. This will aid in facilitating a smooth and controlled deployment of your sails as they roll out from inside the mast.
Step 4: Engaging Roller Boom Furling Once your mainsail is fully released from its stored position inside the mast, engage the roller boom furler by turning its control mechanism or operating button – usually located near the cockpit. This action sets into motion a series of interconnected gears designed to rotate and unwind your mainsail smoothly .
Step 5: Steering & Controlling Unfurled Sail With the sail now unfurled, pay close attention to your boat’s steering to ascertain a balanced and stable sailing stance. Adjust your sail trim by utilizing control lines and sheets, ensuring optimal airflow and maximum efficiency. With the roller boom furling system, controlling the unfurled sail is a breeze, enhancing the overall sailing experience.
Step 6: Furling and Stowing Sail As your sailing adventure draws to an end or if weather conditions change abruptly, it’s time to furl and stow the mainsail using roller boom furling. Gradually release any strain on control lines while simultaneously engaging the furler mechanism in reverse – typically done with a simple push of a button. The rotating drum within the boom will begin winding up the sail efficiently, neatly rolling it back into its stored position until you’re ready to unfurl again.
Step 7: Safety Measures & Maintenance Safety always remains paramount during any sailing endeavor. Regularly inspect all components of your roller boom furling system, including track systems, swivels, bearings, extrusions, and controls. Lubricate moving parts as recommended by manufacturers to ensure smooth operation. Familiarize yourself with emergency procedures specific to your roller boom furling gear in case of unforeseen situations while at sea.
In conclusion, roller boom furling offers an efficient and user-friendly method for handling sails. By following these step-by-step instructions and performing routine maintenance tasks on your gear, you can optimize sail handling performance while enjoying a witty and clever solution guaranteed to make your sailing adventures even more delightful. So get ready to embark on smooth seas with this innovative sail-handling technique !
Roller Boom Furling FAQ: Answering Your Most Pressing Questions about this Advanced Sail Control System
Are you a sailing enthusiast looking to take your sailing game to another level? If so, then roller boom furling is a sail control system that deserves your attention. This advanced technology has revolutionized the way sailors handle their sails, providing improved control and convenience on the water. In this blog post, we will delve into the details of roller boom furling and answer some of the most pressing questions surrounding this innovative system.
Q: What is roller boom furling?
A: Roller boom furling is a cutting-edge sail control system that allows sailors to easily reef or furl their mainsail while out on the water. It replaces the traditional method of manually lowering or folding the mainsail by incorporating a motorized mechanism within the boom itself. This clever innovation enables sailors to adjust their sail area quickly and efficiently, even in challenging weather conditions.
Q: How does roller boom furling work?
A: The roller boom furling system consists of several components working in perfect harmony. It includes an electric motor placed inside the boom that drives a series of gears connected to a flexible foil sail track attached alongside it. By engaging the motor, sailors can effortlessly rotate the boom and wrap or unwrap the mainsail around this foil track as needed. This mechanism eliminates cumbersome manual labor and simplifies sail management on board.
Q: What are the advantages of using roller boom furling?
A: There are numerous notable benefits to adopting this advanced sail control system. Firstly, roller boom furling greatly enhances convenience for skippers and crew members alike. Reefing or stowing your mainsail becomes as easy as pressing a button, saving time and effort while increasing safety at sea.
Secondly, by allowing quick adjustments in response to changing wind conditions, roller boom furling enhances overall performance under various sailing scenarios. Whether you need to reduce sail area during strong gusts or increase it for lighter winds, this technology offers unparalleled flexibility and responsiveness.
Additionally, roller boom furling provides improved sail longevity. By maintaining proper tension and control during the reefing process, it minimizes wear and tear on your mainsail while ensuring a consistently smooth sail shape. This extends the lifespan of your sails and reduces the need for frequent replacements.
Q: Is roller boom furling suitable for all types of boats?
A: While roller boom furling is highly versatile, its suitability depends on the specific design and structure of your boat’s rigging system. Smaller cruising sailboats with single-spreader rigs generally find it easier to implement roller boom furling due to their simpler setups. However, larger yachts with more complex rigging configurations may require additional customizations or adaptations to accommodate this system effectively.
If you are considering installing roller boom furling on your boat, we recommend consulting with a professional sailmaker or yacht rigger who can evaluate your vessel’s specifications and provide expert advice tailored to your unique needs.
In conclusion, roller boom furling is an advanced sail control system that combines convenience, performance, and durability in one brilliant package. By simplifying sail adjustment procedures while maximizing control over your mainsail, this technology allows sailors to elevate their sailing experience like never before. Whether you are a seasoned sailor or a beginner looking to upgrade your boat’s capabilities, roller boom furling is undoubtedly an innovation worth exploring. So why not embark on this exciting journey towards effortless sail management today?
Pros and Cons of Roller Boom Furling: Is it the Right Choice for Your Sailboat?
Title: Pros and Cons of Roller Boom Furling: Is it the Right Choice for Your Sailboat?
Introduction: When it comes to enhancing ease and convenience on a sailboat, roller boom furling systems have gained significant popularity. This innovative technology allows sailors to furl and unfurl their sails effortlessly, making it easier to adapt to changing wind conditions. However, like any other system on a boat, roller boom furling also has its drawbacks and may not be suitable for every sailor or sailboat. In this blog post, we will delve into a detailed analysis of the pros and cons of roller boom furling, helping you make an informed decision about whether it is the right choice for your sailboat.
1. Convenience at your fingertips: The primary advantage of roller boom furling is how effortless it makes handling the sails. With a quick pull or push of a line, you can easily roll or unroll the mainsail according to your needs. This convenience eliminates the need for physically going forward to reef or deploy the sail manually.
2. Enhanced safety: Roller boom furlers contribute significantly towards sailing safety by reducing the risks associated with manual handling of heavy sails in adverse weather conditions . The ability to adjust and reduce sail area swiftly ensures better control over your vessel during sudden gusts or squalls.
3. Improved maneuverability: With roller boom furling systems, altering sail sizes becomes hassle-free while underway. If you encounter varied wind speeds or directions that require adjustments promptly, these systems allow you to quickly change from full sail area to partially furled with minimal effort – thereby enhancing your boat’s maneuverability.
4. Reduced wear and tear: Traditional mainsail flaking and folding methods are notorious for causing excessive creases in the fabric which lead to detrimental wear over time. A roller boom rig helps eliminate creasing issues altogether, ensuring longevity of your sail by reducing friction, chafing, and unnecessary stress on the fabric.
1. Costly investment: It’s important to address the upfront financial investment required for installing a roller boom furling system. These systems tend to be relatively expensive compared to conventional mainsail setups. However, if you frequently sail single-handed or with a small crew, the convenience and safety they offer might outweigh the initial cost.
2. Potential mechanical failures: As with any complex technology, there is always a risk of mechanical failure. Roller boom furlers consist of multiple moving parts – bearings, gears, and motors – that are subject to wear and tear over time. Regular maintenance and occasional repairs might be necessary, so it is essential to have spare parts readily available.
3. Added weight aloft: The installation of roller boom furling systems increases the weight aloft on your sailboat due to additional hardware components. This extra weight can potentially affect your boat’s stability and sailing performance in certain conditions. It is crucial to evaluate how this may impact your specific vessel before proceeding with installation.
4. Limited compatibility: Roller boom furling systems may not be compatible with all sail configurations or mast types. Retrofitting an existing rigging setup could be challenging or require significant modifications which can add costs and complexity to your project.
Conclusion: Roller boom furling undoubtedly brings numerous advantages in terms of convenience, safety, maneuverability, and reduced wear and tear on sails. However, it may not be suitable for every sailor or sailboat due to the associated costs, potential mechanical issues, added weight aloft dynamics, and compatibility concerns.
Ultimately, deciding whether roller boom furling is the right choice for your sailboat requires careful consideration of these pros and cons alongside an evaluation of your sailing style preferences and budget constraints. Consulting with marine professionals or experienced sailors can provide valuable insights tailored specifically to your situation.
Top Tips and Tricks for Maintaining your Roller Boom Furling System in Perfect Working Condition
Maintaining your roller boom furling system is vital to ensuring smooth sailing and maximum performance on the water. A well-maintained system not only prolongs its lifespan but also enhances safety and convenience while at sea. Whether you’re a seasoned sailor or just getting started, these top tips and tricks will help you keep your roller boom furling system in perfect working condition.
1. Regular inspections: Begin with regular inspections to identify any signs of wear, damage, or malfunctioning components. Carefully examine all the parts of the roller boom furling system, such as the boom, furler, swivel, and control lines. Look for cracks, corrosion, rust, frays in the lines, loose connections or fittings that may affect overall functionality.
2. Lubrication: Proper lubrication plays a crucial role in maintaining a smoothly operating roller boom furling system. Apply a high-quality marine-grade lubricant to all moving parts such as bearings, gears, sheaves, and tracks. Ensure that you follow manufacturer recommendations for lubricant selection and application frequency.
3. Sail Care: Take care of your sails to prevent unnecessary strain on the roller boom furling system. Regularly inspect your sails for tears or frayed edges caused by wind stress or chafe against rigging components. Repair any damages promptly using sail repair tape or consult a professional sailmaker if necessary.
4. UV Protection: UV rays from the sun can cause significant damage to both sails and your roller boom furling system over time. Invest in proper UV protection such as sacrificial covers for both mainsails and jibs when they are furled away on the boom after use. This will help minimize UV degradation and extend their lifespan.
5. Tension adjustments: Maintain optimal tension in your roller reefing line according to prevailing wind conditions and sail size for smooth operation during reefing/unfurling maneuvers. Avoid excessive tension or slack that could lead to jams or increased wear on the furling system components.
6. Halyard Management: Ensure proper halyard management by having a dedicated topping lift to support the boom’s weight while at anchor or when the mainsail is not in use. This helps reduce stress on the roller boom furling system and prevents unwanted slippage of sail controls.
7. Regular Cleaning: Saltwater and environmental debris can accumulate on your roller boom furling system, leading to corrosion and impairing its functionality. Rinse your system with fresh water after each sail to remove salt residue before it has a chance to cause damage. Use a mild soap solution for thorough cleaning when necessary.
8. Service Intervals: Follow manufacturer recommendations for regular servicing and maintenance intervals, which often include professional inspections and parts replacement as needed. A periodic checkup by an expert will help identify hidden issues that can escalate into costly repairs if left unattended.
9. Operator Training: Lastly, ensure all sailors aboard are well-trained in operating and maintaining the roller boom furling system correctly. Provide training sessions, offer guidance, and create written instructions that cover operation procedures, emergency protocols, proper line handling techniques, and troubleshooting common problems.
By adhering to these top tips and tricks for maintaining your roller boom furling system in perfect working condition, you’ll be able to enjoy hassle-free sailing experiences season after season. Remember, investing time and effort in preventative maintenance will save you from unexpected breakdowns while ensuring optimal performance when you need it most!
Recent Posts

- Sailboat Gear and Equipment
- Sailboat Lifestyle
- Sailboat Maintenance
- Sailboat Racing
- Sailboat Tips and Tricks
- Sailboat Types
- Sailing Adventures
- Sailing Destinations
- Sailing Safety
- Sailing Techniques
- New Sailboats
- Sailboats 21-30ft
- Sailboats 31-35ft
- Sailboats 36-40ft
- Sailboats Over 40ft
- Sailboats Under 21feet
- used_sailboats
- Apps and Computer Programs
- Communications
- Fishfinders
- Handheld Electronics
- Plotters MFDS Rradar
- Wind, Speed & Depth Instruments
- Anchoring Mooring
- Running Rigging
- Sails Canvas
- Standing Rigging
- Diesel Engines
- Off Grid Energy
- Cleaning Waxing
- DIY Projects
- Repair, Tools & Materials
- Spare Parts
- Tools & Gadgets
- Cabin Comfort
- Ventilation
- Footwear Apparel
- Foul Weather Gear
- Mailport & PS Advisor
- Inside Practical Sailor Blog
- Activate My Web Access
- Reset Password
- Customer Service

- Free Newsletter

What You Can Learn on a Quick Test Sail

Cabo Rico’s Classic Cutter

Bob Perrys Salty Tayana 37-Footer Boat Review

Tartan 30: An Affordable Classic

Preparing Yourself for Solo Sailing
Your New Feature-Packed VHF Radio

Preparing A Boat to Sail Solo
Solar Panels: Go Rigid If You have the Space…

When Should We Retire Dyneema Stays and Running Rigging?

Rethinking MOB Prevention

Top-notch Wind Indicators

The Everlasting Multihull Trampoline
Taking Care of Your 12-Volt Lead-Acid Battery Bank

Hassle-free Pumpouts

What Your Boat and the Baltimore Super Container Ship May Have…
Check Your Shorepower System for Hidden Dangers


Waste Not is the Rule. But How Do We Get There?
How to Handle the Head

The Day Sailor’s First-Aid Kit
Choosing and Securing Seat Cushions

How to Select Crew for a Passage or Delivery

Re-sealing the Seams on Waterproof Fabrics

Waxing and Polishing Your Boat

Reducing Engine Room Noise

Tricks and Tips to Forming Do-it-yourself Rigging Terminals

Marine Toilet Maintenance Tips

Learning to Live with Plastic Boat Bits
- Sails, Rigging & Deck Gear
Furlers: Thumbs Up, Thumbs Down
What the best riggers in the business have to say about the systems they install, maintain, and repair..
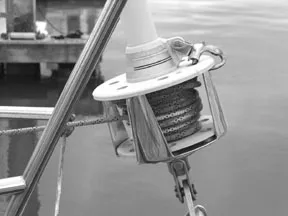
By almost any measure, roller furling units have evolved to become nearly ubiquitous in our pastime. And, as we wrote in our Feb. 1, 2004 market scan of headsail furling units, that evolution has rendered many of these products superbly functional. To wit, an overwhelming majority of respondents to the reader survey that accompanied that article gave these products high ratings for reliability and functionality. Our experience concurs with that. (We installed furling units on two of our test boats in the past.) It seems that these systems are generally earning their keep, but that’s an outlook which needs to be further qualified.
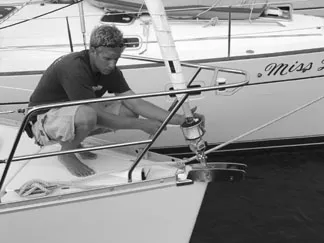
To do that, we felt it would be instructive to field the comments of those who install and repair roller furling units on a regular basis, so we tracked down professional riggers around the country. Some of these individuals were involved in furler developments early on, and all of them have hands-on experience dissecting frozen set screws, replacing damaged extrusions and worn bearings, or simply puzzling though the machinations of differing installations. They often view headsail furling units in a harsher light than the rest of us, so we asked about the most common issues encountered, as well as their experience with particular products. Here’s what they said, followed by responses from the manufacturers:
Common Issues “Most of the problems with roller furlers stem from improper installation,” said Svendsen’s Boat Works’ Doug Fredebaugh from the San Francisco Bay area, a 20-year rigging veteran. “Anything from having the foil the wrong height to having the halyard restrainer in the wrong position, to bad rig tune—an often overlooked culprit—can lead to poor roller furling performance. If you have lots of time and are very careful, roller furling units are easy to install. However, there are always going to be places where you can misinterpret instructions and end up doing something irreparable like cutting the foil to the wrong length.”
“Owner installation is a double-edged sword, because there are owners with different levels of mechanical abilities,” explained Annapolis Rigging’s Collin Linehan, who has been a rigger for nine years and a sailmaker for six prior to that. “It’s something owners can do, but often a customer comes into it with these grand ideas and then they run into problems and it takes me two and a half weeks to clear my schedule to get somebody out there. If you’re sailing in the northeast, that’s a significant part of your season gone right there.
“It’s when you stop paying attention—say furling the sail without looking up—that you risk running into problems. Old halyard wraps, improperly located halyard restrainers, and user error are the most typical problems we see. The most important thing that all of these furler producers could put in their operating instructions would be a line that says: ‘If you think there’s a problem, stop and look around.’ You should never need a winch to turn a furler, these units are meant to be operated by hand.”
“Of course I have a vested interest in saying that people shouldn’t put units together themselves,” admitted Keys Rigging’s Gary Shotwell, a 30-year rigging veteran, “but from a purely benevolent standpoint, I really think it is a fairly complicated process. We’ve had a few dismastings due to halyard wraps. The other thing to be on the lookout for is what some boatyards will do to a roller furling unit in the process of taking the mast down. Often the people doing the job don’t understand the mechanics of the unit. And reassembly by yard personnel almost always leaves the potential for some kind of trouble.”
“The cause of most problems is poor or improper installation and not the furler,” agreed Sound Rigging and Yacht Service’s Todd Rickard in Seattle, basing his remarks on 12 years as a rigger. “There aren’t that many problems with today’s furlers. The fact that most boats in the ’70s and ’80s had hank-on sails led to something of a roller furler binge in the ’90s. Roller furlers have been standard on new boats for the last three-to-five years. Buying a furler requires the same philosophy as buying winches, the benefits of over-sizing make life easier. I just saw a 44-footer with a Schaefer 2100 on it. The unit fit, but the owner is going to be disappointed in its performance in high winds.”
“One of the biggest problems we see,” opined Fritz Richardson of San Diego’s Pacific Offshore Rigging, “is owners not setting the sail up with the right length tack pennant. Typically, furlers don’t break now as they did in the earlier stages.”
“I’d say most of the problems start at the top end of the swivel unit,” offered Alan Veenstra of the Chicago Sailing Club, basing that on his 40 years of experience. “The length of the pennant is often incorrect, as is the angle. If the furler is too low, the halyard will wrap. If there’s a deficiency, it’s that the top swivel is paid less attention than the drum. It’s hard to know from deck level if the jib is the right height. If the sail is too long, it’ll jump off the furler and jam, if it’s too short, you risk a halyard wrap.”
“It’s not a very intricate thing to put together,” countered Eddie Brown, who is involved in installing about 60 furling units a year while commissions new Beneteaus for St. Barts Yachts in Charleston, SC. “If you are replacing one with the same brand, there’s no problem, you can put it right together, but if you’ve got to go and figure out measurements and mess with toggles and link plates and whatever you’ve got to hook up there, then it can be a little tricky doing pin-to-pin measurements.”
“The biggest challenge for an owner installation is changing over to a mechanical wire end fitting,” said John Fretwell of Rig Works in San Diego. That, and going aloft. Mechanical fittings are more expensive than a swaged fitting, and though you might end up coming out ahead eventually in terms of re-rigging, few people are going to own a boat long enough to worry about re-rigging it two or three times. Problems will vary by manufacturer, but in a general sense, corrosion between stainless and aluminum causes most of the problems we see, especially if the unit lives in an anchor well, which is now becoming popular.”
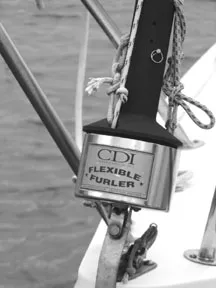
CDI “We used to sell CDI—it’s best for trailerable boats. You can’t take it anywhere you need to reef as it’s sailed on a Flexible Furler that is too flexible.” —Doug Fredebaugh
“CDI came stock on MacGregors, and in my mind they don’t build a system suitable for much more than that, even though I know they make units for larger boats.” —Todd Rickard
“When properly applied, the CDI is a fine system. I’d have to say that my problem with the unit is not the design, but improper application. Invariably, people try to save some money and end up utilizing the wrong system for the wrong application. The CDI doesn’t have the load handling properties that other furlers have and as soon as you start running over the load sizes and the sail sizes, that’s when you really start to generate problems.” —Collin Linehan
“We’ve done a lot of CDIs. They’ve changed a lot over the years. We installed a lot of the Flexible Furler models. It’s a good, cheap unit. While it’s not a Harken, Schaefer, or Profurl, we will recommend a CDI for trailerable boats because they are indestructible. The design is very unsophisticated, changing sails is a bit of a problem, and something that you’re not going to be doing out at sea. We don’t recommend them for anyone who’s doing any blue water sailing. The fact that we hardly ever deal with warranty issues is a good reflection on the product in general.” —Gary Shotwell
“Most of the ones we’ve worked with were quite old and were troublesome, but it was mostly an age issue, as most were 10 years or older.” —John Fretwell
CDI’s Joe Dahmen responds:
“If you look back to the 1995 Practical Sailor roller furler survey, 100 percent [of the respondents] who owned a CDI unit said they’d buy another one again.
“It’s common to have a 10 or 15-degree gap between sections of aluminum extrusions, as getting the tolerances right when heating aluminum to extrude it is very difficult. Put together three splined sections and you typically have thirty degrees of twist. There’s no more wind-up with our unit than with splined joints, and there’s no Loctite to worry about coming loose. We make a unit simple enough for owners to install, and by using an internal halyard we’re able to eliminate problems with forestay wrap.
“A lot of these guys aren’t overly enthusiastic about our unit—we’re breaking their rice bowls by offering an extremely simple, durable, essentially zero-maintenance unit an owner can install.”
Facnor “I’ve only worked on old Facnors, not the new ones, but seeing these units when they are 10 to 12 years old gives you strong opinions about what will be a good furler 10 years from now. The earlier models had joint problems with the foil that tended to open up over time with wear.” —Doug Fredebaugh
We’re starting to get a little more involved with Facnor. Some of their units are quite nice. They’re doing some single-line-drive systems that have been developed from the Code Zeroes used in a lot of the racing programs. I don’t have a heck of a lot of experience using it, but as far as the system and installation, and the actual looks and the integrity, it’s a pretty nice system. However, I have had issues with Facnor getting parts that have put people out for some time.” —Collin Linehan
“We’ve done several Facnor installations, although mostly mainsail furler systems. These are also a fairly inexpensive unit compared to the others.” —Gary Shotwell
“Facnor is ahead of other competitors in terms of continuous line systems. I don’t know if you’re familiar with sails like Code Zeroes—extremely flat asymmetrical spinnakers—a lot of bigger boats are using continuous line furlers to deal with these sails. What’s different about this approach is that the luff is not attached, this unit attaches to the tack of the Code Zero and to the head; there’s no foil. These are systems that generally live with the sail, when it’s time to break out that sail, it gets tacked onto the deck, usually with a snap shackle arrangement, and then the sail gets hoisted in a furled mode; these are primarily used by racers for lighter air.” —John Fretwell
“Facnor has borrowed a lot from Profurl, but in my mind they haven’t improved on anything.” —Todd Rickard
“To me Facnor is a cheaper system as far as how it’s put together. It does have a good system for putting the tubes together, using a longer extrusion that goes inside of the tubes, so it’s pretty tough in there. One thing I see is that The Moorings uses them and that tells me that they are used hard and they hold up. I have had one or two cars that have failed, but it was a faulty ring that they had put in the car and they sent me two new ones, and it was an isolated incident.” —Eddie Brown
Facnor’s John Kileen Responds:
“No other furling manufacturer has created more new products or grown more in the last 10 years than Facnor. Since the company was started in 1981, we have continually created new products and improved on the existing ones. Significan’t changes in our standard jib furling line include sealed waterproof bearings, simplified installation process, and stronger connectors.
“Facnor’s involvement in the world of single-handed ocean racing, including the Vendee Globe and Around Alone, has led to the most innovative improvements in furling systems. Most of these race boats are equipped with Facnor furlers consisting of a continuous line furling drum and Kevlar or PBO headstay instead of wire and foils in order to save weight aloft. A similar arrangement is now available for racing and cruising boats of all kinds using the continuous line drum and our standard aluminum foils.
“Facnor will continue to develop products for ocean racing yachts and use that experience to improve furling products for all levels of cruising and racing sailors. We’re OEM on Beneteau, Jeanneau, and Wauquiez, to name but a few. Now with distribution in the U.S. through Charleston Spars, Facnor is in position to service customers in North America.”
FaMet “We used to have a saying, ‘FaMet rhymes with damn it,’ I’m not even sure if these units are still in production, but if they are, I’m sure they’ve improved.” —Doug Fredebaugh
“We really don’t deal with FaMet at all. I have absolutely no experience with those.” —Collin Linehan
“It’s interesting that you should mention FaMet because I’ve got a customer that has a damaged unit so I’ll be looking for new parts for it. I believe Regency Marine is fulfilling that now, but it’s been a while since I’ve had to go looking for them. Thirty years ago, the FaMet was a popular unit. They are very robust, but very heavy, kind of yesterday’s technology. Check back with me and I’ll tell you how it went.” —Gary Shotwell
PS couldn’t get a response from FaMet in time for this article.
Furlex “Furlex is a design nightmare to put new wires into. The Norseman-style end fittings make it hard to work on, and the system is one that is not engineered with the idea of servicing effectively. Taking apart a Norseman fitting that has been under great strain for 10 years makes me think the manufacturers are trying to torture me. We had a Furlex that took six hours to put a new headstay in, while with a Harken unit, the process usually takes less than an hour.” —Doug Fredebaugh
“Furlex is a great system for the dollar, being that it comes with a headstay. These are tried and true, and really good for around the bay, or for your coastal guys. You could go on extended cruises with it, but I wouldn’t go around the world with one. I say that just because they don’t have the miles logged that say a Profurl system does; they also have a lot of moving parts inside there.” —Collin Linehan
“We’ve sold a lot of Furlex furlers, it’s our third most popular unit here. I don’t think I like it as much as a Harken or a Profurl. One of the reasons is the way the extrusions are put together, there’s a little bit of play in them. The last Furlex we worked on the extrusion machining wasn’t perfect.” —Gary Shotwell
“The Furlex price includes everything: the replacement headstay to the line for the drum, which means less running around for the installer and less complexity. I wasn’t crazy about Furlex until four or five years ago when they went from a plastic cage to a stainless steel body. More people are offshore with Furlex right now than any other. We’ve installed Furlex furlers on John and Amanda Neal’s boat Mahina Tiare III. I’d say Furlex is my favorite.” —Todd Rickard
“I’d rate Furlex unbelievable in their commitment to customer service. I’ve seen the company replace operator-inflicted damage at no charge. My favorite furlers are Profurl and Furlex. Most of my clients will be heading offshore, so even minimum maintenance requirements like flushing out the lower unit with fresh water is sometimes not possible.” —Fritz Richardson (Pacific Offshore Rigging)
Furlex’s Scott Alexander responds:
“We’ve designed our furler from a mastbuilder’s perspective and a complete understanding of rig loads. The guy from Svendsen’s is referring to a Norseman when in fact it’s a Sta-Lok, and he was likely working on a system 10-to-15 years old. We have great instructions on how best to dislodge the Sta-Loks after many years of hard sailing; they have fantastic holding power.
“When Furlex was redesigned in 1997, we addressed the issue of making it much simpler to release the Sta-Lok terminal. Furlex has always used Sta-Loks due to their excellent serviceability and long life in comparison to a swage fitting. All Furlex systems include a new forestay with a Sta-Lok on the lower end. Furlex has been supplied to quality offshore builders for many years: Hylas, Tayana, Farr, Nautor Swan, Halberg Rassy, and Sweden Yachts, to name a few.
“We intentionally have a small gap between the extrusions in order to avoid chafe of the foils with each other when sailing downwind with a slack forestay. We appreciate that Keys Rigging noticed this detail. Mahina Tiare III logs over 15,000 miles per year and enjoys sailing in the Roaring Forties. Need we say more?”
Harken “Harken is what I consider the best. The disassembly is easy and you can still get parts for 10-year-old units. Harken has a big blue sheet spelling out the directions. You have to be sure to inspect everything, every foil. One out of a hundred has a burr on it, and if you miss that halfway through the installation, you are hosed as the joints end up being stuck halfway through. Harken and Schaefer are our most popular brands, these are units that we’ll sell more of by a factor of 10. As far as fitting extrusions together, Harken uses stainless steel screws, while Schaefer uses anodized aluminum rivets. The Harken wedge system is extremely durable. Infrequently there will be problems with not having enough Loctite on, but it’s pretty rare.
“The market on furlers is saturated, and you can expect furlers made today to last 20 years. I’ve seen Harken furlers that were installed in the ’80s that are still working. The only maintenance required is that you spray fresh water on the unit. If you want to get fancy, you can spray McLube on the sail. As far as warranty issues, in the last five years we’ve had one claim on a Harken unit and it was resolved instantly…the quality makes it something of a non-issue since it doesn’t come up very much.” —Doug Fredebaugh
“Harken has a great system. You’ll find that problems with the higher end systems come from installation error or user error. They have refined their unit to the point where if you know what you’re doing when you handle them, you’re all set. I think these companies are all pretty much on the same plane when it comes to customer service, shipping, directions, and warranties. We sell nearly equal amounts of Harken, Profurl, and Furlex.” —Collin Linehan
“Harken is my favorite, and is what I have on my boat. Harken is a very complicated unit [for owners] to install. I think Torlon bearings are an excellent idea, the ones on my own boat are 16 years old now and I’ve done zero maintenance and they are doing just fine. I also like the way Harken fits its extrusions together. It’s very positive and they use the red Loctite ®. There’s a little friction pad that holds it in place while the Loctite cures. Harken has been particularly attentive in terms of customer service, but I can’t say that they are that much better than other furling manufacturers in that regard.” —Gary Shotwell
“Harken units from 10 years ago are still being used successfully. Today you can change the lower unit of a Harken Mark II open drum for about $600, which is a lot cheaper than putting a whole new furler on.” —Todd Rickard
“I install a lot of Harkens, it’s a good, standard furling unit, but not so user-friendly to install. You have to have a swage fitting and it’s hard to modify the unit to fit. You have to take the unit apart to modify it, it’s basically built to be put up and stay up. I’ve found Harken particularly awkward and inelegant to assemble. The extrusions are a very tight fit.” —Alan Veenstra
“One problem that I run into with Harken, is the way that their bearings [foil connectors] go in, the way you have to work down—if you mess up you’d have to take the whole thing back apart.” —Eddie Brown
“Harken is the best choice for the racer as it’s the lightest. But it’s also more awkward than others for repeated disassemblies. For some of the racing boats who want to be able to break down and transport the boat not necessarily on their own keels, and those furlers are a little less easy for multiple disassemblies. It’s the Loctite®, the connectors, and the fact that the connectors need to be swaged on a rod or a wire headstay ,whereas with Schaefer units the connectors are split so that you don’t have to push every foil over every connector for reassembly.” —John Fretwell
Harken’s Dan Rondeau responds:
“Our furling systems take a little more time to assemble, but for good reason. The connectors are closed tubes so they are stronger for their size compared to a “C” shape connector. As a result, foils can be smaller for the same strength as well. Weight aloft is less, so there’s less heeling—something any boat owner can appreciate.
“A simple tool called a ‘pusher wire’ will speed assembly when sliding foils over the connectors. This wire is made of 3/16” 1×19 wire and is about 7 ½’ in length, just a little longer than the foil.
“We use red Loctite® because it gives a durable bond, yet can be taken apart with heat if the foil needs repairs. Coating the connectors with Loctite® spreads the load onto the joint, and takes the point-loading off the fasteners. The screws are really just a final lock for the foil joint. A couple of tips: when coating connectors with red Loctite®, smear most of it on the side opposite the plastic wedges. This is the best gluing surface. Also, instead of putting glue on the foil screws, put a drop in the connector hole.
“The manual has an easy-to-use chart to figure foil cut length so it saves you from doing the math. All you have to do is plug in your pin-to-pin measurement. Note: make sure you measure from the center of the marine eye to the pin that attaches the furler to the chainplate or link plates. Do not include the masthead toggle in your measurement.”
Hood “The latest generation addressed the problems with the earlier ones. With those, the push button furlers were a nightmare to work on as the joints between the extrusions could get loose and cut the sails. We take a lot of Hood furlers in the 10 to 12-year-old range off of boats, and I’m told the new ones are a lot better.” —Doug Fredebaugh
“Hood has a good system, although some of the older ones are increasingly hard to find replacement parts for.” —Collin Linehan
“We’ve done a lot of work on Hoods, mostly on the older units, which had some serious corrosion problems. I’m grateful to Hood because they made the first good, strong roller furling unit that changed my mind about roller furling. They kind of sat on their laurels though, because I didn’t see a lot of improvement after that. The unit uses alternating Delrin and stainless steel bearings. They have a new system out, but my experience with it has been very limited.” —Gary Shotwell
“I don’t have experience with new Hoods, but to be honest we have done fairly frustrating jobs with the old ones, and I guess one of the reasons is because they were old, over 10 years, and we had one supplier for the parts.” —John Fretwell
Hood’s Mike Haber responds:
“In the 1980s, we didn’t have the anti-corrosive selection that we have today. Older parts aren’t in our new units as our newer designs have better functionality and longevity. You could keep a Model T running, but it wouldn’t make great transportation. Still, we try to make an upgraded parts kit and are pretty good at making things work. Many boats owners have replaced sails, rigging, chain plates, and so on. Furlers are one of the least maintained units on a boat, and the location on the pointy end ensures that they’ll be spending a lot of time getting sprayed with salt water. We’re uniquely dedicated to our customers and offer a program that gives 50 percent off the list price for owners of existing Hood furlers looking to upgrade.”
Profurl “Parts for earlier Profurl units are no longer available, and the bearings in these are somewhat archaic. A stiff, 10-year-old Profurl furler won’t perform as well as a 10-year-old unit from another company. The lifetime guarantees won’t do any good if the unit doesn’t spin.” —Doug Fredebaugh
“I consider Profurl to be my personal favorite. There have been a lot of miles logged on these units; they are very, very simple, straightforward, extremely durable, and low maintenance.” —Collin Linehan
“Profurl has sealed bearings, and it’s something that we’ve had good luck with, except that when they start to go bad they won’t let us repair them. The unit has to go back to their authorized factory to change the bearings.” —Gary Shotwell
“Profurl and Facnor are using sealed bearings. The benefits of sealed bearings aren’t as great as they say they are.” —Todd Rickard
“I hate to say it, but I’m satisfied with Profurl. Because these units are made in France, I installed one on my boat with some consternation. But no swaging needs to be done and the extrusions are large enough for a Sta-Lok or an eye fitting to pass through. I installed a Profurl on a 47-footer last year, and the process only took three or four hours. Profurl is better in my mind because you can take it down and work on it, any piece can come out and be replaced relatively easily. That said, I’m not fond of Profurl’s aftermarket replacement parts. I just bought a replacement set screw for $10. It’s a special screw, sure, but it’s not a $10 screw. If this company was concerned about customer loyalty, it should have just sent the screw for free. Also, a 7-foot extrusion costs almost $200.” —Alan Veenstra
“The best unit that I’ve seen out is Profurl. The installation is easy, and I’ve never had a failure on one. I’ve trained several guys who’ve helped me doing rigging for years and if they come to me and tell me there’s a part missing out of the box I tell them they’re lying. The quality control, as far as what’s in that box when I get it, well, everything is there—always. I’ve found one or two cases where they’ve sent me the bottom pin and they forgot to put the threads on it, but the pin was there. As far as stuff that’s in there, they are very customer friendly.” —Eddie Brown
Profurl’s Vernon Hultzer responds:
“It’s a true testament to the system that the older units being referred to are over 25 years old, and Profurl stopped making parts for them over 10 years ago. A 10-year-old Profurl unit that has been looked after will work better than an exposed plastic or stainless steel bearing that has been sitting in the sun and salt for 10 years. We extend a 10-year warranty on our Classic Range of furlers, not a lifetime.
“Profurl has established bearing service repair centers all over the U.S. If a dealer shows that he is competent to handle repairs, we are more than willing to allow them to open the units up. We have to stand by our product, and can’t allow everyone to open the bearing system; otherwise we lose control of the quality control. Our spare parts are expensive. Rolls Royce is also an expensive car. One gets what you pay for in this world.”

Schaefer “Schaefer is what I would consider to be a modern cruiser’s dream. The bearings are brilliant, needing only to be hosed down with fresh water once every six months. The riveted-together extrusions are well engineered, and replacing the forestay in the shop is easy. We put Schaefer on a lot of cruising boats. Harken and Schaefer are our most popular brands.” —Douglas Fredebaugh
“Schaefer makes a fine line of roller furlers. The Schaefer Snapfurl is an excellent system for boats under 26 feet. It’s simple and can be installed by the purchaser.” —Collin Linehan
“You can’t go wrong if you choose one of the top four: Harken, Furlex, Schaefer, and Profurl. Seventy-five percent of our installations are Furlex and Schaefer, the balance is Harken and Profurl.” —Todd Rickard
“Schaefer is gear that I like a lot. We sell a lot of them. They’re fairly simple, and I believe are better engineered than Profurl. They’re a little more robust, and fairly simple gear.” —Gary Shotwell
Schaefer Marine’s Fred Cook responds:
“Riggers are on the front line with customers and have the most ‘real world’ experience. We respect their comments, and their feedback is very important to us. Some call us conservative, but we take our responsibility to our customers, dealers, and riggers seriously.”
Conclusions The functionality of modern roller furling units depends first and foremost on proper installation. Predictably, the riggers we spoke to favor professional installations, partially because they’ve witnessed the downside of owner installations, and, of course, because they too need to put food on the table. And many of them cautioned against the temptation to purchase undersized units as a means of saving money. As with anchors and winches, over-sizing has its advantages, but our riggers made it clear that this is only necessary if your brand of sailing warrants it.
These professionals also counseled that prospective buyers consider the aftermarket prices for things like set screws, foils, and bearings as most units eventually require replacement parts or some servicing, and higher end units will likely have higher aftermarket part prices. They also said that though maintenance on headsail furling units is now quite minimal (the sealed bearings of Profurl are virtually maintenance free, while other units require little more than a periodic rinse with fresh water), it’s a good idea to check the foil connections once a season. Set screws can work loose, and you should also check for signs of corrosion between stainless steel fasteners and aluminum foil sections.
Even with the proper installation, maintenance, and inspections, things can go wrong. Spinnaker halyards or other headsail halyards kept on the bow could inadvertently get wrapped in the upper swivel, and an overzealous or inattentive crew might damage the unit by not noticing this. Headsail halyard tension, several riggers told us, should also be eased when the boat is at rest for long periods to retain sail shape.
They also emphasized that there are other important considerations for those in the market for a new furling system. You need to consider your use of the product. Will it be for racing, occasional offshore cruising, or just daysailing? And how do you feel about swaged end fittings vs. mechanical terminals? What about foil shapes? Do you want rounded extrusions? And will you be able to keep up with the minimum maintenance requirements, or are you hoping that “maintenance-free” means just that? All of these are important considerations.
As an aside, there were several models that appeared in our Feb. 1 market scan—Alado Nautica, Bamar/Plastimo, and Reef-Rite—among them, that we haven’t covered here. These units were hardly mentioned by the riggers we interviewed, but that shouldn’t be misinterpreted as a slight on those products. More than one rigger admitted that he hadn’t any experience with units made by those companies.
So who comes out on top? Our unofficial winner in this highly subjective survey is the one product none of these riggers faulted; one that was invariably used as a standard for excellence: “I’m not sure I want this in print,” said an unnamed rigger who was referred to us by another manufacturer’s distributor, “but I highly recommend Schaefer. They’re reliable. I like the bearings, they require very little maintenance, they are robust, the installation is easy, and they are quite conducive to disassembly.” Harken’s furlers garnered high praise, though they seemed to be more complicated to install and disassemble, and Furlex and Profurl both won emphatic support among many of our riggers. All told, the bar has been pushed to an extremely high level by these four product lines, and collectively they represent solid investments.
Contacts • CDI, 607/749-4599, www.sailcdi.com • Facnor, 704/597-1502, www.facnor.com • FaMet, 785/842-0585, www.fametreefurl.com • Furlex, 843/760-6278, www.seldenmast.com • Harken, 262/291-3320, www.harken.com • Hood Yacht Systems, 603/826-5791, www.pompanette.com/hood • Profurl (Wichard, Inc.), 800/852-7084, www.profurl.com • Schaefer Marine, Inc., 508/995-9511, www.schaefermarine.com • Alado Nautica USA, 972/943-8262, www.aladous.com • Bamar/Plastimo, +39 0543798670, www.bamar.it • ReefRite, +64 9 407 8794, www.reefrite.co.nz
RELATED ARTICLES MORE FROM AUTHOR
Leave a reply cancel reply.
Log in to leave a comment
Latest Videos

The Great Loop – The Basics

Bottom Paint Showdown – Six Paints, One Winner!

Tartan 30 | Boat Review

Fuel Contamination? The Baltimore Francis Key Bridge Collapse
- Privacy Policy
- Do Not Sell My Personal Information
- Online Account Activation
- Privacy Manager

What Is A Furler On A Sailboat?

Last Updated by
Daniel Wade
August 22, 2023
Key Takeaways
- Sailing furlers are common in a variety of different types of sailboats
- These are used to make life easier when sailing or racing to roll the sails in or out
- They are an extremely convenient tool that provides efficiency if used appropriately
- Furler sails can come in many shapes and sizes depending on the boat
- Your sailing goals may go hand in hand with the type of furler you have on board
Furler sailing is a convenient way to make life easier on your sailboat. But what is a furling system on sailboats?
Roller furling systems are unique mechanisms that allow you to effortlessly roll up the sail or unfurl. A roller furling system features a central location for a drum or spool for storing the sail and a furling line to give sailors the ability to operate the sail.
In my experience, furling systems are comparable to reefing systems, but are arguably best for moderate conditions while sailing. Depending on what setup you have will likely make a difference while sailing.
Table of contents
How Does a Roller Furling System Work?
A roller furling setup will vary depending on what type you have on your boat. Most boats today have some type of system already on board, especially racing boats.
Sailors can adjust their sail area or store their sails efficiently by pulling on the furling line. This line can be controlled from the boat's cockpit and allow solo sailing to be more manageable and eliminating the need for crew members to handle bulky sails manually.
There are a variety of positives with furlers that most sailors find useful. Below are the pros for these systems.
Ease of Use
They are convenient and make for a quick setup while adjusting to the wind in various conditions. This allows an easy transfer without having to take the sails down or changing them out completely.
Peace of Mind
This makes it safer while sailing since you will have better response times and control from the cockpit. This helps limit the likelihood of any dangers out on deck or due to weather.
You have the power in your hands to adjust for sailing power. This gives you total control of when to optimize the best sailing conditions.
Longevity in Mind
A furling system allows you to roll up the sail neatly to avoid exposure to harmful UV rays and other issues obtained if you were to leave it out. This is crucial for long term use and for protecting your investment.
There are some negatives to keep in mind for these systems as it may interfere with your sailing goals. Below are the cons to consider.
Strong Conditions
These may not operate the best in windy conditions. A furled sail could decrease upwind performance if the conditions are not the best.
Rope Could Weaken
The rope that is used to control the furler is susceptible to chaffing. This must be checked each time you are going out on the water in addition to other safety guidelines.
Location of Drum
The drum is usually installed on the deck. This means the sail area is slightly reduced and the luff is shortened.
Needs Routine Maintenance
You should always look over and keep records of maintenance on board. The bearings are one example of something you should keep an eye on as the saltwater and sand will cause wear and tear.
Different Types of Roller Furling Systems
There are different types of furling systems that you might have already or might be interested in getting. Some are easy to use while others might be difficult depending on the setup. Below are the three system setups that you will likely need to learn more about.
If you enjoy manual labor to roll the sail in or out, then this means you have a manual one. These are usually cheaper because it is more physically demanding.
You simply need to be able to push a button to get an electric furler to operate. This provides a much smoother sailing experience if you are unable to roll the furlers out by hand.
If you have a larger yacht then you might have a hydraulic furler . These are definitely smoother and offer excellent power.
Which Roller Furling is Best for You?
Now that you know some differences between manual, electric, and hydraulic, you can take a step further and see which system is best for your sailing goals. There are specific names used in the marine industry to categorize these furling systems.
This is the most basic setup for a furling system. This system includes a deck swivel drum, wire luff headsail, and head swivel. This also means you do not need hanks or the use of luff tape.
Internal Halyard
The internal halyard runs alongside the forestay without using the jib halyard. It employs an internal halyard for one groove, while the sail's luff slides up another groove, and prevents the halyard from getting tangled.
Head Swivel
The head swivel is one of the most popular systems and most expensive since it operates the smoothest out of them all. It features a lower drum, equipped with metal cross-sections, and a ball bearing head swivel. It is excellent for racing and for changing headsail easily.
Bottom or Top Down Furler
All systems back in the day were once bottom-up furlers. As engineering improved over the years, more headsails were designed for lighter wind.
The bottom is a standard roller furler where the base of the drum unrolls to release the sail. When rolled back, the sail wraps from the base and is common for jib and genoa sails.
The top down furler is for Code 0 and asymmetric spinnakers. These roll the sail from the top to the base, leaving the base free-floating and improving sail handling.
Cleaning and Maintaining Your Furler
Proper routine maintenance is crucial for keeping your boat in the best shape. This means you cannot afford to skip checking or repairing your furler.
Failure to spend a solid 15 to 30 minutes taking the time to properly clean and maintain your furler will cost you more time and money down the road. Below are a few tips to get started for most furlers.
Reading the Manual
It is imperative that you read and understand the manufacturers manual that came with the furler. This will have the basics and everything else you need to know about safe operation or properly maintaining the furler.
If you do not have one after buying a boat, then you can look for it online or contact the manufacturer to send you one. In addition, you could always look online and read forums that talk about similar issues with their furlers.
Get the Furler Ready
The first thing you should do is to remove the genoa sail and mark the furling line for easy removal of the drum during year-end maintenance or before the season starts. Check the bolts, drum, and remove any debris that could be lodged with a degreaser (your manual might recommend one).
Lube All Required Locations
If any parts move then there needs to be some kind of lubrication. This is especially true if you have metal on metal.
Your manual will likely tell you what type of grease to use and where to apply it. Once that is completed you can assemble the drum and clean everything you touched.
Related Articles
I've personally had thousands of questions about sailing and sailboats over the years. As I learn and experience sailing, and the community, I share the answers that work and make sense to me, here on Life of Sailing.
by this author
Learn About Sailboats
Most Recent

Affordable Sailboats You Can Build at Home
September 13, 2023

Best Small Sailboat Ornaments
September 12, 2023
Important Legal Info
Lifeofsailing.com is a participant in the Amazon Services LLC Associates Program, an affiliate advertising program designed to provide a means for sites to earn advertising fees by advertising and linking to Amazon. This site also participates in other affiliate programs and is compensated for referring traffic and business to these companies.
Similar Posts

Discover the Magic of Hydrofoil Sailboats
December 11, 2023

Hunter Sailboats: Are They Built for Bluewater Cruising?
August 29, 2023

What Is Sail Roach?
August 15, 2023
Popular Posts

Best Liveaboard Catamaran Sailboats
December 28, 2023

Can a Novice Sail Around the World?
Elizabeth O'Malley
June 15, 2022

4 Best Electric Outboard Motors

How Long Did It Take The Vikings To Sail To England?

10 Best Sailboat Brands (And Why)
December 20, 2023

7 Best Places To Liveaboard A Sailboat
Get the best sailing content.
Top Rated Posts
Lifeofsailing.com is a participant in the Amazon Services LLC Associates Program, an affiliate advertising program designed to provide a means for sites to earn advertising fees by advertising and linking to Amazon. This site also participates in other affiliate programs and is compensated for referring traffic and business to these companies. (866) 342-SAIL
© 2024 Life of Sailing Email: [email protected] Address: 11816 Inwood Rd #3024 Dallas, TX 75244 Disclaimer Privacy Policy

- Forums New posts Unanswered threads Register Top Posts Email
- What's new New posts New Posts (legacy) Latest activity New media
- Media New media New comments
- Boat Info Downloads Weekly Quiz Topic FAQ 10000boatnames.com
- Classifieds Sell Your Boat Used Gear for Sale
- Parts General Marine Parts Hunter Beneteau Catalina MacGregor Oday
- Help Terms of Use Monday Mail Subscribe Monday Mail Unsubscribe
Roller Furling upgrade
- Thread starter MitchK
- Start date Oct 13, 2017
- Brand-Specific Forums
Have any of you upgraded the foresail to a roller furling setup. If so, which furler did you go with, and what size sail did you install. We plan on upgrading our N28-2 from hanked on foresails to roller this coming spring. Unfortunately, we al ready have a Jib. Lapper, and a Genoa set up with hanks. All three sails are in good condition, with the lapper in like new condition, and the bag is marked 1985! Doesn't look like it was ever used more than once or twice. Anyway, any experience on a roller furling upgrade would be greatly appreciated. Mitch
Tons of threads on this in the archive. You will have to modify your sails and probably your forestay.
SailormanDan
Bacon Sails recommended the CDI Flexible Furler when I had them put together a new genoa and furler for me to replace my original jib. I went with the FF6, has the ball bearing upgrade. Your current sails can be converted by a sail loft to fit a furler if they are otherwise still in good shape.
Unless your sail is pretty new it is more cost effective to go with a new one. That is because in addition to the luff tape you need sun protection. By the time you modify an old sail you are over half the price of new. You can add sun protection yourself if you have a machine and are handy. Sailrite and perhaps this site sell an adhesive backed material. The adhesive makes it easy to apply, but you are better off if you sew around it afterwards too. Search for adhesive backed fabric or insignia adhesive backed fabric.
I'd get a higher level furling, reefing system that features a rigid, twin groove foil. You can convert all your head sails to luff tape if you like, allowing you many options ... racing, cruising, daysailing...offshore or coastal. My choice would be ProFurl. But Harken, Furlex, Schaeffer, etc., all make a quality product suitable for any type of conditions.
What's your budget and intended use? I purchased and installed an Alado furler on my boat this spring, a very budget minded unit. I also purchased a luff tape conversion kit and sock kit from Sail Rite, did the whole project myself for about $1500.00. There are definitely pros and cons to how I tackled this project but a 41 year old boat has lots of projects an one needs to spread the boat budget as far as possible.
The budget for this upgrade is approx. $2500 . Due to the age of the sails, travel costs, and cost of getting them modified for the roller furling system, I am factoring in a new sail as well as the cost of the furler into the equation. I have an overall budget of approx. $4000-45000 for the furler, headsail and a new mainsail. The sails are currently serviceable, but as best I can tell, these sails were on the boat approx. 15 years ago when the person we purchased the boat from bought it. So the actual age and usage history is unknown. I know the sail loft who made two of them (Jib and Genoa-McKibbins Sails) are out of business. The lapper (Schauttauer ) is in like new condition. However, the sail bag it is in is dated 1985. (1985 vs 2017 sail design and materials?) I do know the main is pretty dirty, and will be removed this winter for a good cleaning. I really need to bring all the sails home and spread them out for a through inspection/cleaning. Another question, is do I attempt to clean them myself, or take them to a sail loft for cleaning, and repair of any wear items that are identified at that time. We plan on keeping the boat for a number of years so the one of the questions is do we invest in new sails or service the old and replace sometime in the future. I guess it becomes a cost benefit question. At what point does the cost of repairing the old sails no longer make financial sense? At this point, I'm figuring around 50% of the cost of new sails. This includes getting the sails to a sail loft (none locally-Portland, OR, or Seattle, WA are the closest--approx. 4hr drive away) and the actual sail loft service costs. Mitch
MitchK said: Schauttauer Click to expand
Good info on Schauttauer. I will keep them and your recommendation in mind. At this point, I would prefer to go to someplace in Portland, as we have relatives (one who shares the sailing bug) there, and can make weekend out of it for minimal cost. But Schautuauer is not out of the running at this point. Thanks Mitch
Since you have a fairly decent budget a furler/headsail combo sounds like the ticket.
Understand the convenience of Portland. I do not have any experience with the two lofts in the Portland area. (North Sails Oregon and Banks Sails Northwest). I met the North's salesman at the boat show a couple of years back. Nice person. I got the impression there business is about selling new sails which are manufactured somewhere (think Asia) and then installing. No business dealings with them. Online you can also reach a business back east (think Pennsylvania) that cleans and reconditions sails. They have a loyal following. Process takes some 4-6 weeks. Good luck.
Sailcare will clean repair and re-resin your sails for much cheaper than new. A friend did the main on his full batten Freedom 28 and was pleased.
Sailcare... That is the online one I was thinking about.
You might consider a Profurl with two loading channels on the furler. It has a fairly thick main extension (about 3/4 inch) and is very durable...you should also consider replacing the headstay if it is the original. I have had one on my N-30 for about 5 years and no issues at all with performance.
- This site uses cookies to help personalise content, tailor your experience and to keep you logged in if you register. By continuing to use this site, you are consenting to our use of cookies. Accept Learn more…

IMAGES
VIDEO
COMMENTS
Roller furlers allow convenient storage of the foresail, but sometimes require maintenance and may need to be removed or replaced for various reasons, perhap...
Roller furling allows you to spend less time folding or changing sails and more time on the water sailing. Furlers have become a reliable, easy to install, industry standard found on many performance racing boats as well as necessary gear for cruisers. This brief synopsis will give you an idea of what to expect when installing a new unit, no matter what brand you choose.
Dinghy, beach cat or small sportboat: Small Boat Furlers mount on the headstay on a sportboat or the jib's luff wire on a dinghy or beach catamaran. Most sportboats, such as my Ultimate 20, use a separate halyard and a jib that zips over the headstay. Trailer sailer: In general, we recommend furlers with a flexible extrusion, like Schaefer's SnapFurl 500 or SnapFurl 700 system, for a ...
A roller furling system allows you to roll or wrap your foresail around the headstay. This not only makes sailing easier, but also improves safety by allowing reefing without the crew having to go on deck in bad weather. To understand how to use a roller furling system, it's first important to know how it works, what specific steps to take when ...
Roller curlers come in a variety of size shapes and prices. I've installed one, uninstalled one, and will install one this spring. It is easier to install them when the mast is down. Installation is straight forward, slide the furling drum on to the forestay, slide the foil sections one and connect them. Put the whole thing back on the boat.
The Hard Road to Convenient Sailhandling. Installing a roller furler is a simple path to Easy Street, provided you avoid the pitfalls along the way. "Hands-On Sailor" from our April 2009 issue. The Schaefer Marine Snapfurl is designed to fit over a small boat's forestay, though in this case, the bow pulpit meant a tang would have to be added ...
Upgrade your sailboat's rigging and sail setup with a new roller furling system, making it easier and safer to manage your sails while sailing short-handed or with family.
Want to put a foresail roller furler but don't want to pay thousands of dollars! This video gives you the tips and tricks to install a simple PVC roller furl...
Basic Assembly. Roller Furler Installation and Use. Install the furling line onto the drum by first feeding it through the fairlead on the cleat and then through the middle size hole on the top of the drum. Tie a figure eight knot in the end of the line. Examine the lay of the wire in the luff of your reacher.
Remove the furled sails sheets, and spin the sail several times, winding on extra furling line. When the sail is furled in high winds, it will be tighter and you will need these extra turns; they also reduce stress on the stopper knot. Reattach the sails sheets, feed the line back through the fairleads, put a stopper knot in the end, belay the ...
Improving Roller Furling Efficiency. In the October 2019 issue of Practical Sailor magazine, we looked at installing new roller furling gear for a genoa —one of the most popular upgrades on an older boat. The article documents the installation process on a Bristol 35.5 First Light, our former New England-based test boat.
Should power fail, the sail can be furled with a winch handle or an endless line furler (available separately) that clips into the drive unit. Facnor also offers two complete electric furling systems, the EF+550 and EF+600, for boats up to 60-plus feet. Pricing starts at $5,799 (full retail) for the EC39 system.
If you are considering installing roller boom furling on your boat, we recommend consulting with a professional sailmaker or yacht rigger who can evaluate your vessel's specifications and provide expert advice tailored to your unique needs. In conclusion, roller boom furling is an advanced sail control system that combines convenience ...
The best time to install a furling system is when the mast is already down. The furling system fits the boat, however after 8-10 years the forestay may have stretched. An old 155% genoa that's in reasonable, albeit old, condition is plenty good for non-racing on the Columbia river here in PDX.
🔔 SUBSCRIBE http://bit.ly/SBYouTube⛵ Informative Sailing Videos!How to replace a furling line on a roller reefing headsail. After seeing the consequences ...
The most common kind of roller furling system attaches to a jib sail and allows the operator to deploy and stow the entire sail from the cockpit. ... If you have a common sailboat, such as a fiberglass sailboat produced in the last 50 years, you should be able to install a roller furling system without much trouble or modification.
If you tell any good sailmaker the brand or type of furling system they will know what luff tape size to sew on. Common size is refered to as #6. They frequently install a UV cover during the conversion to protect the rolled up sail from the sun. It may not be a good idea to invest in a conversion if your sail is old.
The fact that most boats in the '70s and '80s had hank-on sails led to something of a roller furler binge in the '90s. Roller furlers have been standard on new boats for the last three-to-five years. Buying a furler requires the same philosophy as buying winches, the benefits of over-sizing make life easier.
Furling Furling Pull on Furling Line INSTALLATION SHEET Small Boat Furling 434/435 How It Works: To furl the jib, pull the furling line and the sail rolls up around its own luff. To unfurl, uncleat the furling line and pull the jib sheet. Sail with Luff Wire Required: Your sail must have a 1 x 19 counterlaid stainless steel wire
The bottom is a standard roller furler where the base of the drum unrolls to release the sail. When rolled back, the sail wraps from the base and is common for jib and genoa sails. The top down furler is for Code 0 and asymmetric spinnakers. These roll the sail from the top to the base, leaving the base free-floating and improving sail handling.
Oct 15, 2017. #7. The budget for this upgrade is approx. $2500 . Due to the age of the sails, travel costs, and cost of getting them modified for the roller furling system, I am factoring in a new sail as well as the cost of the furler into the equation. I have an overall budget of approx. $4000-45000 for the furler, headsail and a new mainsail.
This video explains how to hoist a jib on a furling system, including setting up the furling drum and pre-feeder device before raising the sail. I'll explai...
In this video I put the genoa jib on the roller furler on my 1092 Allied Princess Ketch.