Yachting Monthly
- Digital edition


How to: replace a halyard
- Theo Stocker
- November 1, 2020
Rubicon 3’s Rachael Sprot explains how to avoid losing the lines in the mast, whether you're replacing an old halyard for new or mousing the mast over winter
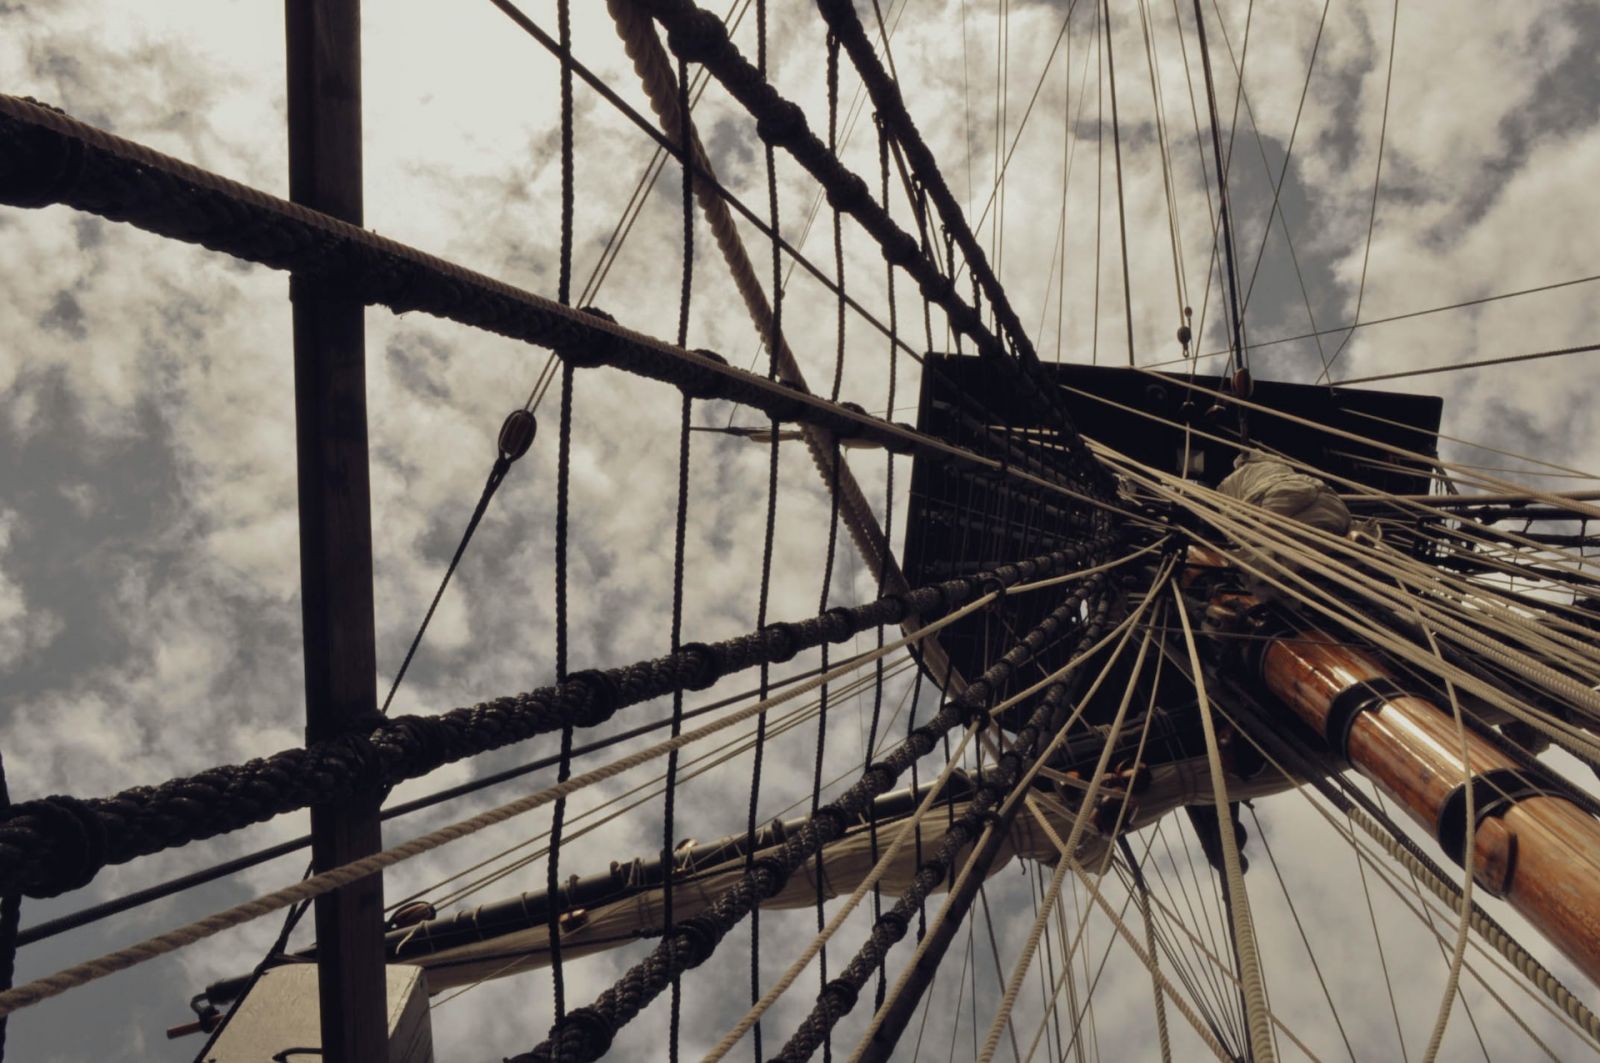
Halyards need taking out of the mast if you’re unstepping the mast or the line needs replacing. It is pretty straightforward, but there are a few steps to follow to make sure you don’t create more problems in the process. Replacing a failed halyard at sea is an entirely different matter, and we’re not covering that in this article. Halyards run up to the top of the mast and then back down inside. Sometimes they go down inside a channel, but usually they’re loose, often alongside cables for your lights and instruments.
Mousing line

It’s crucial they never get twisted, so it’s much safer to replace a halyard with a mousing line than it is to feed in a new halyard from scratch. It doesn’t matter too much what the mousing line is, as long as it’s strong and thin enough. It should be twice the length of your mast, plus enough to take it back to the cockpit if you’re leaving the mast up, or to tie back on itself if you’re lifting the mast out.
Pick the correct end from which to mouse the halyard. It’s best not to use the standing end that’s attached to the sails, as there are often fittings on this end. Start at the working cockpit end. You may even find that a flat loop has been spliced into the end of a braid-on-braid line to make this process easier.
Joining lines

Securely attaching the mousing line is key. If you’ve got heavy halyards and very narrow sheaves then sewing the lines together end-to-end is best. If you have lightweight halyards then tying the mousing line to the halyard tail with a rolling hitch, and then taping over it to cover any edges that could snag should be sufficient. Once tied, give the line a good pull to ensure everything is secure.

Work the line through

Flake out the mousing line in the cockpit so it can run freely, and secure the end so you don’t lose it. Pull through from the standing end, keeping the mousing line under control. If the line gets stuck, gently work the line back and forwards; sometimes the knot or join will need gentle encouragement to get through the sheave.
Make secure
With the halyard out, make one end of the mousing line secure to the base of the mast, and the other end either back to itself, or tied to a secure point in the cockpit. Finally, label each halyard as you go. It is easy to forget which is which and therefore make mistakes when re-rigging.

To re-mouse the halyards, flake out the halyard, attach the working end to the mousing line that comes from the masthead, and check they are secure, before pulling back through. Ensure you keep hold of the standing end so it doesn’t disappear to the top of the mast. You may need to manually work the line through the sheave at the bottom of the mast.

GJW Direct offers some of the most comprehensive and competitive boat insurance policies on the market. With more than 175 years in marine insurance, when you insure your yacht with us, you’re dealing with the boat insurance specialists, leaving you free to enjoy your time on the water.
With thanks to Bruce Jacobs and the experts at rubicon3adventure.com , the UK’s specialists in adventure sailing and training.
Please verify you are a human
Access to this page has been denied because we believe you are using automation tools to browse the website.
This may happen as a result of the following:
- Javascript is disabled or blocked by an extension (ad blockers for example)
- Your browser does not support cookies
Please make sure that Javascript and cookies are enabled on your browser and that you are not blocking them from loading.
Reference ID: bb09af5d-e2f1-11ee-9e2c-959396c78931
Powered by PerimeterX , Inc.
Home > Resources > Halyards, Sheets, and Lines: A Guide to Choosing and Maintaining Your Sailboat Rigging
Halyards, Sheets, and Lines: A Guide to Choosing and Maintaining Your Sailboat Rigging
11 May 2023
Ask Precision Sails , Hardware , Maintenance , Technical

How to Choose the Right Halyard/Sheet
When choosing a halyard for your sailboat, several factors come into play. These include the weight of the sail, the type of sail, the sailboat’s size, and the expected wind conditions. You should also consider the halyard’s stretch, which affects sail shape and performance. It is essential to choose a halyard that matches the load the sail will have on the line. Low-stretch halyards are ideal for racing and performance sailing, where every fraction of a knot counts.
Some Things to Consider when Choosing a Halyard or Sheet Include:
- Material: The material you choose for your line can affect its strength, durability, and stretch resistance.
- Diameter: The diameter of your halyard or sheet should be appropriate for the load the sail will apply to it and the size of your boat.
- Length: The length of your halyard or sheet should allow you to run your lines wherever they are needed, plus some extra for you to trim and tie off with.
- Attachment: The type of attachment you choose for your halyard or sheet can change depending on how you run your sheets and how the head of your sail is configured.
- Review Your Options: Making a decision about lines can be daunting, luckily Precision Sails has made it easy for you to pick your halyard or sheets by simplifying the process into two groups and pre-selecting the diameter, length, and attachment for your boat and line.
Here is a Quick Guide to Explain Material Choice:
The Precision Cruising series employs high-quality polyester lines, which are a good all-around option for starting and performing well. Polyester halyards and sheets are the most common and suitable for most sizes of sailboats, but they do stretch more than other lines like dyneema, spectra, or stirotex, which can affect sail shape and performance.
To address this, the Precision Performance series focuses on using stronger and stretch-resistant inner cores, making them ideal for racing sailboats that require high precision and tight tolerances. These lines are made of stirotex, which you may recognize by the name of spectra or dyneema. Stirotex is a chemically identical variation. The parent compound in these high-tension lines is HMPE. These lines are the strongest and least stretchy, making them the top choice for high-performance racing sailboats.
How to Maintain Your Halyards, Sheets, and Lines
Proper maintenance of your halyards is crucial for their longevity and reliability. Some tips for maintaining your halyards include:
Maintenance Checklist
- Regular inspection: Check your lines regularly for signs of wear, fraying, or damage.
- Cleaning: Clean your halyards and sheets periodically with soap and water to remove dirt and salt buildup.
- Lubrication: Lubricate your halyards and sheets with a silicone spray or dry lubricant to reduce friction and wear.
- Storage: When not in use, store your lines coiled neatly and out of direct sunlight if you can.
Signs of Wear – How to Inspect Your Lines
Lines that show obvious signs of deterioration must be discarded and replaced immediately. One of the most apparent and hazardous signs of wear on a line is a cut or damaged sheath that exposes the core. In such cases, it is important to retire the line immediately to prevent any further damage or potential failures.
Other signs may include hardness around the sheath or fuzziness. These signs may be particularly evident near the connection points or any areas of high friction. It’s also important to pay attention to any changes in the handling or feel of the line, as this may indicate internal damage or other issues that require attention.
A way to protect your investment is proper care and cleaning and avoiding the use of harsh chemicals or high-pressure washers, which can damage the fibers. This can be done by soaking them in a bucket of warm water with mild soap or detergent, then rinsing thoroughly and allowing them to air dry. This helps to remove any salt, dirt, or grime that may have accumulated, which can cause premature wear and tear if left unchecked.
A way to visualize this is to envision dirt particles getting trapped between the fibers of the line and causing small tears in the weave. When the line is put under tension, these dirt particles act like miniature saw blades, gradually weakening the line over time and potentially leading to catastrophic failures. Therefore, regular cleaning and maintenance of your lines, including halyards and sheets, is essential to ensure their longevity and reliability and to avoid any dangerous situations while out on the water.
Inspecting Your Lines for Damage
Pro tip: Usage level and proper care is a more important indicator than age
Let’s dispel some common misconceptions about when to retire a sailboat line. For example, some sailors may retire a line based solely on its age, rather than its condition. We want to stress the importance of inspecting lines regularly and retiring them when signs of wear or damage are detected, regardless of their age. Here’s a helpful checklist so you know what to look for on your lines.
Inspection Checklist
- Check for visual signs of wear and tear, such as fraying or abrasions, which can weaken the line and compromise its strength. Be sure to examine the line thoroughly, paying particular attention to any areas of high friction or wear.
- Run your hands along the length of the line, feeling for any hard or soft spots, which can indicate internal damage or wear. If you detect any abnormalities, consider retiring the line or seeking professional advice.
- Look for any signs of UV damage, which can cause the line to degrade over time. This is particularly important for lines that are exposed to sunlight for extended periods.
- Check the diameter of the line, ensuring that it matches the manufacturer’s specifications. Any significant deviations may indicate that the line has been stretched or otherwise damaged.
- Examine the connection points, including splices and knots, ensuring that they are secure and free from any signs of wear or damage.
To recap, lines, halyards, and sheets are an essential component of any sailing vessel, and choosing the right halyard for your boat is a necessary part of outfitting your vessel. Regular maintenance and proper care of your halyards can ensure their longevity and reliability. We hope this article has provided valuable insights into halyards, sheets, and lines, though we understand that it may seem like a lot of information.
If you feel overwhelmed by the amount of information, don’t worry, we have simplified the process of finding the right line for your boat. Simply fill out a form , and we will send you the best fit and our professional opinion based on the type of sailing you plan on doing. If you have any questions, comments, or wish to order lines from our sail consultants, please don’t hesitate to contact us.
FAQ’s
Q: What is a sailboat halyard?
A: Halyards are ropes or lines used to hoist sails, flags, and other equipment on a boat.
Q: What is a sailboat sheet?
A: A sailboat sheet is a line that is attached to the lower corner of a sail and used to control its position relative to the wind. The sheet is usually led through a block or a series of blocks, which allow the sailor to adjust the sail’s angle and trim it for maximum efficiency. In addition to controlling the sail’s position, the sheet also helps to control the sail’s shape and tension, which can affect the boat’s speed and handling.
Q: Can different types of materials be used to make halyards, sheets, and lines?
A: Yes, lines can be made of various materials such as polyester, nylon, stirotex, and dyneema. Each material has its own strengths and weaknesses, and the choice of material depends on the type of sailing and personal preference.
Q: How do I determine the length of halyard I need for my sailboat?
A: It’s important to consult with a sail consultant or experienced sailor to ensure you get the correct length. The length of halyard you need will depend on the height of your mast, the type and size of the sail you will be using, and where you plan on trimming your sails. Calculating the length is more complex than simply taking a guess, not to worry though, we have made it easy. Give us a call or fill out our form to let our system crunch the numbers for you.
Q: How do I know if my halyard or sheets are due for replacement?
A: Look for signs of wear and tear such as fraying, kinking, or stretching. If the line feels stiff or brittle, it may be time to replace it. Additionally, if you notice any damage to the sheave or winch, this may also indicate the need for a replacement. See the checklist above for detailed instructions.
Q: Are there any safety precautions I should take when using halyards and sheets?
A: Yes, it’s important to properly understand how to use a winch and don’t wrap the rope around your arm or fingers. Always be aware of your surroundings and avoid getting entangled in halyards or other lines. It’s also recommended to have a backup halyard in case of failure or emergency situations.
Q: How can halyards affect the performance of a sailboat?
A: The type of halyard used can have an impact on the performance of the sailboat. For instance, a stretchy halyard may cause the sail to lose its shape by releasing the tension on the sail over time, while a stretch-resistant halyard can help the sail maintain its shape in strong winds.
Q: Is it possible to splice or repair a damaged halyard or sheet?
A: It is possible to splice or repair a damaged halyard, depending on the extent of the damage and the material of the halyard. However, it’s essential to have the repair done by a professional or experienced sailor to ensure the halyard’s continued reliability and safety.
Q: How often should I replace my lines?
A: The lifespan of halyards and sheets can vary depending on factors such as usage, exposure to weather, and material. It’s recommended to regularly inspect your lines for wear and tear and replace them as needed. Condition is a much stronger indicator than age. Assuming light use and good condition, some materials like Stirotex have a longer lifespan, other materials may need to be replaced more often. In general, halyards and sheets should be replaced every 3-5 years for optimal safety and efficiency.
Related Posts

Full Battens vs Partial Battens vs 2 Full plus 2 Partial Battens
Full Battens VS Partial Battens At
Precision Sails we are asked every day during our customer quote consultation “Should I choose Full Battens or Partial Battens for my new mainsail?” Whether you are cruising or racing you will need to examine the pros and cons of adding full battens to your main sail.Positive Aspects of Full […]

My Need for Cruising Speed Demands a Great Suit of Sails
My Need for Cruising Speed Demands a Great Suit of SailsI like to sail fast mostly in the heavy winds that Lake Ontario throws.

How to Fold a Sail (Mainsail or Headsail) For safe Storage
Knowing how to fold a sail correctly will make your sails last longer and make them easier to set. Replacement sails are an investment and folding them properly is important to their longevity.
" * " indicates required fields
- Skip to main content
- Skip to primary sidebar
- Skip to footer
The Boat Galley
making boat life better

Installing a New Halyard
Published on May 7, 2018 ; last updated on June 12, 2020 by Carolyn Shearlock
Installing a new halyard on a sailboat is pretty simple . . . and no, you don’t have to go up the mast as long as the old one is still there. It doesn’t even have to be in good shape (as you’d want it if you were going to use it to go aloft). It just has to be there.
Since we had to replace our spinnaker halyard this past weekend, I took photos of how we did it. Literally less than 10 minutes, and a big part of that was because I was taking pictures. It would have been under 5 minutes otherwise.
Basically, all you have to do is securely fasten the new halyard to the old, then use the old to pull the new into place. The key is securely. Just taping it together won’t do. And you obviously can’t tie a know in it and expect it to pass through the sheave. So how do you do it?
If the old halyard has a shackle on the “sail” end, start by cutting it off (we did this and had it spliced onto the new halyard — read about our splicing here ).
Then use a 8- to 10-inch piece of Monel wire or sail twine to “stitch” the bitter end of the new halyard to the “sail” end of the old halyard.

If using wire, wrap it tightly around the line so it won’t catch on the fittings on the top of the mast or snag another halyard inside the mast.

Start pulling gently down on the old halyard as if hoisting the sail. Make sure the halyards aren’t fouled and don’t have knots in them. If there’s a second person to help, they can hold the other end of the halyard away from the mast and any protrusions, although it usually won’t snag.

And check out our other courses and products

Find this helpful? Share and save:
- Facebook 380
- Pinterest 255
Reader Interactions
May 7, 2018 at 8:27 am
I have always just electrical tape to connect the two lines. I cut an angle in each line. Then I use the tape. I run the tape at lease 6 inches on both sides of the cut. I learn this from tapeing electrical wire to a fish. Oh yes I only have 3 M tape on the no cheap stuff
Carolyn Shearlock says
May 7, 2018 at 10:19 am
I’m always afraid of just using tape in case I have to tug a bit to get it through the sheave or past other things in the mast.
May 8, 2018 at 8:31 am
Good idea on the monel wire and something else to maybe consider is using this technique if you wish to store or “hide” you halyards if you leave you boat for long periods …….. take a length of cheap nylon cord and attach it to the halyard (using this Boat Galley technique) and then “replace” the halyard with the cheap cord for the storage season to prevent UV damage etc to a good halyard while on the hard or moored somewhere.
May 8, 2018 at 8:36 am
Just be careful as some cheap line is VERY susceptible to UV damage and could break in just one summer of exposure.
Tyler Heerwagen says
February 8, 2019 at 1:02 pm
How do you calculate how long your Halyard needs to be?
February 8, 2019 at 1:07 pm
Assuming you know the height of the mast from your boat specs, you can take your existing halyard and see how much longer or shorter it is than twice the height of the mast. Always err on the side of getting it longer than you think you need — it’s better to pay for 5 feet extra than to not get it long enough and have to buy a second piece.
February 8, 2019 at 1:11 pm
Thank you, pretty straightforward for sure, just checking!
Liah Hunter says
March 2, 2020 at 8:27 am
We have a drum of super cheap rope from the hardware store – blinds cord. That is thin enough to bowline through the cover taper on the cockpit end of the line. We can then give it a fair tug through the mast if necessary. Once we have the entire halyard on deck and the cheap 3mm stuff in the mast (and through jammers and fairleads too) we can get an exact replica cut, then we can splice on chafe protection over any vulnerable parts by looking at the damage to the old halyard. Then we repeat the whole thing in reverse, pulling the new halyard back through and putting the hardware shop rope away for the next time.
Leave a Reply Cancel reply
Your email address will not be published. Required fields are marked *
Each week you’ll get:
• Tips from Carolyn • New articles & podcasts • Popular articles you may have missed • Totally FREE – one email a week
SUBSCRIBE NOW
- Forums New posts Unanswered threads Register Top Posts Email
- What's new New posts New Posts (legacy) Latest activity New media
- Media New media New comments
- Boat Info Downloads Weekly Quiz Topic FAQ 10000boatnames.com
- Classifieds Sell Your Boat Used Gear for Sale
- Parts General Marine Parts Hunter Beneteau Catalina MacGregor Oday
- Help Terms of Use Monday Mail Subscribe Monday Mail Unsubscribe
How to replace lost halyard?
- Thread starter walmsleyc
- Start date May 16, 2008
- Forums for All Owners
- Ask All Sailors

Ok ... I've got a fractionally rigged Hunter Legend 35. I was trying to pull a messenger through the mast on the old main halyard, and they parted in the process, and I now no longer have anything running up the mast to the very top. I still have a spin a jib halyard, but they terminate ~5-6 feet down from the mast head. Does anyone have any creative suggestion to getting a new halyard back in without dropping the mast? Assuming I'll have to do it with the mast down, do people have any helpful hints on how to pull a new halyard through?

Stan Breaux
Someone on this board always suggests... 1. Find a bridge that you can get close to and then work on it from the bridge. 2. Find a buddy with a tall mast, too (although I never coudl figure out how this woudl work.
Got a high place? Is there a high place that you can motor up to? Someplace where you can get access to the mast? One of local lakes has an on-the-water mast crane, with something like that you could go up the crane in a bosun chair to the mast head. Maybe a building with a balcony that overhangs the water? Would boat-to boat work? Go up the mast of the other boat and heel yours over with the spin halyard. You will have to think long and hard about the safety of whatever solution you find - but there may be something around that would work. Just ideas, I take the mast down, but my mast is only 30 feet tall. OC

Rent lift Last year a friend rented a Gini which is a lift they use for construction work. He went in with a few people and they shared the cost. It was about $275.00 for a full day. They deliverd it to the Marina and picked it up. After it was all said and done about five people used it and the cost came down more. They pulled the boats to the bulkhead and up they went. Hope this helps. Joe
Old Rigging Chris - Last year I had my mast down and re-routed my halyards to run inside the mast. I had exit plates installed over the exit holes drilled into the mast that were about 6-8 feet above the base of the mast. It was difficult to route the halyards up through these holes being that they were 6-8 feet below the bottom of the mast. I also replaced the standing rigging that spring too so I had an old shroud in my garage. I used this to snake a messenger line up through the exit plate and north all the way to the mast head. I am not sure what the situation at the mast head is like but perhaps you could get the shroud close enough to where the halyard exists the masthead - and you could grab it. Its was a little different for me as it was on saw horses. This all assumes you have an old shroud around, a helper to snake it up and your able to get to the top of the mast. Your spin halyard ends though 5-6 feet below so that might be a problem unless your masthead is open and you could somehow grab the shroud with a boat-hook or something once it comes through.... Just some creative suggestions... Rob

The way I do it My mast is 55'. The way I go up, when absolutely necessary, is to use the boom vang. I have 200' of 1/2 nylon reserved just for this purpose. I attach the rig to the spinnaker halyard, and haul it to the top. Then get in the bosuns chair and haul my skinny little but up. Have the main halyard attached as a back up, with someone tending that line. BE CAREFUL I fell from the spreaders a couple of years ago, doing this very same thing without a backup. There was a sharp edge up there somewhere, and I was up for a pretty long time installing new spreader lights. Swinging back and forth, and pretty much enjoying myselfr. The sharp edge, still haven't found it, cut the line, and I came down in a hurry. I can tell you from first hand experience that the fall isn't bad, but the sudden stop at the end is a bitch.
Vang I have a vang with a 4-1 ratio, so it isn't any big problem pulling myself up. Is actually quicker than you would think. PLEASE, HOWEVER YOU GO UP, BE CAREFUL

Find a bridge? The water near the bridge better be smooth as glass with no wakes. One good bounce against the bridge and your mast will come down. Good luck SH
Just say no Just say no to the bridge idea. I have heard it suggested lots of times, but don't remember ever seeing a post where someone has actually done it. First, you are going to have to find a bridge the proper height, no easy feat. Then manage to get the boat secured so it won't move. Then you will have to get from the boat up on the bridge. Of course the water will have to be dead calm. And lastly, whatever you do will have to be done while leaning over a railing, hoping a passing car doesn't find you, and no boats come bye making a even small wake. Too many things that can go wrong, and when they can they will.

Is the halyard still there or did it drop down the mast? If the halyard is still there and there is some "loop-like" structure on it you could get the boat hook out and go up the mast on the jib halyard. Snag the main and be sure to get pitcures. I have done this once and it did a number on my back but I was successful. The boat was in the water so I was properly motiveted to save $$$$ with a lot of elbo grease.

sailortonyb Allied Mis
Ever hear of Mast Climbers? or something like that. Its similar to mountain climbing gear. You actually climb a rope using your legs for power lifting. If you can get to within 6 feet of the top, then transfer over to the topping lift and go higher. A rigger would know how to do it. I'm too lazy to explain and if you never did it before, you may get killed in the process. A person used to climbing rigging can do it safely. Tony B
The yard may have a cherry picker. Chris: Check with some of the yards they may have a cherry picker. They can hoist someone up there and drop a line down the mast. Do you have exit sheaves at the bottom of the mast? Other than this, you may be stuck with dropping the stick!

Here is something creative that might actually work. Try tying a wad of paper or a small paper cone to a light messenger chord somethin like nylon thread. introduce it through the the bottom and blow it up with a blast of air. They use that technique for pulling cable through the underground computer conduit at school. That thing snaked through about 100' of conduit. Frank
Climb up You could buy a mast ladder. The steps slide right into the sail track. You could use the spin halyard for a belay line.
I did this a couple of months ago It took several trips up and down to get it all done because of the fact that my topping lift and main halyard were crossed combined with the fact that I could not get the little fishing weight to pass over the top of the block. Check first if the lines are crossed. My boat has the topping lift exiting the mast on the starboard side. The topping lift should exit the top of the mast through the pulley on that same side. First, use the topping lift as a messenger to pull another replacement line to use for a halyard. My topping lift was too short to use as a normal halyard. It is strong enough but hard to grip. If your lines are crossed like mine were, just use the main halyard and you can later fish it out the base of the mast. If not, pull it through a snatch block at the base of the mast. After the snatch block, it passes through the starboard jib block and thence to the starboard winch. I attached the free end of the line to the base of the mast. Then I tried Jumar ascenders with a climbing harness but it was too dicey on the boat because of it moving around too much. Then I tried pulling the halyard very tight and that was a little better. I tried using a sail slide as well to keep from swinging around and that helped a lot. You can use the old method by having a friend winch you up there but you may help a little by climbing when you can. I got tired from helping and it made my hands shakey and cold when I finally got up there so keep that in mind. Also, I was not close enough to the mast head on my first trip to reach everything and had to redo my rig on the second trip to get higher. Even so, you will be working over your head and it is difficult to hang on, support yourself and fish the weight too. To get the fishing weight to fall over the top of the mast pulley, I used a short length of straw with the fishing line passed through it and that worked to push it over on my fourth trip. It sounds simple but you will see what I mean when you get up there. The pulley is much smaller than I expected and my fingers would not fit into the space where the line goes. I also used the second jib halyard attached to a long line (I used anchor rode) which I cleated to the next slip over and tightened to make the boat lean to one side and keep the weight on the proper side and keep it from swinging around other lines inside the mast. I used a short stiff electrical wire to hook the fishing line when it got to the bottom. It also may help to push the forward halyards against the front of the mast using the topping lift hole for access. A mast ladder or four part block might also work to get you up there but I did not have a ladder and the block hoist was too tiring for me. While I was up there, I replaced my broken Windex with one of the new ones with the spike to keep the birds off of it. It was seriously difficult to get it out. The threaded base was literally glued in place from corrosion. A hammer would not get it out so I took out the set screw and replaced only the upper portion. That is all I can think of but if any of this is confusing, ask again. Do not forget to use a safety line around the mast that will stop you at the next lower spreader. A Prussik knot will work too.
go buy a 100 foot fishtape all tho it may take a few tries to hit the right spot. Mast Mate however sounds like the best overall solution. Another possibility is a lift truck as used to replace light bulbs in parking lots/signs.

This might work If your fractional rig is like mine (1988 33.5), you have the main halyard and the topping lift as the only two lines that go all the way to the mast head. A broken sheave and jammed halyard forced me to use the remaining line to hoist a Mast Mate to the top. A bosons chair could also be used, but may not give you the height you need to work the top of the mast head. I have a ZSpar mast which has a removable cap on the masthead. Once removed you can drop a small weighted line down the mast and fish it out at the bottom. A long electricians fish-tape might also work. If you use a small weighted line you will have to securely attach and fish in a larger messenger line and then fish in the new halyard. Sewing the new halyard to the messenger line with whipping twine and feeding the new halyard it slowly works best. Best of luck

Warren Milberg
I'm not familiar with the Hunter Legend 35, but I am familiar with money, the all purpose tool that always works. Contact your local or mobile rigging shop and see what they say and how much they would charge to reeve you a new halyard. Most rigging shops do this kind of thing all the time -- and without the radical surgery and cost of unstepping a mast.
- This site uses cookies to help personalise content, tailor your experience and to keep you logged in if you register. By continuing to use this site, you are consenting to our use of cookies. Accept Learn more…

- Forum Listing
- Marketplace
- Advanced Search
- About The Boat
- Gear & Maintenance
- SailNet is a forum community dedicated to Sailing enthusiasts. Come join the discussion about sailing, modifications, classifieds, troubleshooting, repairs, reviews, maintenance, and more!
Replacing Halyards

- Add to quote
Being new to owning a boat that I can''t unstep mast on easily I''m a little worried about replacing halyards. My thought is I would "whip" or (couple clove hitches) a short, small diameter messenger line to the end (sail end), whip messenger to new line and pull back thru. I believe usual method is to butt tape the ends together but I don’t feel comfortable with that unless I was to sew a few stitches of stout thread between them also. Old halyards have the shackles tied on with bowline on a bight, I plan to have lines made with hardware spliced on, that seems stronger and “neater” to me, am I missing something?
You have it. Personally I tape the messenger line to the free end of the halyard. I find it runs smoothly thru the sheaves. My hardware is spliced on.
I just simply tie the end of the messenger line to the existing halyard by opening up a hole in the end with my fid, then tying a long boline. never had a prob with this method. Splicing is the only way to go. a knot can reduce the strength of the halyard by a large percentage. make sure that whoever does your splicing uses a core-to-core splice so that you have 100% of the line strength.

I typically butt stitch the ends of the halyard and messenger lines together and then put masking tape over the joint to smooth it. When I was working as rigger and over the years, I replaced a lot of halyards and it was amazing what could and does go wrong. I would advise against Mr. Christian''s (and I am not picking on Mr. Christian per se) suggestion doing a tuck through the line and tieing the messenger line without taping over the loop and knot. That was a very traditional way to re-run a halyard and that is the technique that we used to when I first landed the job as a rigger BUT we had a loop of line catch on what we speculated was the end of a bolt or screw and we were not able to free it for days. When we did free the halyard the halard went one way and the messenger line went the other so we were forced to fish the halyard down the mast. The second point is about tieing vs splicing. While a splice are nice, it really is not necessary and may not be the best idea for distance crruising. Most halyards are sized for minimal stretch, adequate life after chafe, and for comfort in gripping rather than working load capacity which means that they have many times (typically 3 to 4 times) the load capacity required to break the line as compared to the actual loads that they expeience. Knots typically reduce the strength of the connection by 20% to 50% depending on the type of line and type of knot, so the lost strength at the knot is negligable. What is nice about using a knot vs a splice is that you can easily relocate the halyard attachment point at sea as the biggest source of chafe is in the first couple feet of the halyard where it passes through the masthead sheave. If you do tie on the halyard shackle, it and you are using a double braided line, it is important to stitch on a whipping, rather than simply burn the ends of the line so that the core can''t retract into the shell. With double braid I typically add a sacrifical cover at high chafe areas and at the halyard locks of cleats. To do this I buy some line (any cheap double braid will do) in the next larger size, strip the core and slide lengths of the cover over the line until they are centered on the high chafe area. I then split the ends of the sacrificial cover and tuck the ends of the sacrificial cover into the cover of the halyard and stitch it in place. I then pull both the halyard and the sacrificial cover tight and do the same at the other end. This greatly adds to the life span of the cover and reduces slipping (experially with smaller diameter high tech line)at the stoppers and winches. Respectfully, Jeff
Good topic. I have a question regarding halyard "Technique". My masthead is a tapered rig, and has three closely spaced WIRE sheeves facing forward, Port, Stbd, and Center. The lack of space precludes me from using any of the newer high-tech solutions. The line''s diameters are too big for the sheeves for the loadings on a 37'' masthead rigged IOR race boat. My question is this: The traditional method of using a wire hayard is to get two or more turns on a winch before you go to the splice, hence the 4 small winches at the mast partner. This necessitates a person going to the cabin top to raise and lower sails, two if you are racing and have a crew "Jumping" the halyard at mark roundings. Weight forward never a good thing in the squirlly IOR desings, and it gets crowded. I am looking to replace my three forward halyards, and bring the tails to SpinLocks on the cabin top near the cockpit. A pair of self tailing winches behind port and stbd banks of three locks on either side of the companionway. Can I trust the wire/rope splice? How much can it hold and are there any techniques to improve the strength of the splice? Thanks for any and all input.
We raced and cruised for many years on a 36'' boat with wire/rope halyards as you propose, with the rope tails led to a bank of stoppers on the cabintop so the splices were fully loaded. Never saw any sign of distress. These were commercial tapered splices. Is there any way you can fit sheaves to take the new, small diameter Spectra lines? These can be spliced to a larger tail (and/or sleeved) so the stopper will hold them. Lighter - and no nasty meathooks.
Jeff, what would you do with the parallel core construction line (sta set x)? I guess stitch on a whipping will not work? Max.
I think that a stitch on whipping would work on Staset X. The whipping clamps the core to the cover and the stitching holds the whipping in place. If in doubt you can also backsplice the core and cover before doing the whipping. Jeff
My local rigger just shook his head and said "How about a new stick? For only...." The mast is over 65'' base to mast head, and tapers dramatically down. This was the early days of the "Bendy" masthead rigged boats. The sheeves are closely spaced, between sections of aluminum reinforcements. They are 1/4" wide, just big enough for the wire, but no way a rope sheeve will fit. I guess I will trust the wire/rope splice for now, and continue to advise all foredeck crew to make sure they always wear gloves when handling the wire.
I have the same situation you do. ''82 Dehler DB1 3/4 ton IOR boat, very tapered fractional bendy mast, and a bank of 3 sheaves for the center jib and 2 wing wire halyards. All the jib halyards were fraying badly and needed replacing. I checked the sheaves and they are not the U-channel groove style suitable for only wire, nor are they abraded badly... and my 8mm (5/16") Validator II replacement line appears to fit nearly perfectly in them... which means it is probably larger than optimal size for that sheave diameter. The old wire halyards were 3/16". Still, I am going to run it for this summer season and see how things go. I tied on my shackles w/ buntline hitches, the line strength is rated at over twice what the old (and fraying) wire was, so I anticipate no problems with that. I am not stripping the cover, mainly for longevity but also for added protection since i''m not absolutely certain there will be no chafe issues.
- ?
- 173.7K members
Top Contributors this Month


Boat Sailor
Halyard sailing: unlocking the secrets to smooth sailing.

Ahoy there, fellow sailing enthusiasts! Today, I’m excited to dive deep into the world of halyard sailing, a crucial aspect of sailing that often goes overlooked. As someone who has spent countless hours on the water, I can vouch for the significance of a well-maintained halyard system in optimizing your sailing experience. So, hop aboard as we hoist the sails and explore the ins and outs of halyard sailing!
Introduction to Halyard Sailing
As you embark on your sailing journey, understanding the fundamentals of halyards becomes paramount. These seemingly ordinary ropes play a pivotal role in raising and lowering sails, directly impacting your vessel’s performance and safety. But fear not, we’re here to guide you through the enchanting realm of halyard sailing!
Understanding Halyards
What are halyards.
Halyards are ropes or lines used to hoist and lower sails, allowing you to harness the wind’s power and set your course. These ropes are the unsung heroes that transform the still canvas into billowing sails, propelling your boat forward.
Types of Halyards
There are various halyards available, each catering to different sailing needs. From wire halyards to modern synthetic lines, understanding their unique characteristics empowers you to make informed choices.
Materials Used for Halyards
The choice of halyard material can significantly impact its strength, durability, and performance. We’ll explore the pros and cons of different materials, helping you decide what suits your sailing style best.
Importance of Proper Halyard Setup

Safety and Performance
A well-maintained halyard system ensures not only a smooth sailing experience but also enhances your safety on the water. We’ll delve into the relationship between halyards and safety, so you can navigate with confidence.
Avoiding Wear and Tear
Halyards are subject to wear over time due to constant use and exposure to the elements. By understanding how to minimize wear, you can prolong their lifespan and save on replacement costs.
Enhancing Sail Control
Efficient halyard handling allows for precise sail control, empowering you to adapt to changing weather conditions and achieve optimal performance. Let’s unravel the secrets of harnessing the wind’s full potential.
Choosing the Right Halyard for Your Sailboat

Consider the Boat Type
The type of boat you own plays a vital role in determining the appropriate halyard. Whether you’re cruising on a monohull or flying on a catamaran , we’ve got you covered.
Sailing Conditions
Adapting to varying weather conditions demands the right halyard choice. Discover how to match halyards to different wind strengths and sea states, ensuring a pleasurable sail in all circumstances.
Sail Material and Size
The type of sails you use influences the halyard’s requirements. We’ll explore the connection between sail material, size, and halyard selection to optimize your sailboat’s performance.
Maintaining and Inspecting Halyards
Regular cleaning and lubrication.
Proper halyard maintenance involves regular cleaning and lubrication to prevent dirt buildup and maintain smooth operation. Learn the best practices for keeping your halyards in top-notch condition.
Identifying Signs of Wear
Vigilance is key to spotting early signs of halyard wear. We’ll walk you through common indicators, ensuring you catch any issues before they escalate into a larger problem.
Replacing Halyards
When the time comes to bid farewell to your trusty halyards, having a seamless replacement process can get you back on the water swiftly. We’ll provide guidance on when and how to replace aging halyards.
Best Practices for Halyard Handling
Raising and lowering sails.
Mastering the art of raising and lowering sails ensures a safe and efficient sailing experience. Discover techniques to execute these maneuvers effortlessly.
Preventing Tangles and Snags
Tangled halyards can quickly turn a leisurely sail into a frustrating affair. Unravel the mysteries of tangle prevention and maintain a stress-free sailing journey.
Coiling and Storing Halyards
A well-coiled halyard is a sailor’s best friend. Learn how to coil and store halyards properly, preventing tangles and extending their lifespan.
Upgrading Halyard Systems
Modern halyard technologies.
The world of sailing continues to evolve, and halyard technology is no exception. Explore the latest innovations that can take your sailing experience to the next level.
Benefits of Upgrading
Upgrading your halyard system can be a game-changer, but understanding the benefits is crucial before making the investment. We’ll discuss the advantages that come with modernizing your halyards.
Cost-Effectiveness
Is upgrading halyards worth the investment? We’ll weigh the costs against the benefits, helping you make an informed decision based on your sailing needs.
Troubleshooting Halyard Issues
Empower yourself with DIY halyard fixes that can save you time and money. Discover quick and easy solutions to common halyard challenges.
When to Seek Professional Help
While some issues can be tackled on your own, others may require professional expertise. Know when it’s time to call in the experts for halyard-related matters.
Enhancing Performance with Halyard Tuning
Tuning for different conditions.
Adapting your halyard setup to different wind and sea conditions can optimize your boat’s performance. Learn how to fine-tune your halyards for any sailing scenario.
Improving Sail Shape
Halyard tension plays a vital role in achieving the desired sail shape. Unlock the secrets of sail shape optimization for maximum speed and efficiency.
Optimizing Speed and Efficiency
Halyard tuning directly affects your boat’s speed and overall efficiency.
Tips for Halyard Care and Longevity
Protecting halyards from uv damage.
UV rays can take a toll on halyard strength and integrity. Discover how to shield your halyards from the sun’s harmful effects.
Avoiding Overloading
Overloading halyards can lead to premature wear and failure. Learn how to distribute loads properly and ensure your halyards stand the test of time.
Storing Halyards Properly
Proper halyard storage during offseason is crucial for their longevity. We’ll guide you through the best practices for storing halyards when they’re not in use.
Frequently Asked Questions
What’s the lifespan of a typical halyard.
Halyard lifespan can vary depending on several factors, such as material, usage, and maintenance. Generally, a well-maintained halyard can last anywhere from 3 to 10 years. Regular inspections and timely replacements can prolong their lifespan.
Can I use a rope halyard for my large sailboat?
Using a rope halyard for a large sailboat is possible, but it’s crucial to choose the right type of rope and ensure it has adequate strength to handle the loads. Consider the sail’s size, boat type, and sailing conditions before making a decision.
How do I know if my halyards need replacement?
Signs of wear, such as fraying, discoloration, or stiffness, may indicate that it’s time to replace your halyards. Additionally, if you notice reduced performance or difficulty in raising or lowering sails, it’s best to inspect the halyards thoroughly and consider replacement.
Can I use the same halyard for different sails?
While it’s possible to use the same halyard for different sails, it may not always be ideal. Different sails often have unique requirements in terms of tension and halyard length. It’s recommended to have dedicated halyards for each sail to ensure optimal performance.
How often should I inspect my halyards?
Regular inspections are essential to catch any signs of wear or damage early on. It’s advisable to inspect your halyards before and after every sailing season, and also periodically throughout the sailing season, especially after experiencing rough weather conditions.

Michael Thompson
Embarking on a lifelong love affair with the sea, I found solace and exhilaration in the art of sailing. From navigating treacherous waters to harnessing the wind's untamed power, my passion has evolved into a mission to inspire others. Join me on a voyage of discovery as we explore the vast horizons of sailing's timeless allure.
More to Explore

Sail Boat Trailers: Your Guide to Safe and Convenient Transportation

Sail Boat Decor: Enhancing Your Nautical Oasis

Keel Sailing Boat: Navigating the Seas with Stability
Average Cost to Replace Running Rigging (with Examples)
Replacing the running rigging is a crucial part of the upkeep of your sailboat. Its cost can vary, mainly depending on the size of your boat, the type of lines used, and whether you opt for professional installation or take on the project yourself. In this article, we will discuss some examples to give you a better understanding of what you may be looking to spend on running rigging replacement.
For a 30-foot sailboat, the cost to replace a main halyard can be around $500. The estimated cost of replacing your boat's running rigging with sheets is around $1,700–$2,000+. For an average 40-foot boat, you can expect to pay around $4,000 for wire rigging replacement, which may include control lines.
The average maintenance cost for boats under 30 feet is around $255 per month, or just under $3,000 per year, so you may want to plan for periodic rigging replacement. This way, you can avoid unexpected expenses and maintain your sailboat's performance and safety.
- Replacing the running rigging on your sailboat can be a necessary expense, but also an investment in safety and performance.
- Timely replacement of your sailboat's running rigging not only ensures a smooth sailing experience but also prevents costly scenarios such as having to hire a rigger to go up your mast to replace a broken halyard.
- Sta-set-x might be a suitable option for halyards as it has less stretch compared to other materials and only costs a few pennies more than regular sta-set.
- Make sure to include other additional expenses (like shiv replacement) if needed when estimating the cost.

On this page:
Average cost to replace running rigging, cost breakdown by rigging type, factors affecting replacement cost, ways to save on replacement costs, understanding running rigging replacement, when to replace running rigging.
In this section, we'll cover the average costs associated with replacing running rigging, focusing on different materials and professional services.
Dyneema lines offer a long-lasting solution
Dyneema lines are known for their strength, durability, and lightweight nature. They can be more expensive than other options, but they offer a long-lasting solution. The cost of replacing running rigging with Dyneema lines can be:
Keep in mind that pricing can vary based on the quality and brand of the lines.
Polyester lines offer a good balance between strength and handling
If you're looking for a more budget-friendly option, consider using double braid polyester lines. They are more affordable than Dyneema but still offer a good balance between strength and handling. The cost of polyester lines can be:
Wire rope for replacing running rigging
For specific applications like certain types of forestay and backstay, you might require wire rope. The cost of stainless steel wire rope varies depending on the diameter and type.
Basic materials cost for your running rigging
As an example, let's assume you're replacing all the running rigging for a 30-foot sailboat with polyester lines. Your total basic material cost could be around $180–300 with approximately 200 feet of line (main halyard, jib halyard , sheets, etc.).
Professional services cost to replace your running rigging
If you decide to hire a professional rigger, the service fees might increase the overall cost. For example, to replace the main halyard on a 30-foot sloop, a professional rigger may charge close to $500. Labor rates can vary, so it's recommended to get quotes from multiple riggers in your area to find the best deal.
Here's an overview table with the cost to replace rigging for different boat and rig types.
Below, we will break down the average cost of replacing running rigging for your sailboat, with examples for each type of rigging: Halyards, Sheets, and Control Lines.
Halyard replacement costs vary depending on the length, material, and quality of the line you choose
Replacing halyards can vary in cost depending on the length and material. For instance, a basic double braid polyester halyard for a 30-foot sailboat may cost around $500.
For a standard 30-foot sailboat, you can expect the cost to be around $500 for the main halyard. Keep in mind, this estimate includes installation by a professional rigger. If you opt to replace it yourself, the price might be lower. It is essential to research the specific halyards your boat requires and compare prices from different retailers to find the best deal.
Sheet replacement costs will depend on the size, material, and quality of the line
Sheets are essential for controlling sails, and their replacement cost also depends on length, material, and whether you're doing the work yourself or hiring a professional. Here are some average costs for different types of sheets:
A common material for sheets on smaller sailboats is a double braid polyester line. The estimated cost of replacing your boat's running rigging with this material is around $1,700–$2,000+ for a 30-foot sailboat. This cost includes hiring a professional to complete the task. Keep in mind that if you are comfortable replacing the sheets yourself, the overall cost might be lower. As with halyards, research your specific needs and compare prices from different retailers.
Control line replacement costs will vary depending on your sailboat's configuration
Control lines cover a wide range of rigging elements, each with different cost considerations. Some common control lines and their respective average costs include:
Control lines are often replaced with materials similar to those used for sheets, like double braid polyester. Unlike halyards and sheets, control lines are specific to the control systems used on your boat, such as traveler, vang, or furling systems, so the costs will vary depending on your sailboat's configuration. For an average 40-foot boat, you can expect to pay around $4,000 for wire rigging replacement, which may include control lines. It's crucial to understand the control lines you need to replace and their specifications before sourcing the best prices and materials for the job.
Material and quality of the rigging components
Higher-quality materials, such as Sta-Set-X , are more durable and offer less stretch, which translates to a slightly higher price. On the other hand, more affordable materials might not provide the same level of performance or longevity, requiring more frequent replacements.
Boat size impacts the amount of running rigging you'll need
A larger vessel requires more line, sheet, and other components, increasing the overall cost of replacement. For example, replacing the standing rigging on a sailboat can cost around $4,000 every ten years .
Labor charges when replacing running rigging
If you choose to hire professional help to undertake the project, you can expect to pay for their time and expertise. Labor costs vary by region and can also depend on the complexity of your boat's rigging system.
When it comes to replacing your sailboat's running rigging , there are a few ways to save money without sacrificing quality. By following these tips, you can ensure that you get the best value for your investment.
DIY approach on running rigging replacement
Although it might take some time and effort, learning how to replace your own running rigging will save you labor costs. Many sailors find this process rewarding and educational. Familiarize yourself with the different components and materials used in your sailboat's running rigging system, then research how to install and maintain them. There are numerous online tutorials and guides available to help you along the way.
Purchasing rigging materials in bulk
Instead of buying only the specific amount that you need for your boat, consider buying larger quantities at lower prices per foot. For example, Sampson Ropes and other manufacturers offer double braid Dacron rope products at prices ranging from $1.00 to $2.50 per foot. By purchasing larger quantities, you may be able to secure a more favorable price per foot, which will ultimately lower your overall replacement cost.
Take advantage of shopping deals and discounts
Keep your eyes open for sales and promotions at your local chandleries or online retailers. Signing up for newsletters from sailing or marine supply stores can provide you with access to exclusive discounts and information about upcoming sales. Additionally, consider purchasing gently used or clearance items, which can offer significant savings without sacrificing quality.
Running rigging consists of all the lines, sheets, and halyards used to haul and operate the sails. As a boat owner, you should be aware of the signs that your running rigging needs replacement and the average costs associated with it.
First, let's look at the reasons for replacing your running rigging. The primary reason is wear and tear caused by continuous use, exposure to the sun, saltwater, and friction . Over time, these factors can weaken your lines, making them prone to breaking or developing other issues that can impact your boat's functionality and safety. It's important to inspect your running rigging regularly and spot any signs of wear like fraying, chafing, or discolored fibers . These indicate a need for replacement before any accidents happen.
Now, let's discuss the average cost of replacing your running rigging. The overall cost varies depending on factors such as your boat's size, the quality of materials used, and labor expenses. For a 30-foot sailboat, the cost to replace a main halyard without going aloft can be around $500, including labor and materials. However, this is just an example, and costs may differ based on your specific boat and your location.
When planning to replace your running rigging, you can opt for various material options, each with its own price range and characteristics. Materials like polyester, Dyneema, and Vectran can offer different benefits, such as increased strength, reduced stretch, and improved durability. It's important to research and choose the right material for your sailboat based on your needs and budget.
Another aspect of expenses to consider is the labor cost , which depends on the rigging service you hire and the complexity of the replacement job. For instance, some tasks may require a rigger to climb the mast , adding to labor hours and overall costs. To save money, you can learn to do some running rigging replacements yourself; however, make sure you know your limits and call a professional for complex tasks.

Signs of wear and fraying on your running rigging
Regularly inspect key areas such as halyards, sheets, and control lines . If you notice any frayed or chafed sections, consider replacing the affected line immediately. A broken halyard can lead to expensive repairs and even pose safety risks for you and your crew while sailing. Keeping these components in good condition is crucial for smooth sailing and the optimal performance of your boat.
Maintenance schedule that includes regular inspection and cleaning of your lines
A proactive approach to maintaining your running rigging will prolong its life and ensure the safety of your vessel. It's a good idea to establish a maintenance schedule that includes regular inspection and cleaning of your lines. While it may be tempting to wait until a problem arises, preventative upkeep can help you avoid costly repairs or emergency situations in the long run . Check your rigging for signs of wear and replace parts when necessary to maintain optimal sailing conditions.
Leave a comment
You may also like, sailboat parts explained: illustrated guide (with diagrams).
When you first get into sailing, there are a lot of sailboat parts to learn. Scouting for a good guide to all the parts, I couldn't find any, so I wrote one myself.

Guide to Understanding Sail Rig Types (with Pictures)

Average Cost to Replace Standing Rigging (with Examples)

What's the Best Rig for Single-Handed Sailing?
Own your first boat within a year on any budget.
A sailboat doesn't have to be expensive if you know what you're doing. If you want to learn how to make your sailing dream reality within a year, leave your email and I'll send you free updates . I don't like spam - I will only send helpful content.
Ready to Own Your First Boat?
Just tell us the best email address to send your tips to:
Currency: GBP
- Worldwide Delivery
Mooring Warps and Mooring Lines
- LIROS 3 Strand Polyester Mooring Warps
- LIROS Braided Dockline Mooring Warps
- LIROS Classic Mooring Warps
- LIROS Green Wave 3 Strand Mooring Warps
- LIROS Handy Elastic Mooring Warps
- LIROS Moorex12 Mooring Warps
- LIROS Octoplait Polyester Mooring Warps
- LIROS Polypropylene Floating Mooring Warps
- LIROS Super Yacht Mooring Polyester Docklines
- Marlow Blue Ocean Dockline
Mooring Accessories
- Mooring Cleats and Fairleads
- Mooring Compensators
- Mooring Shackles
- Mooring Swivels
Mooring Strops
- LIROS 3 Strand Nylon Mooring Strops
- LIROS Anchorplait Nylon Mooring Strops
- Small Boat and RIB Mooring Strops
Mooring Bridles
- V shape Mooring Bridles
- Y shape Mooring Bridles
Mooring Strops with chain centre section
- 3 Strand / Chain / 3 Strand
- Anchorplait / Chain / Anchorplait
Bonomi Mooring Cleats
- Majoni Fenders
- Polyform Norway Fenders
- Dock Fenders
- Fender Ropes and Accessories
- Ocean Inflatable Fenders
Mooring Buoys
Max power bow thrusters.
- Coastline Bow Thruster Accessories
50 metre / 100 metre Rates - Mooring
Mooring information.
- Mooring Warps Size Guide
- Mooring Lines - LIROS Recommended Diameters
- Mooring Rope Selection Guide
- Mooring Warp Length and Configuration Guide
- How to estimate the length of a single line Mooring Strop
- Mooring Ropes - Break Load Chart
- Mooring Compensator Advisory
- Rope Cockling Information
- Fender Size Guide
- Majoni Fender Guide
- Polyform Norway Fender Inflation Guide
Custom Build Instructions
- More Article and Guides >
Anchor Warps Spliced to Chain
- LIROS 3 Strand Nylon Spliced to Chain
- LIROS 3 Strand Polyester Spliced to Chain
- LIROS Anchorplait Nylon Spliced to Chain
- LIROS Octoplait Polyester Spliced to Chain
Anchor Warps
- Leaded Anchor Warp
- LIROS 3 Strand Nylon Anchor Warps
- LIROS 3 Strand Polyester Anchor Warps
- LIROS Anchorplait Nylon Anchor Warps
- LIROS Octoplait Polyester Anchor Warps
- Aluminium Anchors
- Galvanised Anchors
- Stainless Steel Anchors
Calibrated Anchor Chain
- Cromox G6 Stainless Steel Chain
- G4 Calibrated Stainless Steel Anchor Chain
- Lofrans Grade 40
- MF DAMS Grade 70
- MF Grade 40
- Titan Grade 43
Clearance Chain
Anchoring accessories.
- Anchor Connectors
- Anchor Trip Hooks and Rings
- Anchoring Shackles
- Bow Rollers and Fittings
- Chain and Anchor Stoppers
- Chain Links and Markers
50 / 100 metre Rates - Anchoring
Chain snubbers.
- Chain Hooks, Grabs and Grippers
- Chain Snubbing Bridles
- Chain Snubbing Strops
Drogue Warps and Bridles
- Lewmar Windlasses
- Lofrans Windlasses
- Maxwell Windlasses
- Quick Windlasses
Windlass Accessories
- Coastline Windlass Accessories
- Lewmar Windlass Accessories
- Lofrans Windlass Accessories
- Lofrans Windlass Replacement Parts
- Maxwell Windlass Accessories
- Quick Windlass Accessories
Anchoring Information
- How To Choose A Main Anchor
- Anchoring System Assessment
- Anchor Chain and Rope Size Guide
- The Jimmy Green Guide to the Best Anchor Ropes
- What Size Anchor Do I Need?
- Anchor Size Guides
- Anchor Rope Break Load and Chain Compatibility Chart
- How to Choose Your Anchor Chain
- How to Establish the Correct Anchor Chain Calibration?
- Calibrated Anchor Chain - General Information
- Calibrated Anchor Chain Quality Control
- Calibrated Chain - Break Load and Weight Guide
- Galvanising - Managing Performance and Endurance expectation
- Can Galvanised Steel be used with Stainless Steel?
- Windlass Selection Guide
- More Articles and Guides
Stainless Steel Wire Rigging and Wire Rope
- 1x19 Wire Rigging
- 7x19 Flexible Wire Rigging
- Compacted Strand Wire Rigging
- Insulated 1x19 Wire Backstays
Wire Rigging Fittings
- Swaged Terminals
- Swageless Terminals
- Turnbuckles / Rigging screws
- Turnbuckle Components
- Backstay Insulators
- Wire Terminals
Rigging Accessories
- Backing Plates
- Backstay Adjuster and Fittings
- Backstay Blocks
- Pins, Rings and Nuts
- Rigging Chafe Protection
Fibre Rigging
- DynIce Dux Fibre Rigging
- LIROS D-Pro Static Rigging
- LIROS D-Pro-XTR Fibre Rigging
- Marlow Excel D12 MAX 78 Rigging
- Marlow M-Rig Max Rigging
Fibre Rigging Fittings
- Bluewave Rope Terminals
- Colligo Marine Terminals
Dinghy Rigging
- Dinghy Rigging Fittings
- Fibre Dinghy Rigging
- Stainless Steel Dinghy Rigging
Wind Indicators
Guard wires, guardrails and guardrail webbing.
- Guard Rail Fittings
- Guard Rails in Fibre and Webbing
- Guard Wire Accessories
- Guard Wires
Furling Systems
- Anti-torsion Stays
- Headsail Reefing Furlers
- Straight Luff Furlers
- Top Down Furlers
Furling Accessories
- Continuous Furling Line Accessories
- Furling Line Accessories
50 / 100 metre Rates - Wire and Fibre
Standing rigging assistance.
- More Articles and Guides >
- Cruising Halyards
- Performance Halyards
- Dinghy Halyards
Rigging Shackles
- Bronze Snap Shackles
- Captive and Key Pin Shackles
- hamma™ Snap Shackles
- Selden Snap Shackles
- Soft Shackles
- Standard Snap Shackles
- Tylaska End Fittings
- Wichard Snap Shackles
Lashing, Lacing and Lanyards
- LIROS 3 Strand Lashing, Lacing and Lanyards
- LIROS Braided Lashing, Lacing and Lanyards
- Cruising Sheets
- Performance Sheets
- Dinghy Sheets
- Continuous Sheets
- Tapered Sheets
Running Rigging Accessories
- Anti-Chafe Rope Protection
- Barton Sail Handling
- Lazy Jack Sail Handling
- Rodkickers, Boomstruts
- Sail Handling Accessories
- Slab Reefing
Shock Cord and Fittings
Control lines.
- Cruising Control Lines
- Performance Control Lines
- Dinghy Control Lines
- Continuous Control Lines
Classic Ropes
- 50 / 100 metres - Classic
- Classic Control Lines
- Classic Docklines
- Classic Halyards
- Classic Sheets
- LIROS Classic 3 Strand Polyester
50 / 100 metre Rates - Running Rigging
- 50 / 100 metres - Cruising Ropes
- 50 / 100 metres - Dinghy Ropes
- 50 / 100 metres - Lashing and Lanyards
- 50 / 100 metres - Performance Ropes
- LIROS Ropes
- Marlow Ropes
Running Rigging Resources
- Running Rigging Rope Fibres and Construction Explained
- How to Select a Suitable Halyard Rope
- How to select Sheets and Guys
- Dyneema Rope - Cruising and Racing Comparison
- Dinghy Rope Selection Guide
- Rope Measurement Information
- Running Rigging - LIROS Recommended Line Diameters
- Running Rigging Break Load Comparison Chart
- Colour Coding for Running Rigging
- Selecting the right type of block, plain, roller or ball bearing
- Replacing your Furling Line
- Recycling Rope
- Running Rigging Glossary
Custom Build Instructions for Sheets, Halyards, Control Lines
Low friction rings, plain bearing blocks.
- Barton Blocks
- Harken Element Blocks
- Seasure 25mm Blocks
- Selden Yacht Blocks
Wooden Blocks
Ball bearing blocks.
- Barton Ball Bearing Blocks
- Harken Ball Bearing Blocks
- Holt Dynamic Blocks
- Selden Ball Bearing Blocks
Ratchet Blocks
- Harken Ratchet Blocks
- Selden Ratchet Blocks
Roller Bearing Blocks
- Harken Black Magic Blocks
- Selden Roller Bearing Blocks
Clutches and Organisers
- Barton Clutches and Organisers
- Lewmar Clutches
- Spinlock Clutches and Organisers
Genoa Car Systems
- Barton Genoa Sheeting
- Harken Genoa Systems
- Lewmar HTX Genoa Systems
Traveller Systems
- Barton Traveller Systems
- Harken Traveller Systems
Deck Fittings
- Bungs and Hatches
- Bushes and Fairleads
- Deck Eyes, Straps and Hooks
- Pad Eyes, U Bolts and Eye Bolts
Rudder and Transom Fittings
- Pintles and Gudgeons
- Tiller Extensions and Joints
Stanchion Blocks and Fairleads
Snatch blocks.
- Barton K Cam Cleats
- Harken Ball Bearing Cam Cleats
- Holt Cam Cleats
- Selden Cam Cleats
- Spinlock PXR Cleats
Block and Tackle Purchase Systems
- Barton Winches, Snubbers and Winchers
- Coastline Electric Winch Accessories
- Harken Winches, Handles and Accessories
- Karver Winches
- Lewmar Winches, Handles and Accessories
- Winch Servicing and Accessories
Deck Hardware Support
- Blocks and Pulleys Selection Guide
- Barton High Load Eyes
- Dyneema Low Friction Rings Comparison
- Seldén Block Selection Guide
- Barton Track Selection Guide
- Barton Traveller Systems Selection Guide
- Harken Winch Selection Guide
- Karver Winch Comparison Chart
- Lewmar Winch Selection Guide - PDF
- Winch Servicing Guide
Sailing Flags
- Courtesy Flags
- Red Ensigns
- Blue Ensigns
- Flag Accessories
- Flag Staffs and Sockets
- Flag Making and Repair
- Signal Code Flags
- Galvanised Shackles
- Stainless Steel Shackles
- Titanium Shackles
- Webbing only
- Webbing Restraint Straps
- Webbing Sail Ties
- Webbing Soft Shackles
Hatches and Portlights
Sail care and repair.
- Sail Sewing
Maintenance
- Antifouling
- Fillers and Sealants
- Primers and Thinners
- PROtect Tape
Fixings and Fastenings
- Monel Rivets
- Screws, Bolts, Nuts and Washers
- U Bolts, Eye Bolts and Pad Eyes
Splicing Accessories
- Fids and Tools
- Knives and Scissors
General Chandlery
- Barrier Ropes
- Canvas Bags and Accessories
- Carabiners and Hooks
- Netting and Accessories
- Rope Ladders
Seago Boats and Tenders
Chandlery information, flag articles.
- Flag Size Guide
- Bending and Hoisting Methods for Sailing Flags
- Courtesy Flags Identification, Labelling and Stowage
- Courtesy Flag Map
- Flag Etiquette and Information
- Glossary of Flag Terms and Parts of a Flag
- Making and Repairing Flags
- Signal Code Message Definitions
Other Chandlery Articles
- Anchorplait Splicing Instructions
- Antifoul Coverage Information
- Hawk Wind Indicator Selection Guide
- Petersen Stainless - Upset Forging Information
- Speedy Stitcher Sewing Instructions
- Thimble Dimensions and Compatible Shackles
Jackstays and Jacklines
- Webbing Jackstays
- Stainless Steel Wire Jackstay Lifelines
- Fibre Jackstay Lifelines
- Jackstay and Lifeline Accessories
Safety Lines
Lifejackets.
- Children's Life Jackets
- Crewsaver Lifejackets
- Seago Lifejackets
- Spinlock Lifejackets
Buoyancy Aids
Life jackets accessories.
- Lifejacket Lights
- Lifejacket Rearming Kits
- Lifejacket Spray Hoods
Overboard Recovery
- Lifebuoy Accessories
- Purchase Systems
- Slings and Throwlines
Floating Rope
- LIROS Multifilament White Polypropylene
- LIROS Yellow Floating Safety Rope
- Danbuoy Accessories
- Jimmy Green Danbuoys
- Jonbuoy Danbuoys
- Seago Danbuoys
- Liferaft Accessories
- Seago Liferafts
Safety Accessories
- Fire Safety
- Grab Bag Contents
- Grab Bags and Polybottles
- Handheld VHF Radios
- Sea Anchors and Drogues
Safety Resources
- Guard Wires - Inspection and Replacement Guidance
- Guard Wire Stud Terminal Dimensions
- Webbing Jackstays Guidance
- Webbing Jackstays - Custom Build Instructions
- Danbuoy Selection Guide
- Danbuoy Instructions - 3 piece Telescopic - Offshore
- Liferaft Selection Guide
- Liferaft Servicing
- Man Overboard Equipment - World Sailing Compliance
- Marine Safety Information Links
- Safety Marine Equipment List for UK Pleasure Vessels
Sailing Clothing
- Sailing Jackets
- Sailing Trousers
- Thermal Layers
Leisure Wear
- Accessories
- Rain Jackets
- Sweatshirts
Sailing Footwear
- Dinghy Boots and Shoes
- Sailing Wellies
Leisure Footwear
- Walking Shoes
Sailing Accessories
- Sailing Bags and Holdalls
- Sailing Gloves
- Sailing Kneepads
Clothing Clearance
Clothing guide.
- What to wear Sailing
- Helly Hansen Mens Jacket and Pant Size Guide
- Helly Hansen Womens Sailing Jacket and Pant Size Guide
- Lazy Jacks Mens and Womens Size Charts
- Musto Men's and Women's Size Charts
- Old Guys Rule Size Guide
- Sailing Gloves Size Guides
- Weird Fish Clothing Size Charts
The Jimmy Green Clothing Store
Lower Fore St, Beer, East Devon, EX12 3EG
- Adria Bandiere
- Anchor Marine
- Anchor Right
- August Race
- Barton Marine
- Blue Performance
- Brierley Lifting
- Brook International
- Brookes & Adams
- Captain Currey
- Chaineries Limousines
- Coastline Technology
- Colligo Marine
- Cyclops Marine
- Douglas Marine
- Ecoworks Marine
- Exposure OLAS
- Fire Safety Stick
- Fortress Marine Anchors
- Hawk Marine Products
- Helly Hansen
- International
- Jimmy Green Marine
- Maillon Rapide
- Mantus Marine
- Marling Leek
- Meridian Zero
- MF Catenificio
- Ocean Fenders
- Ocean Safety
- Old Guys Rule
- Petersen Stainless
- Polyform Norway
- PSP Marine Tape
- Sidermarine
- Stewart Manufacturing Inc
- Team McLube
- Technical Marine Supplies
- Titan Marine (CMP)
- Ultramarine
- Waterline Design
- William Hackett
Clearance August Race Boat Cleaning Kit £26.00
Clearance LIROS Racer Dyneema £55.08
Clearance Folding Stock Anchor £123.25
Clearance LIROS Herkules £0.00
Clearance Barton Size 0 Ball Bearing Blocks - 5mm £10.13
Clearance Marlow Blue Ocean® Doublebraid £18.48
Mooring Clearance
Anchoring clearance, standing rigging clearance, running rigging clearance, deck hardware clearance, chandlery clearance, safety clearance, sheets and halyards selection guide.
23 Nov 2018
A guide to choosing the right replacement running rigging lines
Purchasing replacement lines is often a straightforward process. Especially, if you're happy with the performance of the existing line and can identify what it is. The length can easily be specified by measuring an existing halyard or sheet and can even be guessed fairly accurately, from schematics if you are familiar with your deck layout. The nominal diameter is slightly trickier because different brands use different volumes of fibre to achieve their specifications creating slight variations in comparable ropes. If in doubt, deck hardware is often a good place to check for recommended line diameters.

The difficulty arises when considering an upgrade or you're not entirely sure what you already have on board. At this point, the material to be used, the construction and the diameter of the rope all need to be considered. These factors have a significant influence on the overall cost and performance of your line. This guide aims to help you choose the right line at the right price.
Rope Materials
There are many more fibres available for the truly discerning sailor, however, this article sets out the 5 most common ones found in our product range.
Listed in order from most expensive to most economical, they are Vectran, Dyneema, Technora, Polyester and Polypropylene.

- Vectran is the strongest and most expensive fibre and has very low elongation over time (creep). It is commonly impregnated with a UV stabiliser.
- Dyneema is very nearly equal to Vectran in terms of strength and stretch and is also usually impregnated with a UV protective coating. The price advantage over Vectran makes this a popular choice with rope manufacturers at the upper end of the market.
- Technora has very high abrasion and UV resistance and is commonly blended into the cover/jacket of a braid on braid line.
- Polyester is the most common fibre with excellent UV resistance, good breaking strains and low stretch characteristics. It is available in a bright monofilament fibre and a softer, matt finish, spun yarn. Bright polyester fibres are low stretch e.g. braid on braid bright white polyester. The softer feel, spun yarn has less strength and is slightly stretchier. Spun yarn is typically used for the cover/jacket on e.g. 16 plait matt polyester.
- Polypropylene is the lightest (doesn't absorb water) and cheapest fibre. However, it is stretchy and susceptible to UV.
Rope manufacturers have traditionally used different fibres for the core and the cover, in order to make the most of their relative advantages, but can now produce even better ropes by blending different fibres together, in either the core or the jacket.
Rope Construction

The majority of lines are comprised of a braided core and a braided jacket. The most common cruising lines are 100% polyester (cost effective). The weight of fibre in these lines is usually balanced equally between the cover and the core and can be spliced using the double braid splice.
Marlowbraid is the exception as it has a 3-strand core which slightly reduces stretch for a very modest increase in price. The downside of this construction is that it tends to flatten around sheaves and winches.

N.B. braided lines with a polypropylene core may make a saving but will be reflected in a marked lack of performance particularly with regard to extra stretch where it is not desirable.
The construction of the cover also has a bearing on abrasion resistance. Generally, the covers with a tighter weave or 'more plaits' e.g. 8, 16, 24 or 32 plaits offer a sliding scale of improved wear resistance.
Stronger fibres such as Dyneema or Vectran are required to significantly increase the strength of a line and reduce its stretch. Typically, these fibres are used in the core which is therefore much stronger than the cover. These lines then have to be spliced using the core dependent method which in turn means the weight of fibre in the cover can be reduced.
Cost vs Performance
The cost is directly related to the amount of Dyneema/Vectran content in the finished rope and therefore related to the strength and stretch.

It, therefore, follows that the strongest (and most expensive) line for a given diameter does not have a cover and is 100% 'core'. However, Halyards and sheets still rely on the cover for grip and abrasion resistance in clutches and on winches. The solution is to strip the cover from the core shortly after the winch or clutch. This can only be done with core dependent ropes.
All the fibres mentioned can be blended to produce covers with different properties. Racers may use a polypropylene/Dyneema blend for lightweight sheets or a technora/polyester blend for sheets that get through a lot of work. Cruisers are less likely to have sailing condition specific requirements, so a standard polyester cover heavy enough to give good longevity is usually the best bet.
Choose the right line
The full range of lines supplied by Jimmy Green Marine can cater for both the cruisers and the racers. So we have arranged the lines on a sliding scale to help you decide where to aim. Specifications are based on 12mm lines.
Whether you're a cruiser looking to strengthen up your lines for a more adventurous outing or a racer looking for a better price point Jimmy Green has a line for you.
You can also find further information on the infographic below. The stretch percentages are based on a 500kg working load rather than an ultimate breaking load. This accounts for the difference between the infographic and the table above.

Shop for Sheets and Halyards
Related products
Liros 12mm dynamic plus dyneema - sheets, halyards, control lines, 10mm marlowbraid - sheets, halyards, control lines, 100 metre reel - marlowbraid, liros 14mm herkules - sheets, halyards, control lines, 50 metre cut length - liros classic matt plait polyester, author: jimmy green, you may also like.

Top 5 Sail Control Ropes

Ten tips to help you enjoy winter sailing.
Keyboard_arrow_left guide to tackling a complete re-rig, the decision-making checklist for buying anchor chain keyboard_arrow_right.
Free Shipping Over $99* - 366 Day Returns - Dedicated Customer Support
- Call Us +1-503-285-5536
- Sign in & Register
- Recently Viewed
Line for Halyards
Marine grade lines for sailboat main halyards, jib halyards, and spinnaker halyards. For advice on selecting the right halyard, see the information at the bottom of this page.
A halyard line is the rope that pulls the sail up the mast. On some small sailboats, this might be a short 20 foot length of basic 5mm line. On larger, performance boats, this might be 80 feet of high tech double braid line. No matter what type of halyard line you need, West Coast Sailing has you covered. Shop diameters between 4 mm and 12 mm including favorites such as Marlow Doublebraid, Robline Admiral 5000, Dinghy Control Line, Sirus 500, and more.
- Qty in Cart

5mm New England Ropes Sta-Set

8mm New England Ropes Endura Braid

6mm New England Ropes Endura Braid

6mm New England Ropes Sta-Set

4mm Alpha SSR Line

5mm Robline Sirius 500 Line

5mm Dinghy Control Line

6mm Alpha SSR Line

6mm Marlow PreStretch Line

6mm Robline Admiral 5000 Line

6mm Robline Dinghy Control Line

6mm Robline Orion 300 Line

8mm Robline Admiral 5000 Line

10mm Robline Admiral 5000 Line
- Total: items /
- Add all to cart
Adding your products to cart
Halyard recommendations, finding the right diameter.
If you are replacing an existing line, the easiest way to determine what diameter you need is to match what you already have. This can be done with a caliper or by close estimation with a tape measure. If you've previously used a 7mm halyard and it has performed well, another 7mm line is likely a great choice. In most applications, there is some flexibility in the exact diameter that can be used. Most blocks, for example, have an 'ideal' diameter (ie, the line diameter that runs most effectively though the block's sheave) but also have a range so that you can run a slightly thinner or slightly thicker line. If you have a halyard that is getting hung up in your rig, stepping down 1-2mm might help the halyard run more efficiently. If you have a larger boat or rig and want to run a thinner halyard, consider a double braid line that features a Dyneema or spectra core for strength.
Line Diameter Conversion
1mm = 3/64 inch | 2mm = 5/64 inch | 3mm = 1/8 inch
4mm = 5/32 inch | 5mm = 3/16 inch | 6mm = 1/4 inch
7mm = 9/32 inch | 8mm = 5/16 inch | 9mm = 3/8 inch
10mm = 25/64 in | 11mm = 7/16 in | 12mm = 1/2 in
Double Braid vs Single Braid
Two terms you will often see in line descriptions are 'double braid' and 'single braid', which refer to the way the line is constructed. At the most basic level, a double braid line has a cover and a core whereas a single braid does not, but there are other important distinctions to consider when making a line selection.
Single Braids are made up of either 8 or 12 strands that are braided into a circular pattern, half clockwise and half counter clockwise. This produces a line that is supple, absorbs twists, and tends not to kink. There are two types of single braid lines: performance single braids and polyester/blended single braids. Performance single braids are made from fibers with very low stretch and designed to handle extreme loads - think Dyneema, Spectra, or Vectran. Polyester/blended single braids, sometimes called hollow braid, are soft and easy to grip, built for sheets and hand-adjusted control lines. These are less common than performance single braid lines but recommended in a few specific applications.
Double Braids , sometimes called braid on braid, have a braided core within a braided outer jacket or cover. This creates a strong, durable, smooth-running line that is easy to handle. Double braids are used for the vast majority of all running rigging on sailboats including sheets, halyards and control lines for both cruising or racing. There are two types to consider: polyester double braids and high-tech double braids. Polyester double braids, found most commonly on recreational and cruising sailboats, have a polyester cover with polyester core. These are low maintenance, affordable, and long-lasting, while offering relatively low stretch and high working loads. For additional strength and minimal stretch, consider high-tech double braids. These lines typically feature a Dyneema or Spectra core (non-stretch) inside a polyester or polyester/dyneema blend cover for additional durability. They are more expensive but often the go to choice for high performance racing boats.
For halyards, we typically recommend a line with double braid construction because they hold their shape well under load and when cleated or in a clutch.
Whipping & Splicing
Looking to clean up the end of your line or need to add a splice to your rig? Visit our Whipping & Splicing page for a full selection of whipping twine, fids, splicing needles, and complete splicing kits. Perfect for the DIY sailor looking to further optimize their rigging.
Subscribe To Our Newsletter
Sign up for our newsletter to receive exclusive discounts, new product announcements, and upcoming sales.
× You are using an outdated browser. Please upgrade your browser to improve your experience.
We Ship Worldwide! | FREE SHIPPING! for US Continental orders over $99. Click for details.

Shopping Cart
Your cart is currently empty..
FREE SHIPPING! for US Continental orders over $99 click for details
MAURIPRO Rigging - Halyards

Full range of halyards made out of the latest on halyard lines with all needed splicing and required shackles (when applicable). MAURIPRO Sailing rigging shop division has created an easy to use set of tools to facilitate sailboat owners to find the correct length and specifications for your halyards.
Need help? For any additional information or custom made running rigging, contact us; our riggers and sail consultants are ready to assist you with any of your sailing needs.
MAURIPRO Sailing, your direct access to Sailboat Halyards - Pre Spliced and all your other sailing and boating needs.
Copyright © 2024 MAURIPRO Sailing LLC.
IMAGES
VIDEO
COMMENTS
If you're going to remove a halyard, either for winter, or to replace it with a new one, there are a few little tricks that will make it easier, and stop you...
There are three attachment techniques and two types of halyard terminations. We'll show you all of them and how best to work with them to install and remove...
To re-mouse the halyards, flake out the halyard, attach the working end to the mousing line that comes from the masthead, and check they are secure, before pulling back through. Ensure you keep hold of the standing end so it doesn't disappear to the top of the mast. You may need to manually work the line through the sheave at the bottom of ...
Mark Chandler shows us the easy way to replace an internal halyard. If your boat has internal halyards, installing new ones may be a challenge. To make it easier to swap out your halyards, splice a reeving eye at the bitter end of the ones you have. Watch Mark Chandler share the details in the accompanying video.
http://www.sailrite.com/Replacing-your-Halyard-Rope-Video This video illustrates how to change your halyard rope in your sailboat. Did you know that rope hal...
Q: How can halyards affect the performance of a sailboat? A: The type of halyard used can have an impact on the performance of the sailboat. For instance, a stretchy halyard may cause the sail to lose its shape by releasing the tension on the sail over time, while a stretch-resistant halyard can help the sail maintain its shape in strong winds.
Both halyards were then tied together using light nylon twine, leaving a gap of about 1/4" of slack between. The twine laid in the grooves and didn't protrude, while the knot in the nylon line fit in the space between the two halyard ends.
Then use a 8- to 10-inch piece of Monel wire or sail twine to "stitch" the bitter end of the new halyard to the "sail" end of the old halyard. If using wire, wrap it tightly around the line so it won't catch on the fittings on the top of the mast or snag another halyard inside the mast. We then wrap cheap electrical tape around the ...
Two frayed and one wore right thru.u000bu000bTo replace them, start at the cockpit end. Butt the two bitter ends of the old & new halyard together and stitch them together. Wrap the seam and stitching tightly with rigging tape (keeping the same diameter/thickness). Then just pull it on through the sheaves.
The owner wanted to reuse the same snap shackle. Replacing your halyard is very easy. The steps are simple and easy to carry out. Tie a messenger line to the lazy end of the halyard. Pull the halyard (and messenger line) through the mast and out the mast head shiv. Tie the messenger line to the lazy end of the new halyard.
Untie the shackle from the old halyard and use a bowline knot to attach it to one free end of the new halyard line. Then, take the other free end of the new line and butt it up against the old halyard line's end (that previously held the shackle). To replace the line, you want to feed the two lines secured together up the mast.
Check first if the lines are crossed. My boat has the topping lift exiting the mast on the starboard side. The topping lift should exit the top of the mast through the pulley on that same side. First, use the topping lift as a messenger to pull another replacement line to use for a halyard. My topping lift was too short to use as a normal halyard.
Either your old halyard fell out of the mast or you want to install a brand new additional halyard in your mast, how do you do it? How do you feed it through...
I did not replace the spare but I am going to use a sk38 core line prior to the season, no sense spending $3+ lf for a spare. When I purchased the sailboat, it had a mix bag of halyards; 1 VPC, 1 Marlow double briad with a polyster core, 1 - Endura Briad and 1 - Sta Set (I think or something similar).
Replacing Halyards. Being new to owning a boat that I can''t unstep mast on easily I''m a little worried about replacing halyards. My thought is I would "whip" or (couple clove hitches) a short, small diameter messenger line to the end (sail end), whip messenger to new line and pull back thru. I believe usual method is to butt tape the ends ...
Posts: 4,730. Re: Halyard replacement. 1) If it was called out on the survey you may have to do it in order to get insurance. 2) Out of all the things that go wrong on sailboats, broken halyards is near the bottom of the list. 3) It is much easier to replace halyards when the mast is down for other reasons.
Replacing Halyards. When the time comes to bid farewell to your trusty halyards, having a seamless replacement process can get you back on the water swiftly. ... Using a rope halyard for a large sailboat is possible, but it's crucial to choose the right type of rope and ensure it has adequate strength to handle the loads. Consider the sail ...
For a 30-foot sailboat, the cost to replace a main halyard can be around $500. The estimated cost of replacing your boat's running rigging with sheets is around $1,700-$2,000+. For an average 40-foot boat, you can expect to pay around $4,000 for wire rigging replacement, which may include control lines. The average maintenance cost for boats ...
Hey Ocean Family! In this episode we show a simple system to pass halyards inside the mast that worked brilliantly for us, as well as a DIY way of replacing...
However, Halyards and sheets still rely on the cover for grip and abrasion resistance in clutches and on winches. The solution is to strip the cover from the core shortly after the winch or clutch. This can only be done with core dependent ropes. All the fibres mentioned can be blended to produce covers with different properties.
A halyard line is the rope that pulls the sail up the mast. On some small sailboats, this might be a short 20 foot length of basic 5mm line. On larger, performance boats, this might be 80 feet of high tech double braid line. No matter what type of halyard line you need, West Coast Sailing has you covered. Shop diameters between 4 mm and 12 mm ...
MAURIPRO Rigging - Halyards. Full range of halyards made out of the latest on halyard lines with all needed splicing and required shackles (when applicable). MAURIPRO Sailing rigging shop division has created an easy to use set of tools to facilitate sailboat owners to find the correct length and specifications for your halyards. Need help?
We replaced the main halyard, jib halyard, and reinstalled the sails on our 2002 Hunter 326 sailboat with a Selden furling rig. The sails went in for repair...